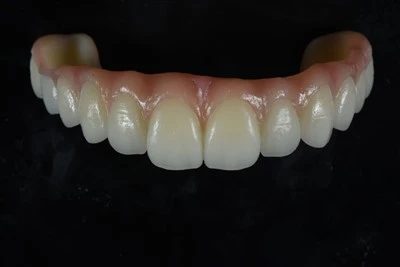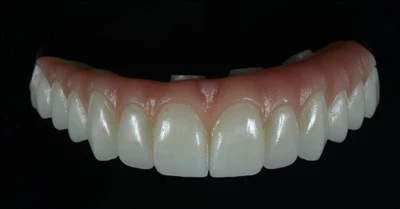
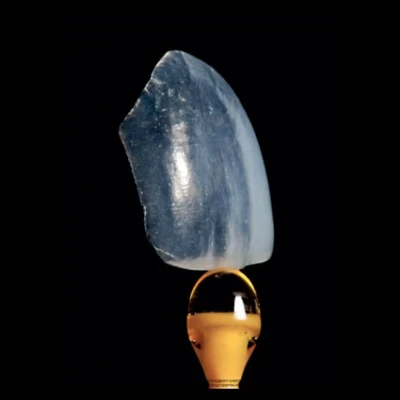
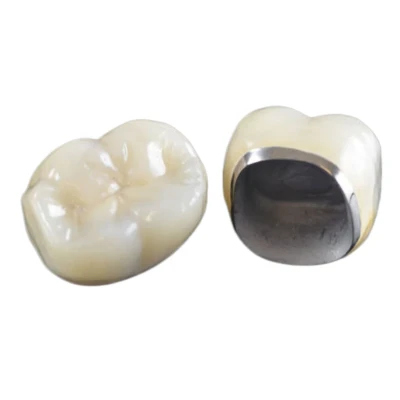
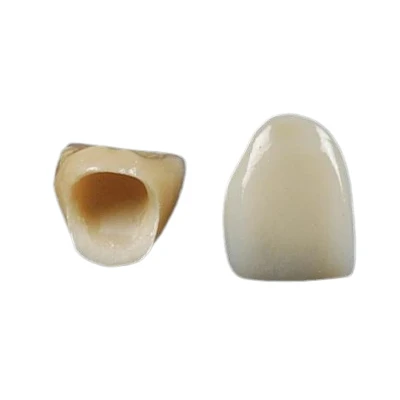
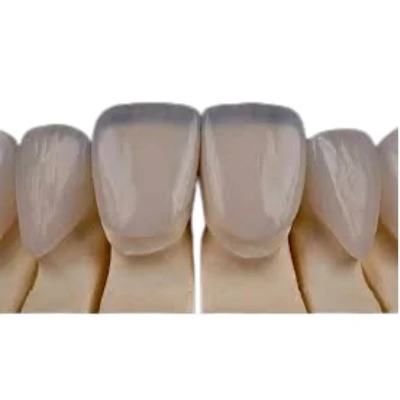
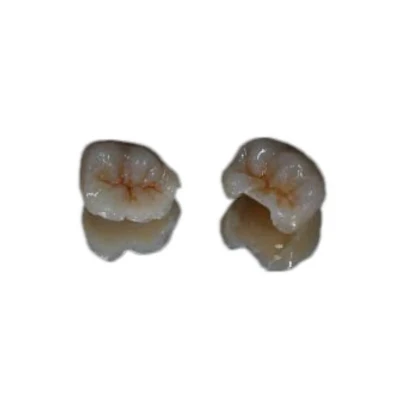
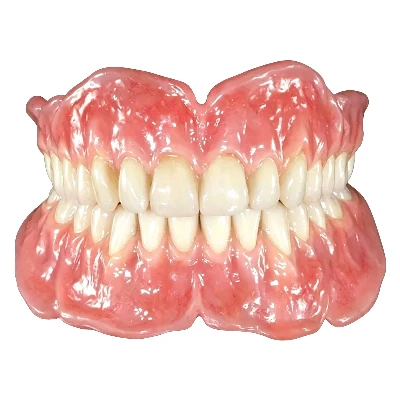


A natural-looking zirconia crown is not created by selecting an A1, A2, or B1 shade and applying stain at the end of production. The final appearance develops through the entire dental laboratory workflow: clinical shade communication, zirconia selection, CAD/CAM nesting, pre-sintering coloration, sintering, surface characterization, glazing, polishing, and final quality control.
This is why two zirconia crowns made to the same prescribed shade can still look noticeably different. Good zirconia crown shading depends on how all of these steps work together.

What Do Shading and Characterization Mean for a Zirconia Crown?
In dental laboratory terms, shade matching means reproducing the general color characteristics of the target tooth. This includes hue, value or brightness, and chroma or color saturation.
Zirconia crown characterization goes further. It adds the regional and individual optical details that keep the restoration from looking like a single block of uniform ceramic.
A natural tooth does not normally have one identical color from the cervical margin to the incisal edge. The cervical third may have stronger chroma. The body carries the dominant tooth shade, while the incisal region can show greater translucency, lower chroma, subtle gray or blue effects, white enamel features, or visible mamelon patterns.
Depending on the tooth and the clinical reference, technicians may also reproduce minor characteristics such as fissure coloration, localized white areas, fine enamel-like lines, or wear patterns.
This distinction matters. A crown may correspond to the correct VITA shade tab but still appear artificial if the color transition, translucency, surface texture, and gloss do not resemble the surrounding dentition.
For a broader discussion of how translucency and shade influence the clinical appearance of zirconia, see our guide on whether zirconia crowns look natural.
Good Shade Matching Starts with the Information Sent to the Lab
The quality of dental lab shade matching depends heavily on the clinical information supplied with the case.
A shade prescription such as A2 provides a useful starting point, but it does not describe all the optical characteristics of an individual tooth. For aesthetic anterior cases, the laboratory benefits from more complete reference information.
Useful records include:
- Prescribed tooth shade
- Stump shade or prepared tooth color
- Patient photographs
- Photographs with the selected shade tab next to the natural teeth
- Pre-operative photographs
- Preparation photographs
- Adjacent natural teeth for reference
- Temporary restoration photographs or scan data when relevant
- Desired tooth length and morphology
- Notes about incisal, cervical, or other individual characteristics
The stump shade can be particularly important when a restoration uses more translucent zirconia. The underlying preparation may influence the final visual result, especially when restorative thickness is limited.
Photography also matters. A photograph with a shade tab placed in the same image as the target tooth gives the technician more information than an isolated photo of the smile. Controlled lighting, correct exposure, and a neutral photographic environment make interpretation more reliable.
For demanding aesthetic cases, laboratories may also work with digital shade-measurement systems, spectrophotometers, or more detailed color mapping.
For a more detailed clinical workflow, see How to Communicate Shade to a Dental Lab: Photos, Stump Shade, and Characterization.
A laboratory can only reproduce the characteristics it can identify. Better clinical shade communication gives the technician a stronger foundation for the rest of the zirconia characterization process.
How Zirconia Material Selection Influences the Final Shade
Zirconia crown shading begins before any coloring liquid or surface stain is applied.
Modern dental laboratories work with zirconia materials that differ in base shade, translucency, opacity, strength, and internal gradient structure. These differences affect how much additional characterization will be necessary and how the finished crown interacts with light. The relationship between zirconia composition, translucency, and optical behavior is also well documented in published zirconia optical-properties research.
Higher-translucency zirconia can provide more enamel-like light transmission, while more opaque zirconia offers greater masking ability. Material thickness also affects the result. A thin crown and a thick crown made from the same zirconia do not necessarily present identical value and translucency.
Different yttria-stabilized zirconia systems are also used for different balances of strength and esthetics. Our 4Y/5Y zirconia crowns page shows how these higher-translucency zirconia options are applied in crown production.
For readers who want a deeper material overview, see What Is a Zirconia Crown Made Of? Materials, Composition, and Properties.
White, Pre-Shaded, and Multilayer Zirconia
The three material approaches require different shading strategies.
|
Zirconia Type |
Main Shade Characteristic |
Typical Lab Approach |
|
White zirconia |
No built-in tooth shade gradient |
Greater technician control through coloring and characterization |
|
Pre-shaded zirconia |
Built-in base tooth shade |
Less base-coloring work, followed by final adjustment |
|
Multilayer zirconia |
Built-in cervical-to-incisal shade and/or translucency gradient |
Use material gradient as the foundation, then characterize where needed |
White zirconia gives technicians considerable control over how the base color is developed. It can be useful for customized shade work, although it generally requires a more deliberate coloring protocol.
Pre-shaded zirconia already provides a selected base shade, which simplifies routine production.
Multilayer zirconia contains a gradual transition through the disc or block. Depending on the product, this may include changes in shade and translucency, and some systems also combine different material-strength zones. A properly positioned crown can therefore obtain part of its cervical-to-incisal transition directly from the zirconia itself.
Multilayer material reduces some manual staining work, but it does not eliminate zirconia crown characterization. Final shade correction, surface texture, glaze, and localized effects may still be necessary.
The choice of translucency should still follow the clinical indication. Our guide to high-translucency zirconia and where it works best discusses this balance in more detail.
Why Nesting Position Matters in Multilayer Zirconia
Nesting is the CAD/CAM positioning of a restoration inside the zirconia disc before milling. With multilayer zirconia, vertical nesting is also part of shade management.
Moving a crown higher or lower in the disc changes how the restoration passes through the cervical, body, and incisal zones.
A crown positioned higher may capture more of a bright or translucent region. A lower position may produce stronger cervical or body chroma. Restoration height also matters because a short crown may use only part of the available gradient, while a taller crown can pass through more layers.
This explains why two crowns milled from the same shade disc can still look different after sintering.
Nesting should never be controlled by aesthetics alone. Wall thickness, restoration design, material indications, and strength requirements remain essential, particularly for posterior restorations and bridges.
How Dental Labs Build Color Before Sintering
Pre-sintering coloration, sometimes called infiltration, means applying compatible coloring liquids to zirconia while it is still in its unsintered or "green-state" form.
At this stage, the zirconia structure is porous enough to absorb coloring liquids. This allows technicians to establish color within the restoration rather than relying entirely on stain applied to the final surface.
The general workflow is straightforward:
- Remove residual zirconia dust and prepare the milled restoration.
- Establish the required base coloration.
- Add localized color where needed.
- Allow the restoration to dry correctly.
- Complete the specified sintering cycle.
Depending on the zirconia system and laboratory protocol, color may be applied by immersion, brushing, localized infiltration, or a combination of methods.
More customized cases can also be treated by zones. The cervical region may receive stronger chroma, the body establishes the primary shade, and the incisal area may be treated more conservatively to preserve a lighter and more translucent appearance.
The purpose is not to paint a finished tooth before sintering. It is to create a controlled color foundation that can be refined later.
Exact liquid concentrations, immersion times, application methods, and sintering parameters vary by zirconia and coloring system. Laboratories should follow the manufacturer's instructions and the technical documentation for the specific zirconia material system, such as those provided by Ivoclar, rather than applying one universal formula to every material.

How Zirconia Crowns Are Stained and Characterized After Sintering
After sintering, the zirconia has reached its final dense state and its base shade and translucency can be evaluated more accurately. The technician can then adjust value, chroma, regional color transitions, and individual details through post-sintering surface staining and characterization.
Surface stains are normally applied conservatively. Thin, controlled applications offer more predictable adjustment than a heavy layer of stain, which can make the restoration appear dark, flat, or artificial.
Cervical Characterization
The cervical third of a natural tooth commonly carries more chroma than the incisal region. When the clinical reference shows this pattern, the zirconia crown can be characterized with a slightly warmer or more saturated cervical zone.
The important point is the transition. A sharply defined colored band around the cervical area usually looks artificial. The color should blend gradually into the body of the restoration.
Body Characterization
The body carries the dominant shade of the crown and connects the cervical and incisal zones.
Technicians evaluate whether the overall value is too high or too low and whether the restoration requires additional warmth, reduced chroma, or a smoother transition between different areas. Small corrections are usually more useful than aggressive surface coloring.
The goal is not to make every square millimeter identical. Natural variation should remain visible.
Incisal and Individual Characterization
Anterior zirconia crowns usually require the greatest attention at the incisal third.
Depending on the patient and adjacent teeth, technicians may reproduce subtle effects such as:
- Gray or blue visual nuances
- Greater perceived translucency
- Mamelon-like structures
- Fine white enamel effects
- Localized lines or crack-like features
- Hypocalcification-like white areas
These details should be based on clinical information. They are not decorative effects that should automatically be added to every anterior crown.
Posterior zirconia characterization follows a different priority. Occlusal anatomy, cusp definition, and restrained fissure coloration are usually more relevant than complex incisal effects.
This is where experienced technician control becomes important. Natural characterization is usually subtle. If every effect is exaggerated, the crown attracts attention instead of blending with the dentition.
When Is Ceramic Layering Used Instead of Stain-and-Glaze Alone?
Many modern monolithic zirconia crowns can achieve good aesthetics through appropriate material selection, multilayer positioning, controlled staining, texture, and glaze. Surface characterization is not the only option, however.
For more demanding anterior cases, a laboratory may use veneering ceramic to create additional optical depth. The practical differences between these approaches are covered in more detail in Monolithic vs. Layered Zirconia Crowns: When to Use Each.
Micro-Layering or Cut-Back
With a cut-back technique, selected areas of the zirconia contour are reduced to create space for a relatively thin layer of veneering ceramic.
This gives the technician more control over:
- Incisal translucency
- Enamel-like depth
- Fluorescence
- Internal optical effects
- Complex anterior characterization
Micro-layering is useful when stain alone cannot reproduce the visual depth required by the case but a full veneered crown is unnecessary.
Full Veneering
A fully veneered zirconia restoration uses a more complete ceramic layer over the zirconia substructure.
This approach offers wider control over color, translucency, morphology, surface texture, and light dynamics. It may be considered in selected high-aesthetic situations where matching adjacent natural teeth is particularly demanding.
For an example of this type of restoration, see our layered zirconia crown product page.
Ceramic layering is not automatically a better solution. It adds processing steps and should be selected because the case requires it, not simply because it is more complex.
Why Surface Texture, Glaze, and Polishing Affect the Final Shade
A zirconia crown can have the correct shade and still look wrong if its surface does not interact with light like a natural tooth.
Surface texture refers to the macro- and micro-anatomy created on the outside of the crown. It includes features such as developmental contours, line angles, fine texture, and the transitions between facial surfaces.
These details change how light is reflected. A smooth, highly reflective crown may appear brighter and flatter than a neighboring natural tooth even when the actual shade is close.
The same principle applies to gloss.
Glazing creates and controls the final surface luster while also integrating certain external stain systems. The goal is not simply to make zirconia as shiny as possible. The gloss level should support the morphology and match the surrounding dentition.
Polishing is then used to refine areas that need adjustment and to maintain a smooth, clinically appropriate surface. Excessive polishing can remove surface characterization or alter the intended gloss.
For this reason, natural-looking zirconia crowns depend on more than shade, translucency, and stain. Surface morphology and luster are part of the final color perception.

How Dental Labs Verify the Final Shade Before Delivery
Characterization is not complete when the last stain or glaze firing finishes. The restoration still needs aesthetic and functional verification.
Final zirconia crown quality control typically includes assessment of:
- Overall shade, value, and chroma
- Cervical-to-body-to-incisal transition
- Uneven or excessive surface staining
- Translucency balance
- Surface texture and gloss
- Marginal integrity
- Proximal contacts
- Occlusal contacts and anatomy
- General consistency with the clinical prescription and photographs
Shade may also be reviewed under controlled or multiple light conditions because different light sources can change the perceived color of a dental restoration.
This final inspection also explains why the same shade designation does not guarantee the same final appearance.
Two A2 zirconia crowns may differ because of their zirconia material, thickness, stump shade, multilayer nesting position, sintering conditions, staining intensity, surface texture, glaze, and the amount of clinical shade information available to the technician.
Shade matching therefore has to be evaluated as a complete system rather than a single number on the prescription.
Better Zirconia Shade Results Start with Better Dentist–Lab Communication
Dental labs shade and characterize zirconia crowns through a sequence of controlled decisions. The prescribed shade establishes the target, but material selection, multilayer nesting, pre-sintering coloration, post-sintering characterization, ceramic layering when required, surface finishing, and final QC determine how naturally the crown integrates with the patient's dentition.
For aesthetic cases, good photographs, stump shade information, preparation records, and clear characterization instructions give the laboratory much more to work with than a shade code alone.
ADS Dental Laboratory combines digital CAD/CAM production with technician-controlled zirconia staining, characterization, surface finishing, and structured quality inspection for overseas dentists and dental laboratories. If you have a zirconia case that requires specific shade matching or aesthetic characterization, contact our dental laboratory team to discuss the clinical information and production requirements before fabrication.