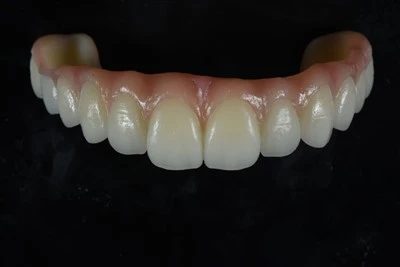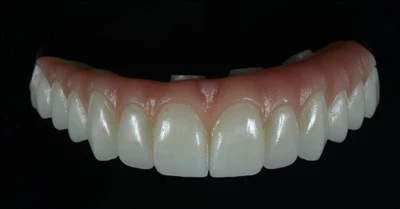
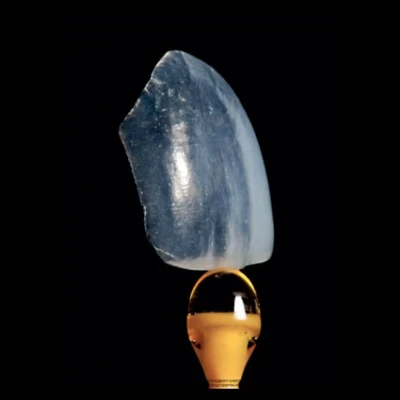
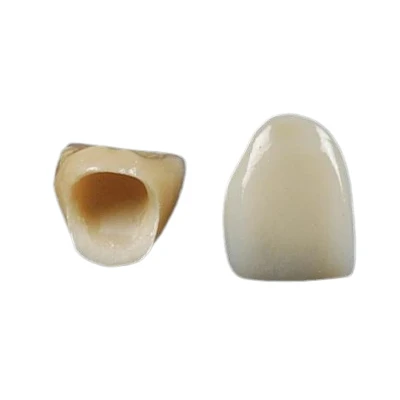
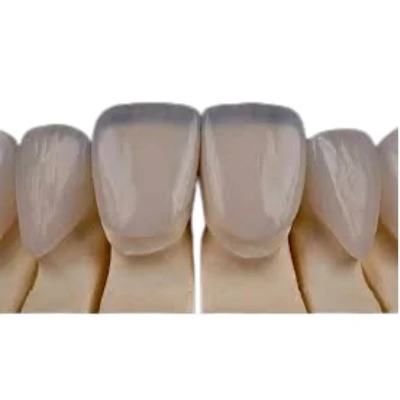
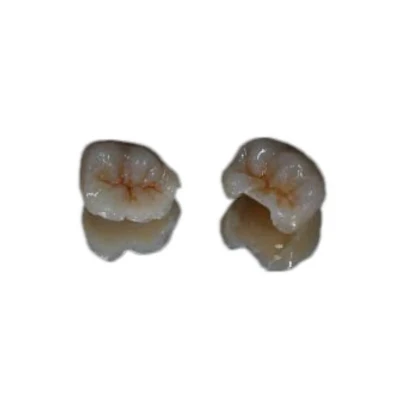


A veneer can have the correct shade, good translucency, clean margins, and balanced proportions yet still look artificial. One common reason is the facial surface. Natural enamel is not uniformly smooth, and its subtle contours and micro-details influence how light moves across the tooth.
For natural-looking dental veneers, surface texture should not be treated as decoration. It is part of the optical design of the restoration, working together with tooth form, translucency, characterization, and gloss.

What Is Veneer Surface Texture?
Veneer surface texture refers to the visible and microscopic topography of the facial surface of a dental veneer. It includes both larger anatomical features and much finer enamel-like details.
Natural anterior teeth do not present a perfectly flat facial surface. Their appearance is shaped by facial convexities, developmental anatomy, transitional line angles, shallow depressions, fine horizontal features, and areas with different levels of gloss.
Macrotexture vs. Microtexture
It is useful to separate these features into two broad levels.
Macrotexture describes the larger anatomical features that shape the facial surface and control the main reflective zones. These include:
- Facial convexity
- Developmental lobes and grooves
- Transitional line angles
- Shallow depressions
- Major changes between the cervical, middle, and incisal thirds
Microtexture refers to much finer surface details. These may include subtle irregularities, fine horizontal features, and perikymata.
Perikymata are shallow surface expressions of incremental enamel growth lines. They often appear as fine horizontal ridges or grooves and may be more noticeable in some areas of a natural tooth than others. Research into perikymata spacing and distribution on anterior teeth also shows why they should not be understood as one evenly repeated surface pattern across the entire crown.
They are not decorative scratches and should not be reproduced as evenly spaced lines across every veneer.
Surface texture therefore involves much more than adding horizontal grooves. The larger anatomy establishes the tooth form first. Microtexture refines it.
How Surface Texture Changes the Way a Veneer Reflects Light
The main reason veneer surface texture matters is simple: it changes the way light is reflected from the restoration.
A very flat and uniformly polished veneer tends to create broader, more continuous reflections. Depending on the contour, viewing angle, and lighting, this can make the tooth appear flatter, brighter, or visually wider than the adjacent natural teeth.
Natural enamel creates a more complex reflection pattern.
Small convexities, depressions, line-angle transitions, and microtexture divide large reflective areas into smaller zones. Highlights become less uniform, and the transitions between bright and shaded areas become more gradual.
That affects several aspects of dental esthetics:
- Perceived width: Broad facial reflections can make a tooth appear wider.
- Brightness: A smooth, highly reflective surface may appear brighter even when the ceramic shade has not changed.
- Depth: Controlled changes in reflection help prevent the facial surface from appearing visually flat.
- Contour: Reflective zones help the observer read the three-dimensional form of the tooth.
- Vitality: Irregular but controlled light behavior contributes to the visual complexity associated with natural enamel.
This is why two veneers made from the same ceramic and matched to the same shade can still look different.
One may reflect light as a broad polished ceramic surface. The other may show smaller, softer reflective transitions that integrate better with the surrounding dentition. This is also why well-designed natural aesthetic veneers require more than simply selecting the correct ceramic shade.
Veneer texturing is ultimately a form of light management.
Texture does not create natural esthetics on its own, but it strongly influences how the morphology and optical properties of the restoration are perceived.
Why More Texture Does Not Always Make Veneers Look More Natural
A common mistake is to assume that more visible texture produces a more realistic veneer.
It does not.
Natural tooth surfaces contain variation. Perikymata are not perfectly parallel. Developmental features are not identical from tooth to tooth. Wear also changes the appearance of the surface over time.
When veneer microtexture becomes too regular or too visible, it can create the opposite effect of what was intended.
Common problems include:
- Deep, repeated horizontal grooves
- Identical texture copied onto every anterior tooth
- Texture that remains obvious from normal smile distance
- Strong horizontal detail extending too far toward the incisal edge
- Fine anatomy added before the major facial contour is correct
The most important principle is that tertiary anatomy should remain tertiary.
Micro-details are meant to refine the surface. They should not become the dominant visual feature.
The same rule applies to overall form. If the transitional line angles are misplaced, the veneer is too convex, the proportions are incorrect, or the value is too high, adding more surface texture will not solve the problem.
It only adds detail to an incorrect form.
A practical sequence is:
Form first. Texture second. Finish last.
The outline, facial convexity, line angles, and secondary anatomy should establish the natural tooth form before fine enamel-like details are added.
Successful veneer texture usually disappears into the overall appearance. The observer should notice a natural-looking tooth, not the technician's texture pattern.

How Veneer Texture Should Change With the Patient and Clinical Situation
There is no universal surface texture that works for every veneer case.
Age, tooth position, existing enamel, wear, the number of veneers, and the patient's preferred esthetic style all influence how much surface characterization is appropriate.
Single Veneer Beside Natural Teeth
A single anterior veneer, especially a single central incisor veneer, is one of the most demanding situations for surface texture matching.
The adjacent natural central incisor provides a direct reference for:
- Facial lobe development
- Mesial and distal reflective zones
- Horizontal surface features
- Cervical texture
- Incisal wear
- Surface gloss
- Overall value distribution
In this situation, the neighboring natural tooth should normally take priority over a generic digital texture library.
Even a technically attractive texture can look incorrect if it does not match the tooth beside it.
Multiple Anterior Veneers
Two, four, or six anterior veneers can share a related surface character, but they should not be exact copies.
Central incisors often have broader facial anatomy. Lateral incisors may show quieter or less organized surface detail. Canines usually present a different convexity and light-reflection pattern.
Repeating one identical texture map across every unit creates a regular rhythm that natural teeth usually do not have. Carefully individualized layered veneers for a natural smile are therefore designed around a related esthetic concept without making each anterior unit look identical.
Consistency is useful. Duplication is not.
Younger vs. Worn or Mature Dentition
Younger, less-worn natural teeth may show clearer developmental anatomy and more visible fine surface detail. Perikymata can also be easier to identify.
With time, abrasion, erosion, toothbrushing, and normal function can soften some of these fine features. A mature or visibly worn dentition may therefore look more natural with reduced microtexture and smoother transitions.
Age alone should not become a design formula.
Some younger teeth are relatively smooth, while some older teeth retain visible surface character. Close photographs of the patient's natural teeth are more useful than assumptions based on age.
Patient preference matters as well. Some people prefer highly individualized, natural-looking veneers. Others intentionally choose a cleaner, smoother, and more uniform smile.
The correct texture is the one that fits the clinical reference and the approved esthetic direction.
Texture, Surface Roughness, and Gloss Are Not the Same Thing
Three terms are often mixed together in discussions about ceramic veneers: surface texture, surface roughness, and gloss.
They describe different characteristics.
Surface texture refers to the organized topography and anatomy of the veneer surface.
Surface roughness describes small surface irregularities and can be measured quantitatively using parameters such as Ra.
Gloss, or surface lustre, describes how light is reflected from the finished surface and how shiny or matte that surface appears.
A veneer can have visible microtexture without being poorly finished.
This distinction is important. Fine enamel-like topography should not be created by simply leaving a ceramic surface rough.
Research on tactile perception has shown that people can detect very small differences in restorative surface roughness. That reinforces the need for controlled finishing rather than uncontrolled surface irregularity.
Gloss must also be coordinated with the texture.
A heavy glaze may visually soften or fill some delicate surface features and produce larger specular reflections. Aggressive polishing, on the other hand, can flatten intentional texture. Insufficient finishing may leave an unnecessarily rough surface.
Studies examining the effects of polishing and glazing on dental ceramic optical properties reinforce an important point: finishing is not merely a cleanup step. Surface treatment can influence how a ceramic behaves visually.
For a practical laboratory perspective on these finishing stages, see Staining and Glazing Dental Ceramics: What Changes in the Final Restoration?.
The correct approach depends on the ceramic system, fabrication method, surface characterization, and the final appearance required.
Texture and gloss therefore need to be evaluated together.
A carefully textured veneer with the wrong gloss can still look artificial.
How Dental Technicians Create Natural Veneer Surface Character
Natural veneer surface character is usually built in stages. Fine microtexture should not be the starting point.
A typical esthetic sequence begins by establishing the basic silhouette and tooth proportions. The facial convexity is then developed, followed by the transitional line angles and secondary developmental anatomy.
Only after these larger elements are correct should restrained microtexture be introduced.
The sequence may include:
1.Establishing tooth length, width, and facial silhouette
2.Developing three-dimensional facial contour
3.Positioning transitional line angles
4.Refining developmental lobes and grooves
5.Adding controlled tertiary surface detail
6.Coordinating external characterization and staining
7.Glazing or polishing according to the ceramic system
8.Rechecking reflective zones and surface appearance under suitable lighting
Digital dentistry can support several parts of this process.
CAD/CAM systems help establish consistent morphology, contours, symmetry, and restoration dimensions. Digital reference data can also help the dental technician compare the proposed restoration with adjacent anatomy. A broader overview of how these stages connect can be found in our guide to the CAD/CAM dental workflow from scan to final restoration.
However, designed texture is not necessarily finished texture.
The restoration may still pass through milling, pressing, layering, firing, staining, glazing, and polishing. Each step can change the final surface.
For that reason, the finished veneer-not only the CAD model-must be evaluated for texture and reflected light.
Material also affects the working method.
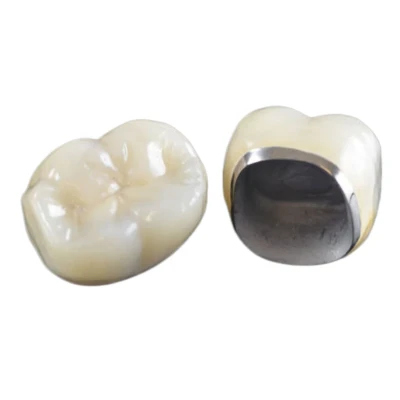
Hand-layered feldspathic veneers allow extensive control over layering and external characterization. Lithium disilicate veneers, including IPS e.max lithium disilicate restorations, can also receive individualized morphology and surface finishing through pressed, milled, monolithic, or layered workflows.
For dentists comparing these two common veneer materials, Feldspathic vs. E.max Veneers: How Dentists Should Choose explains the broader material and case-selection differences.
No ceramic automatically guarantees natural surface esthetics.
The material establishes the available optical and manufacturing options. The final result still depends on morphology, characterization, finishing, and technician judgment.
For aesthetic dental laboratories, this is where digital manufacturing and experienced craftsmanship need to work together. Digital precision establishes a reliable foundation. Fine contouring, surface characterization, staining, glazing, and polishing determine much of the final visual integration.

How Dentists Can Communicate Veneer Texture to the Dental Lab
"Add natural texture" is not a useful veneer prescription.
It tells the dental technician the desired outcome but provides little information about what the clinic actually expects.
A more useful prescription identifies the reference and describes the location, intensity, and finish of the required surface anatomy.
Useful information can include:
- Which untreated tooth should be used as the texture reference
- Whether the texture should be subtle, moderate, or pronounced
- Where horizontal details should be most visible
- How strong the vertical developmental anatomy should be
- Whether the incisal third should remain relatively smooth
- Preferred gloss level
- Relevant age or wear characteristics
- Patient-approved esthetic preferences
Which Photos Help the Lab Read Surface Texture?
Different photographs communicate different information.
Standard frontal and oblique photographs help the laboratory evaluate overall morphology, proportions, and major reflective zones.
Close-up unpolarized photographs under directional or raking light are particularly useful for surface texture. Directional light creates highlights and shadows that reveal small convexities, grooves, and changes in gloss.
Cross-polarized photographs are valuable for shade evaluation and internal color effects because they reduce surface reflections. That same advantage makes them less useful as the only reference for surface topography.
For demanding anterior cases, a useful image set may include frontal, oblique, close-up, and incisal views, with both shade-oriented and surface-oriented photographs. For a broader case-submission approach, see How to Communicate Shade to a Dental Lab: Photos, Stump Shade, and Characterization.
A short video under moving light can also help show how reflective zones change as the viewing angle changes.
Example of a More Useful Veneer Texture Prescription
Instead of:
Add natural texture.
A prescription could say:
Match the untreated adjacent central incisor. Maintain moderate vertical facial anatomy, use faint irregular horizontal texture mainly in the cervical and middle thirds, reduce horizontal detail toward the incisal third, and match the final gloss to the adjacent natural teeth.
That instruction gives the technician something that can actually be evaluated.
Clear communication becomes even more important when veneer cases are outsourced to an overseas dental laboratory. Good photographs, clear shade information, patient preferences, and specific surface references reduce subjective interpretation and make the expected result easier to reproduce consistently.
Natural Veneer Texture Is About Integration, Not Maximum Detail
Natural veneer esthetics depends on more than selecting the correct ceramic or matching a shade tab.
The facial surface changes the way the restoration reflects light. Macrotexture establishes the larger form. Microtexture adds finer enamel-like character. Gloss controls how those features remain visible under reflected light.
None of them should be designed in isolation.
The best veneer surface is not the one with the most visible detail. It is the one that fits the adjacent teeth, age and wear pattern, clinical situation, and the esthetic result approved by the patient.
For dentists and dental laboratories working on customized veneer cases, predictable results depend on clear case communication and careful coordination between digital design and technician-led finishing.
ADS Dental Laboratory Ltd combines digital veneer workflows with experienced aesthetic technicians for individualized contouring, surface characterization, staining, glazing, and final inspection. Contact ADS to discuss aesthetic veneer cases, digital files, surface references, or long-term dental laboratory outsourcing requirements.