
Lithium disilicate has become one of the most widely used glass-ceramic materials in aesthetic dentistry, and for good reason. It combines flexural strength in the range of 360–500 MPa with a translucency that closely mimics natural enamel, making it a go-to choice for lithium disilicate veneers, single anterior crowns, and conservative inlay/onlay restorations.
For dental laboratories, however, delivering consistently high-quality lithium disilicate veneers requires more than simply milling or pressing the ceramic. Predictable results depend on appropriate case selection, accurate digital design, controlled veneer thickness, material handling, firing protocols, shade management, and clear communication between the clinician and dental lab.
This article walks through the main indications for lithium disilicate veneers and the dental lab considerations that can separate an acceptable restoration from an exceptional one.
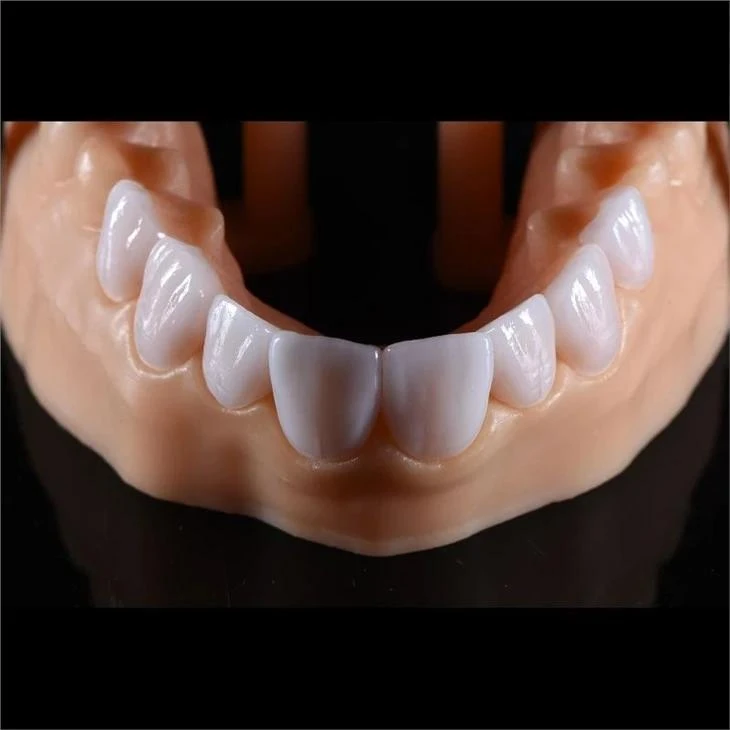
Why Choose Lithium Disilicate for Veneers?
Lithium disilicate glass-ceramic, with the main crystalline phase Li₂Si₂O₅, occupies a unique position among dental ceramics. Its interlocking microstructure of needle-like crystals resists crack propagation, giving it significantly higher fracture toughness than traditional feldspathic porcelain, which typically has flexural strength in the range of 50–80 MPa.
At the same time, its refractive index of approximately 1.52 closely matches that of natural tooth enamel, allowing well-designed ceramic veneers to blend naturally with the surrounding dentition.
The material's core advantage is the balance it strikes between strength and aesthetics. Unlike zirconia, which can achieve flexural strength of 900 MPa or above but is generally more opaque, lithium disilicate retains enough translucency for demanding anterior aesthetic cases while providing the mechanical properties required for everyday function.
This balance makes lithium disilicate particularly suitable for dental veneers, where thin restoration thicknesses of approximately 0.3–0.8 mm may still need to reproduce enamel-like translucency, shade transitions, surface texture, and natural incisal effects.
For material classification and standardized testing context, dental ceramics are also covered by the ISO 6872 dental ceramic material standard.
From a dental lab perspective, however, material strength alone does not determine success. Veneer preparation, restorative space, stump shade, translucency, occlusion, and the desired degree of shade change all influence how the ceramic should be designed and fabricated.
When Are Lithium Disilicate Veneers Indicated?
Lithium disilicate veneers are indicated across a broad spectrum of aesthetic and functional situations. Understanding where the material performs best helps clinicians and dental laboratories plan more predictable restorations.
Ideal Indications
|
Clinical Scenario |
Why Lithium Disilicate Works |
|
Discoloration such as tetracycline staining or fluorosis |
High-translucency and more opaque material options allow the restoration to balance masking with natural incisal translucency |
|
Diastema closure |
The material can be pressed or milled to thicker cross-sections at contact areas without losing aesthetic integration |
|
Worn or shortened anterior teeth |
Flexural strength of 360–500 MPa can withstand functional loads when adequate adhesive bonding is achieved |
|
Conical or peg-shaped lateral incisors |
Full-contour veneers can re-establish normal tooth morphology with relatively conservative preparation |
|
Mild to moderate enamel hypoplasia |
The glass-ceramic surface accepts characterization stains, texture development, and glazing for aesthetic integration |
Case selection should not be separated from laboratory design. A case that appears to be suitable for a minimally invasive veneer clinically may still require sufficient ceramic space for masking, contour development, translucency, and incisal characterization.
For this reason, minimal-prep should not automatically be interpreted as minimum ceramic thickness. Preserving tooth structure remains important, but insufficient restorative space can restrict what the dental technician can achieve, particularly when a significant shade change or complex morphology is required.
Contraindications and Caution Areas
Lithium disilicate is not the universal answer for every veneer case. Certain clinical situations call for alternative materials or modified approaches.
Bruxism and parafunctional habits remain a significant concern. While the material's flexural strength is adequate for normal anterior function, patients with uncontrolled nocturnal bruxism place cyclic loads that can exceed the fracture threshold of thin veneer sections. In such cases, an occlusal guard is mandatory, or a higher-strength material such as monolithic zirconia may be more appropriate.
Severe tooth discoloration that requires heavy opacity can also compromise the aesthetic outcome. The more masking pigment required, the more difficult it becomes to reproduce the optical behavior of natural enamel. For extreme discoloration, a more opaque or layered restorative strategy may be necessary.
Insufficient enamel for adhesive bonding is another limiting factor. Lithium disilicate veneers rely heavily on the resin cement–tooth interface for long-term retention. When preparation extends predominantly into dentin, bond strength drops and the risk of debonding rises.
The underlying tooth color should also be evaluated early. With thin, translucent ceramic veneers, the preparation is part of the final optical system rather than simply a supporting structure. As translucency increases and ceramic thickness decreases, the influence of the stump shade becomes increasingly important.
For clinicians comparing different aesthetic ceramic approaches, understanding the differences between E.max and feldspathic veneers can also help with case-specific material selection.
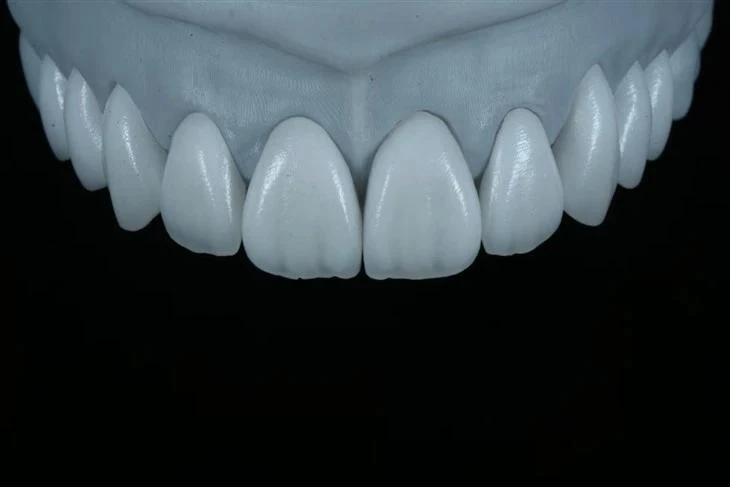
Key Dental Lab Considerations for Lithium Disilicate Veneers
Producing a high-quality lithium disilicate veneer involves a sequence of technical decisions, each of which influences final fit, aesthetics, and long-term performance.
A predictable veneer lab workflow requires control of digital design, restoration thickness, material selection, shade strategy, ceramic processing, margin refinement, surface characterization, and quality control.
CAD/CAM Design Parameters
Digital design is where the veneer's success begins. Whether the case is produced through CAD/CAM milling of lithium disilicate CAD blocks or through a lost-wax pressing technique, the design stage establishes the foundation for the final restoration.
Margin design and thickness control are two of the most important parameters.
For lithium disilicate veneers, the minimum recommended thickness is approximately 0.3 mm at the cervical margin, although many clinicians and laboratories prefer around 0.5 mm for additional strength in the thin cervical area. The incisal edge can be designed with approximately 0.5–1.0 mm of thickness depending on the preparation design.
Common design guidelines include:
|
Design Parameter |
Recommended Range |
Rationale |
|
Cervical margin thickness |
0.3–0.5 mm |
Thinner margins risk fracture during try-in and bonding; excessive thickness can compromise emergence profile |
|
Incisal edge thickness |
0.5–1.0 mm |
Provides material volume for incisal translucency effects and resistance to chipping |
|
Axial reduction |
0.5–0.7 mm |
Provides sufficient restorative space without unnecessary tooth reduction |
|
Margin placement |
At or slightly above the cementoenamel junction |
Facilitates clear impression or scan margins and supports adhesive bonding to enamel |
|
Cement gap |
60–80 µm |
Balances seating resistance with adequate space for resin cement |
These figures should be treated as design guidelines rather than universal targets. Actual veneer thickness should also reflect the substrate color, desired shade change, occlusion, preparation design, and aesthetic requirements of the individual case.
For a broader clinical discussion of reduction, margin placement, and preparation strategy, see these veneer preparation guidelines.
Digital scanning accuracy directly affects final fit. Intraoral scanners with accuracy in the range of 10–20 µm have largely replaced conventional impressions for many veneer cases. On the laboratory side, the digital model should be checked carefully to confirm that margin lines are continuous and clearly identifiable before the case proceeds to milling, wax-up, or pressing.
A digital workflow improves dimensional control, but it does not eliminate the need for technician judgment. In aesthetic veneer production, CAD/CAM design must still be coordinated with morphology, surface texture, incisal position, translucency, and the intended visual integration with adjacent natural teeth.
Material Selection: Pressed vs. Milled Lithium Disilicate
One of the first production decisions is whether to use pressed or milled lithium disilicate. Both routes can produce excellent results, but their workflows and practical advantages differ.
Pressed lithium disilicate uses a lost-wax technique. A wax pattern is invested and burned out, after which the ceramic ingot is pressed into the mold under pressure and heat. This method produces a homogeneous restoration with excellent marginal fidelity.
Pressed veneers are often preferred for cases requiring extensive individual characterization because the pressed restoration can be cut back and layered with veneering ceramic to develop customized translucency, shade transitions, and incisal effects. For cases where this individualized ceramic work is particularly important, hand-layered E.max veneers represent one laboratory approach to achieving additional aesthetic characterization.
Milled lithium disilicate using CAD/CAM begins with a partially crystallized block in a softer intermediate state. After milling, the restoration undergoes a crystallization firing at approximately 840–850°C, developing its final crystalline structure as well as its mechanical and optical properties.
The digital milling workflow offers efficiency and repeatability, particularly when multiple restorations require coordinated design. Digital E.max veneers are one example of how this CAD/CAM workflow can be applied to aesthetic veneer production.
From a clinical performance standpoint, both routes can deliver favorable long-term outcomes. Published research on the clinical survival of ceramic laminate veneers supports their use as a predictable restorative option when case selection, preparation, bonding, and fabrication are appropriately controlled.
The choice between pressing and milling therefore often depends on case complexity, aesthetic requirements, the desired characterization technique, laboratory workflow, and turnaround requirements.
For a dental lab, the more important question is not simply "pressed or milled?" but which workflow provides the most appropriate combination of fit, ceramic thickness, optical control, and technician customization for that specific case.
Translucency, Ingot and Shade Selection
Lithium disilicate is available in several translucency levels, each suited to different clinical situations. Selecting the correct translucency level is essential for predictable ceramic veneer aesthetics.
|
Ingot Type |
Translucency Level |
Best Used For |
|
HT |
High translucency |
Cases with minimal to mild discoloration where the natural tooth shade is relatively close to the target |
|
LT |
Lower translucency |
Moderate discoloration requiring additional masking while retaining some translucency |
|
MO |
Medium opacity |
More significant discoloration requiring control of the underlying tooth color |
|
HO |
High opacity |
Severe discoloration where a stronger masking effect is required beneath a layered restoration |
The dental lab should match material selection not only to the prescribed final shade but also to the color of the prepared tooth.
Stump shade becomes increasingly important as veneer translucency increases.
When the preparation is considerably darker than the target shade, a more opaque material or layered approach may be necessary to prevent the underlying tooth from influencing the final restoration excessively. Conversely, excessive opacity can make a veneer appear flat or lifeless.
This means shade selection for lithium disilicate veneers is not simply a matter of matching a shade-tab number.
The final appearance is influenced by several variables working together:
- Stump shade
- Ceramic thickness
- Material translucency
- Target shade
- Internal characterization
- Incisal translucency
- Surface texture
- Cement influence
At ADS Dental Laboratory, veneer prescriptions can include the final shade, stump shade, gingival/body/incisal characterization, margin requirements, contact, embrasure, occlusion, and other case-specific instructions. This type of structured information gives the technician more control over the final aesthetic result, especially in complex anterior veneer cases.
Crystallization Firing and Glazing
For CAD-milled lithium disilicate, crystallization firing is a critical step that converts the material from its machinable intermediate state into its final crystalline form.
The firing protocol must be controlled carefully to obtain the intended mechanical and optical properties.
Key considerations during crystallization include temperature, heating rate, hold time, support, and furnace calibration.
The standard crystallization program typically involves a heating rate of around 60°C per minute to a peak temperature of approximately 840–850°C with a hold time of 10–15 minutes. The restoration is supported on a firing tray with appropriate firing paste or pins to prevent deformation during the high-temperature phase. Vacuum is applied during heating to minimize porosity.
After crystallization, the veneer is in its final crystal phase but still requires surface refinement and glazing.
The glazing stage serves both aesthetic and functional purposes. It develops surface gloss, allows characterization stains to be applied, and helps the technician coordinate the ceramic surface with adjacent enamel.
Over-firing is a common pitfall. Excessive temperature or prolonged hold times can cause excessive crystal growth, increasing opacity and reducing the restoration's ability to reproduce natural enamel translucency. Dental laboratories should follow the material manufacturer's firing parameters and maintain furnace calibration.
High-end veneer aesthetics also depend on steps that cannot be reduced to a firing program. Surface texture, shade transition, incisal characterization, contouring, margin finishing, staining, and glazing still require experienced technician judgment.
This is why a useful laboratory principle is digital precision combined with experienced dental craftsmanship. Digital production improves design consistency, while manual ceramic finishing remains important for individualized aesthetic details.
Margin Fit and Marginal Adaptation
Marginal adaptation is one of the most closely evaluated quality metrics for ceramic veneers. Poorly fitting margins may contribute to cement exposure, marginal discoloration, secondary caries, and gingival irritation.
For lithium disilicate veneers, the target marginal gap is generally 50–80 µm or less. CAD/CAM-milled restorations typically achieve marginal gaps in the 40–70 µm range when the digital workflow is executed correctly. Pressed restorations can achieve reported marginal gaps in the 30–50 µm range under well-controlled conditions.
Several factors can influence marginal fit.
Scan quality and margin clarity.
A digital model with a blurred or ambiguous finish line can result in an imprecise restoration. If the laboratory cannot identify the margin confidently, requesting a new scan or additional clinical information is preferable to designing from assumptions.
Milling bur condition.
Worn or damaged milling burs can produce rough margins and dimensional inaccuracies. Burs should be replaced according to the relevant manufacturing protocol, while cutting parameters should match the material being processed.
Post-mill margin refinement.
Even with precise milling, some margins require light manual refinement under magnification. Fine-grit diamonds or silicone polishers can be used carefully without rounding or damaging the margin edge.
Crystallization shrinkage.
Crystallization involves a volumetric shrinkage of approximately 0.2–0.3%, which CAD software compensates for during design. Incorrect support or restoration movement during firing, however, can still contribute to distortion.
For this reason, marginal accuracy should be treated as the result of the entire workflow rather than a single milling step.
Quality Control Checkpoints
A systematic quality control process helps identify issues before a lithium disilicate veneer leaves the dental laboratory.
Typical checkpoints include:
|
QC Checkpoint |
What to Verify |
Acceptance Criteria |
|
Post-mill inspection |
No chips, cracks, or milling artifacts on the veneer surface or margin |
No visible defects under 5x magnification |
|
Post-crystallization inspection |
No distortion, excessive opacity, or loss of margin integrity |
Margin gap within 80 µm on the die |
|
Shade verification |
Restoration shade matches the prescription under multiple light sources |
Shade match within one half-step of the target under daylight and warm light |
|
Surface finish |
Smooth, glossy surface without residual stains or glaze pooling |
Uniform gloss coordinated with natural enamel |
|
Try-in verification |
Veneer seats fully on the die without rocking or marginal discrepancy |
Full seating with no visually detectable marginal gap |
Aesthetic quality control should not focus on shade alone.
Natural-looking lithium disilicate veneers depend on the interaction of:
- Macro morphology
- Surface microtexture
- Value
- Translucency
- Incisal characteristics
- Shade transition
- Light reflection
In other words, matching the prescribed shade tab does not automatically produce a natural veneer.
At ADS, the broader quality-control workflow includes technician traceability, margin inspection, contact inspection, occlusal inspection, shade and aesthetic evaluation, magnification-assisted checks, and final QC. For long-term outsourcing relationships, maintaining a relatively consistent technician or production team where practical can also help improve aesthetic consistency between cases.
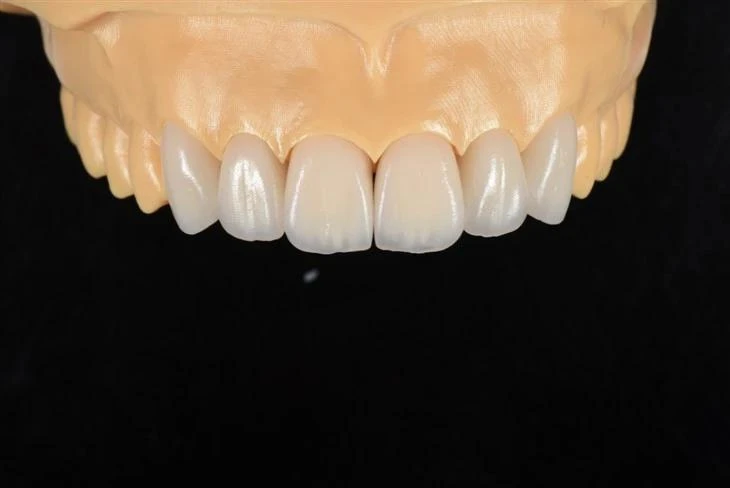
What Clinicians Should Send to the Dental Lab
The quality of a lithium disilicate veneer depends heavily on the information available to the dental laboratory.
Clear, structured communication reduces avoidable remakes, prevents unnecessary delays, and gives the technician enough information to reproduce the clinician's aesthetic and functional objectives.
In many cases, what appears to be a fabrication problem may actually begin as a communication problem.
Essential Information for Every Veneer Case
When submitting a lithium disilicate veneer case, the following information should be provided whenever applicable.
Shade prescription.
This should include not only the target shade, such as A1 or 02M1, but also the stump shade of the prepared tooth.
Without the stump shade, the laboratory has less information for selecting the appropriate ceramic translucency and masking strategy. If multiple teeth are being restored, each preparation should ideally be documented individually because adjacent stump shades can differ.
For difficult anterior aesthetic cases, a structured approach to shade communication with the dental lab can help communicate stump shade, surface characteristics, translucency, and photographic references more consistently.
Preparation design.
The clinician should specify whether the preparation uses a window, feather-edge, or incisal overlap design because this affects incisal thickness, morphology, and characterization.
The approximate preparation depth and whether the preparation remains predominantly in enamel or extends substantially into dentin are also clinically relevant.
Photographic documentation.
High-quality clinical photographs, including a full-face smile view, retracted anterior view, and close-up photographs with shade tabs, provide information that a scan and shade number alone cannot capture.
Photographs can help the ceramist evaluate:
- Adjacent tooth translucency
- Surface texture
- Incisal effects
- White-spot patterns
- Value
- Tooth morphology
- Smile integration
Occlusal information.
The dental laboratory should be informed about the patient's occlusal scheme, parafunctional habits, and any planned occlusal guard when relevant.
These factors can influence incisal edge position, veneer thickness, contact design, and functional adjustment.
Where digital workflows are used, the case should also include clear preparation scans, the opposing arch, bite records, and any approved diagnostic design or wax-up needed for the case.
Common Communication Problems
Several recurring communication gaps can increase the likelihood of veneer remakes.
Missing stump shade is one of the most important omissions. Without this information, the laboratory may have to make assumptions about translucency and masking. The result can be a veneer that is either too translucent, allowing the preparation to influence the final shade, or unnecessarily opaque.
Inadequate margin definition on impressions or scans may lead to open, short, or overextended margins. If the finish line cannot be identified accurately, obtaining a clearer scan or impression is generally preferable to proceeding based on an uncertain margin.
Insufficient restorative space can limit both strength and aesthetics. A minimal-preparation philosophy should preserve tooth structure while still providing enough ceramic space to reproduce the desired contour, shade, translucency, and surface anatomy.
Incomplete photographic references can make highly customized anterior work more difficult. Shade tabs alone cannot communicate surface texture, localized translucency, white characteristics, or the relationship between the restoration and the patient's smile.
Unrealistic turnaround expectations for complex aesthetic cases can also compromise workflow. Multi-layered and highly characterized veneers may require wax-up, pressing or milling, cut-back, layering, staining, glazing, and multiple inspection stages.
For an overseas dental lab outsourcing relationship, structured case communication becomes even more important. A standardized prescription covering material, shade, stump shade, characterization, margins, contacts, embrasures, occlusion, and special instructions helps reduce ambiguity before production begins.
Conclusion
Lithium disilicate veneers remain one of the most versatile options for aesthetic anterior restorations because they combine relatively high flexural strength, enamel-like translucency, adhesive compatibility, and the ability to reproduce highly individualized surface and optical characteristics.
Their predictability, however, depends on much more than the ceramic itself. Appropriate case selection, conservative but adequate veneer preparation, sufficient restorative space, accurate stump-shade information, suitable translucency selection, controlled fabrication, precise margins, functional occlusion, and disciplined laboratory quality control all contribute to the final result.
For dentists and dental laboratories, the most useful principle is simple: a successful lithium disilicate veneer is the result of coordinated clinical planning and laboratory execution, not material selection alone.
ADS Dental Laboratory Ltd is a full-service digital dental laboratory in Shenzhen, China, providing lithium disilicate and aesthetic veneer production as part of long-term dental lab outsourcing services for overseas dentists and dental laboratories. If you would like to discuss a specific veneer case, digital workflow, aesthetic requirement, or ongoing outsourcing project, contact our team to review the case requirements with us.
FAQ
1. What are the main indications for lithium disilicate veneers?
Lithium disilicate veneers are commonly considered for anterior aesthetic cases involving discoloration, diastema closure, worn or shortened teeth, peg-shaped lateral incisors, mild enamel defects, and other situations where tooth shape, color, or proportion needs to be improved conservatively.
Final case selection should also consider enamel availability, occlusion, parafunctional habits, substrate color, preparation design, and the amount of restorative space available.
2. How thick should a lithium disilicate veneer be?
Lithium disilicate veneers may be designed in relatively thin sections, with cervical thickness often around 0.3–0.5 mm and incisal thickness commonly around 0.5–1.0 mm depending on the case.
However, minimum thickness should not be treated as a universal target. The required ceramic thickness varies with preparation design, occlusal conditions, underlying tooth color, translucency, desired shade change, and the aesthetic effect being created.
3. Why does the dental lab need the stump shade for a veneer case?
Lithium disilicate is a translucent glass-ceramic, so the color of the prepared tooth can influence the final appearance of the restoration.
The thinner and more translucent the veneer, the more important stump shade becomes. Providing the stump shade allows the laboratory to make more informed decisions about ceramic translucency, opacity, thickness, characterization, and masking.
4. Are pressed or milled lithium disilicate veneers better?
Both pressed and CAD/CAM-milled lithium disilicate veneers can provide excellent clinical and aesthetic results.
Pressed restorations are frequently used when extensive cut-back and individualized layering are required, while digital milling offers an efficient and repeatable workflow. The better option depends on the case design, aesthetic requirements, available restorative space, laboratory workflow, and required level of characterization.
5. What information should be sent to the dental lab for a lithium disilicate veneer case?
A complete veneer case should ideally include the preparation scan or impression, opposing arch, bite information, prescribed material, target shade, stump shade, preparation design, relevant occlusal information, and high-quality clinical photographs.
For demanding aesthetic cases, full-face smile photographs, retracted anterior photographs, close-ups with shade tabs, desired surface texture, incisal characterization, and any approved diagnostic wax-up or digital design can give the dental technician additional information for producing a more predictable result.