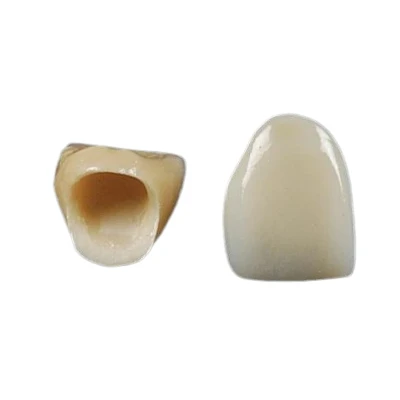
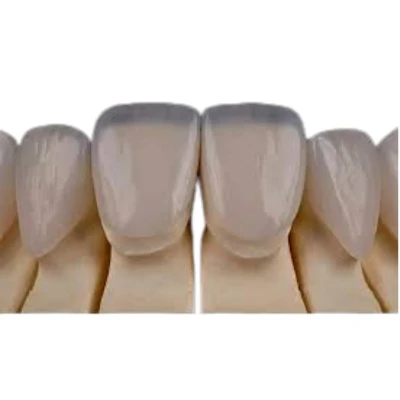



Successful veneer preparation starts before the bur touches the tooth. The clinician must define the final tooth shape, color, position, and ceramic space first, then remove only the tooth structure needed to achieve that design.
A reliable protocol combines diagnostic planning, controlled depth reduction, enamel preservation, clear margin design, and accurate communication with the dental laboratory. The figures in this guide are practical reference ranges, not fixed rules. Final preparation depth must reflect the tooth position, substrate shade, ceramic material, occlusion, and approved restorative design.

Preoperative Assessment and Restoration-Driven Planning
Veneer preparation is a tooth reduction procedure performed to create enough space for a thin bonded restoration while preserving as much healthy enamel as possible. It should be restoration-driven, which means the planned final veneer contour determines where and how much tooth structure is removed.
Begin with a complete clinical assessment. The teeth and gingiva should be healthy before cosmetic treatment starts. Active caries, uncontrolled periodontal inflammation, pulpal problems, and defective existing restorations should be addressed first.
The evaluation should include:
- Tooth color and severity of discoloration
- Existing enamel volume and dentin exposure
- Tooth width, length, form, and axial inclination
- Diastemas, rotations, crowding, and facial or lingual tooth position
- Existing composite restorations, crowns, or veneers
- Overbite, overjet, anterior guidance, and excursive contacts
- Bruxism, clenching, and other functional risk factors
- Gingival levels and smile-line exposure
Patients with significant misalignment may benefit from orthodontic treatment before veneers. Whitening may also be indicated before shade selection when the surrounding natural teeth will remain unrestored.
Clinical records should include facial and intraoral photographs, radiographs where indicated, upper and lower scans or impressions, and a bite record. These records are used to create a diagnostic wax-up or digital smile design.
A diagnostic wax-up defines the planned shape and position of the final restorations. A mock-up transfers that design to the patient's mouth, allowing the dentist to evaluate tooth length, symmetry, lip support, phonetics, and patient acceptance before irreversible preparation.
Preparation should then be measured from the approved mock-up or planned restoration-not only from the original tooth surface.
Choosing the Right Veneer Preparation Approach
There is no single veneer preparation design for every case. The correct approach depends on the amount of additive space available, the degree of color change, tooth position, existing restorations, and the intended ceramic thickness.
No-Prep or Additive Veneer Cases
A true no-prep veneer is an additive restoration placed with little or no systematic enamel reduction. It is suitable only when the tooth already has space for additional material.
Typical indications include:
- Small or narrow teeth
- Lingually positioned teeth
- Minor diastema closure
- Slight increases in tooth length
- Limited shade change
- Cases in which the final contour can be added without creating excessive facial bulk
No-prep treatment preserves enamel and can provide a highly favorable bonding surface. Its main limitation is overcontouring. On facially positioned or naturally full teeth, adding ceramic without reduction can create bulky cervical profiles, thick margins, and unnatural emergence contours.
A true no-prep case should not require routine facial reduction of 0.5 mm or more. Once systematic facial or incisal reduction is performed, the procedure is better described as minimal-preparation or conventional veneer preparation.
Minimal-Preparation Veneers
Minimal-preparation veneers are used when limited tooth reduction is required to define the margin, improve the path of insertion, or create controlled ceramic space.
Common indications include:
- Mild to moderate tooth reshaping
- Small changes in axial inclination
- Moderate color improvement
- Limited interproximal modification
- Slight facial reduction to prevent overcontouring
The term "minimal-prep" does not refer to one fixed depth. It describes the least amount of controlled reduction needed for the planned restoration.
Conventional or More Extensive Preparation
More extensive preparation may be required when the clinician must create additional space for masking, contour correction, or replacement of an existing restoration.
Indications may include:
- Dark or severely discolored substrates
- Existing veneers that must be removed
- Significant facial prominence or rotation
- Greater changes in tooth width or axial position
- Ceramic systems that require more space for opacity and layering
- Interproximal defects extending beyond the facial surface
These preparations carry a greater risk of dentin exposure. When a large part of the planned bonding surface will be dentin, the clinician should reconsider whether a veneer remains the best restoration or whether another treatment would offer more predictable support and retention.
|
Preparation approach |
Typical indication |
Main advantage |
Main limitation |
|
No-prep or additive |
Small, lingualized, or spaced teeth |
Maximum enamel preservation |
Risk of bulky contours |
|
Minimal-prep |
Moderate shape or shade correction |
Controlled space with substantial enamel retention |
Local dentin exposure may still occur |
|
Conventional or extensive |
Major masking, existing restorations, greater contour change |
More space for ceramic and color control |
Greater tooth reduction and bonding complexity |
Step-by-Step Veneer Tooth Preparation Protocol
Isolation, Bur Selection, and Initial Depth Cuts
Use effective moisture control and soft-tissue protection throughout the procedure. A rubber dam, retraction system, cotton roll isolation, or a combination of methods may be selected according to the tooth position and preparation stage.
Diamond burs are commonly used for veneer tooth preparation. Bur selection should match the task:
- Depth-cutting burs establish controlled grooves.
- Round-ended or torpedo-shaped diamond burs create facial reduction and a rounded cervical finish line.
- Thin tapered burs assist with interproximal access.
- Fine-grit diamonds refine the surface and margins.
Start by placing depth cuts through the approved mock-up or against the planned restorative contour. Initial depth grooves are commonly around 0.3–0.5 mm in conservative cases.
The grooves should not automatically have the same depth in every region. Cervical enamel is generally thinner than enamel in the middle and incisal thirds. Tooth position also changes the required reduction. A facially prominent area may require more reduction than a lingually positioned area on the same tooth.
Use continuous water cooling, light pressure, and intermittent cutting. This reduces heat generation and limits pulpal stress.
Facial Reduction by Anatomical Plane
The facial surface should be prepared in anatomical planes rather than flattened into one continuous plane.
Work through the cervical, middle, and incisal thirds separately. Connect the depth grooves with controlled movements that follow the planned contour. The goal is to produce uniform restorative space without creating undercuts or unnecessary dentin exposure.
Check the preparation repeatedly with a silicone index made from the diagnostic wax-up. A facial index confirms overall reduction, while a sectioned incisal or putty index helps evaluate space at specific locations.
The final facial surface should be smooth and continuous. It should not contain sharp ridges, isolated depressions, or unsupported enamel.
Interproximal Preparation
Interproximal preparation must be planned according to the final tooth width, contact position, substrate color, and path of insertion.
The contact area may be preserved when:
- Tooth width will remain unchanged
- There is no diastema to close
- The substrate color is not difficult to mask
- The existing contact is stable
- The margin can be hidden without crossing the contact
The contact may need to be opened when:
- Closing a space
- Changing tooth width
- Correcting rotation
- Replacing an interproximal restoration
- Hiding the margin on a dark substrate
- Establishing a clear path of insertion
Use a thin diamond bur carefully near the adjacent tooth. A metal matrix, protective strip, or other barrier can reduce the risk of iatrogenic damage.
In selected masking cases, the proximal margin can be extended further toward the lingual surface. This "dog-leg" type extension helps prevent the ceramic-tooth junction from becoming visible from an oblique angle. It should be used only when the esthetic benefit justifies the additional reduction.
Incisal and Optional Lingual Preparation
Incisal design depends on the planned change in tooth length, the condition of the natural incisal edge, and the patient's functional contacts.
A window preparation terminates on the facial surface and preserves the natural incisal edge. It may be considered when the incisal edge is intact and no change in length is required.
A butt-joint preparation reduces the incisal edge and creates a rounded, approximately perpendicular finish line. This gives the dental laboratory a clear endpoint for controlling final tooth length.
An incisal overlap design extends ceramic across the incisal edge and onto the lingual surface. When lingual extension is used, the finish line should not be placed directly in a heavy centric or excursive contact area.
Lingual preparation is not routine for every veneer. It may be indicated when an existing lingual restoration, caries, tooth-form correction, or occlusal requirement makes extension necessary.
Finishing, Polishing, and Final Inspection
Use fine-grit diamonds to refine the preparation. Round all internal line angles and remove sharp transitions.
Inspect for:
- Continuous and clearly visible margins
- Adequate ceramic space
- Absence of undercuts
- Smooth transitions between facial planes
- Rounded internal line angles
- Supported enamel at the finish line
- Correct interproximal extension
- A defined path of insertion
The preparation should be easy to read clinically, digitally, and on the laboratory model.

Recommended Reduction Depths and Margin Design
Reduction values are useful only when interpreted in the context of the final restorative plan. A single depth should never be applied automatically to the entire facial surface.
Facial Reduction Reference Ranges
|
Clinical situation |
Practical facial reduction reference |
|
Additive or highly conservative case |
No systematic reduction or limited local recontouring |
|
Typical conservative veneer |
Approximately 0.3–0.7 mm |
|
Greater shape or shade correction |
Approximately 0.8–1.0 mm in selected areas |
|
Extensive masking or contour correction |
Approximately 1.0–1.5 mm in carefully selected areas |
These measurements should be verified against a mock-up and silicone index. They do not represent a requirement to remove the maximum amount shown.
Dark substrates often require more restorative space than lightly discolored teeth. However, increasing reduction is only one part of color management. Ceramic type, translucency, opacity, stump shade, layering method, and resin cement shade also affect the final result.
Finish Line and Gingival Margin Position
A light chamfer of approximately 0.3 mm is commonly used for porcelain veneer preparation. It provides a clear endpoint without creating a heavy shoulder.
The margin should be:
- Smooth
- Continuous
- Clearly visible
- Free of unsupported enamel
- Accessible for scanning, impression taking, and bonding
When the substrate color and tooth form allow it, a supragingival or equigingival margin is preferred. It is easier to isolate, scan, bond, finish, and maintain.
Slight subgingival extension may be justified when hiding a dark margin, replacing an existing subgingival restoration, or managing a specific cervical contour. Deep extension without a clear indication makes soft-tissue control and adhesive cementation more difficult.
Incisal Reduction Reference Ranges
For a butt-joint design, a common incisal reduction range is approximately 0.5–1.0 mm. Cases requiring greater length change, opacity, or ceramic support may need approximately 1.0–1.5 mm.
Larger reductions should be based on a defined restorative and functional need, not on a routine preparation formula.
Preserving Enamel and Avoiding Over-Preparation
Enamel preservation is central to minimally invasive veneer preparation because enamel generally provides a more predictable bonded substrate than dentin.
The aim is not to avoid all reduction. The aim is to remove only the tooth structure necessary to create adequate ceramic thickness, correct contours, and a clear finish line.
Over-preparation may lead to:
- Greater dentin exposure
- Increased sensitivity
- More complex adhesive management
- Reduced control of the cervical margin
- A weaker remaining tooth structure
- A need to reconsider the restoration type
Under-preparation also causes problems. If the laboratory does not receive enough restorative space, the technician may have to produce a veneer that is too thin, too opaque, or overcontoured. The final result may look bulky even when the restoration fits accurately.
Use the mock-up as the reduction reference. Establish depth grooves through the planned contour, then check the remaining space with silicone indices at the cervical, middle, and incisal thirds.
Do not continue reducing simply to reach a predetermined number.
The correct endpoint is the least controlled reduction that allows the restoration to achieve its required thickness, color, contour, and path of insertion.
Gingival Management, Digital Impressions, and Temporary Veneers
Gingival Management and Impression Quality
The finish line must be fully captured after preparation. Blood, saliva, and crevicular fluid can obscure the margin and reduce the quality of both digital scans and conventional impressions.
Use an appropriate retraction method based on the position of the margin and the condition of the gingiva. Single-cord or double-cord techniques may be used when mechanical displacement is required. Hemostasis must be achieved without damaging the tissue.
For digital impressions, verify:
- Complete capture of every finish line
- Clear interproximal data
- No missing facial or incisal surfaces
- No soft-tissue overlap
- No obvious stitching distortion
- Complete opposing arch scan
- Accurate bite registration
For conventional impressions, inspect the material for bubbles, pulls, tears, or missing margins before dismissing the patient.
Temporary Veneers as a Design Verification Tool
Temporary veneers protect prepared teeth and maintain appearance while the final restorations are fabricated. They also provide clinical information that the laboratory cannot obtain from the preparation scan alone.
Evaluate the provisional restorations for:
- Incisal edge position
- Tooth length and width
- Midline
- Lip support
- Phonetics
- Proximal contacts
- Gingival response
- Centric and excursive contacts
- Patient acceptance
When the patient approves the provisional design, scan or photograph it and send the information to the dental laboratory. This allows the technician to reproduce the accepted contours more accurately.
What to Send to the Dental Laboratory
A well-prepared tooth can still produce a poor result if the laboratory receives incomplete clinical information. Veneer cases require more than a preparation scan and a target shade.
A complete digital veneer submission should include:
- Preoperative upper and lower scans
- Preparation scan
- Opposing arch scan
- Bite registration
- Diagnostic wax-up or approved digital design
- Mock-up or provisional scan
- Full-face smile photographs
- Retracted frontal and lateral intraoral photographs
- Target shade
- Stump shade
- Photographs with a shade tab
- Requested ceramic material
- Incisal translucency instructions
- Surface texture and gloss preference
- Midline and incisal edge position
- Proximal contact requirements
- Occlusal instructions
- Required completion date
Stump shade and target shade should be recorded separately. The same final shade may require a different ceramic strategy on a light enamel substrate than on a dark dentin substrate.
Photographs should show the shade tab in the same plane as the prepared tooth, under controlled lighting, without overexposure. Notes such as "natural" or "highly esthetic" are not enough. Specify the requested translucency, surface texture, line angles, and incisal characterization.
ADS dental laboratory Ltd supports digital veneer cases for overseas dentists and laboratories through case review, design communication, shade planning, and consistent custom fabrication.

Common Preparation Errors, Final Checklist
Common Preparation Errors
|
Error |
Likely consequence |
Prevention |
|
Insufficient reduction |
Bulky contour, limited shade control |
Use a mock-up and silicone index |
|
Excessive reduction |
Dentin exposure and greater bonding complexity |
Use depth grooves and sectional checks |
|
Flattening the facial surface |
Uneven ceramic space and unnatural contour |
Prepare in cervical, middle, and incisal planes |
|
Irregular finish line |
Poor scan readability and marginal inconsistency |
Refine with fine-grit diamonds |
|
Sharp internal angles |
Localized ceramic thinning and stress |
Round all internal transitions |
|
Undercuts |
Incomplete seating or path-of-insertion problems |
Inspect from the planned insertion direction |
|
Inadequate proximal extension |
Poor contact, width, or shade control |
Extend according to the restorative goal |
|
Unnecessary deep subgingival margin |
Difficult retraction, bonding, and maintenance |
Keep margins supragingival or equigingival where possible |
Final Preparation Checklist
Before scanning or taking the final impression, confirm that:
- Restorative space is adequate and reasonably uniform
- Enamel has been preserved wherever clinically possible
- The finish line is continuous and visible
- No undercuts interfere with seating
- Internal line angles are rounded
- Interproximal extension matches the planned tooth form
- Incisal design is compatible with the occlusion
- Soft tissue is stable and free of bleeding
- The preparation can be recorded completely
- The laboratory prescription is complete
Conclusion
Preparing teeth for veneers requires controlled reduction based on the approved restorative design. The clinician must create enough space for ceramic while preserving enamel, maintaining clear margins, and protecting the functional relationship of the anterior teeth.
The quality of the final veneer also depends on the information sent to the dental laboratory. Accurate scans, clear photographs, stump shade records, provisional contours, and specific design instructions reduce uncertainty and improve consistency.
ADS dental laboratory Ltd provides custom digital veneer production and long-term outsourcing support for dental clinics and laboratories worldwide. Contact our team to discuss case requirements, digital files, materials, or veneer design before submitting your next case.
FAQ
How much tooth structure should be removed for veneers?
Conservative facial reduction is often approximately 0.3–0.7 mm. Some additive cases need little or no systematic reduction, while masking or major contour changes may require more space in selected areas.
Should veneer preparations remain entirely in enamel?
Enamel should be preserved wherever possible, especially around the margins. Complete enamel-only preparation is not achievable in every case, but extensive dentin exposure should prompt a review of the preparation and restoration choice.
Do interproximal contacts need to be opened?
Not routinely. Contacts may be preserved when width and color remain stable. They may need to be opened for diastema closure, rotation correction, contact relocation, margin concealment, or improved insertion.
Which incisal preparation design should be used?
Use a window design when the natural incisal edge can be preserved. Select a butt joint when changing tooth length or creating incisal ceramic space. Lingual overlap should be used only when its restorative benefit outweighs the additional preparation and the margin can remain outside heavy contact.