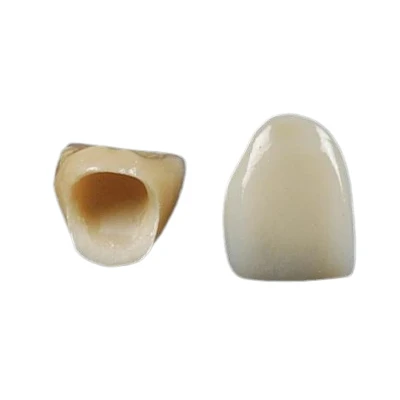
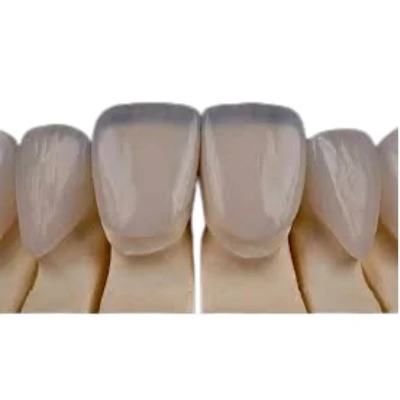
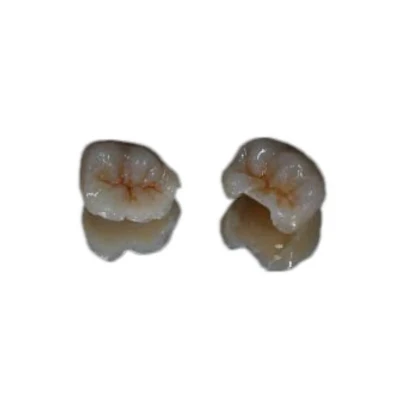
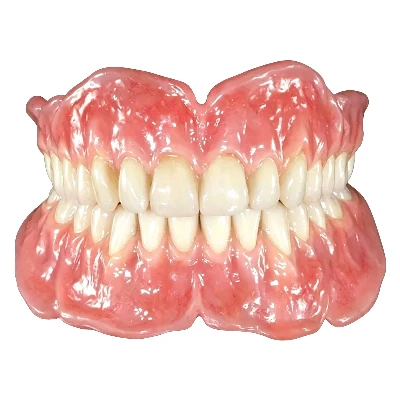


Dental restoration remakes waste more than material. They consume chair time, delay treatment, disrupt schedules, and weaken patient confidence. A remake occurs when a crown, bridge, veneer, implant restoration, or other prosthesis must be extensively modified or fabricated again because the original result cannot be used as intended.
Most preventable remakes develop through errors in preparation, impressions, scans, bite records, prescriptions, design, manufacturing, or quality control. Reducing them requires a controlled workflow on both the clinical and laboratory sides.

Why Dental Restoration Remakes Cost More Than the Restoration
The visible cost of a remake includes new material, technician time, another production slot, and sometimes another shipment. The larger cost often sits inside the dental practice.
A restoration that does not seat may require repeated try-in, contact adjustment, occlusal correction, new records, another temporary, and a second delivery appointment. The patient may need to take more time off work, while the practice loses a slot that could have been used for treatment.
Consider a practice completing 15 crown cases per week. At a 10% rate of full remakes or major adjustments, about 75 cases would require significant rework each year. Even 30 to 35 extra minutes per case would consume nearly 40 hours of chair time.
That is almost one full clinical week.
Frequent remakes also make scheduling less predictable. Dentists begin adding buffer time because they no longer trust routine seating appointments to remain routine. Patients notice that uncertainty, especially when treatment requires repeated visits.
For laboratories, remakes reduce productive capacity and increase communication, shipping, and administrative work. More importantly, they show that the process is not stable enough.
A remake is not only a replacement restoration. It disrupts the full restorative workflow.
Common Remake Problems and Their Root Causes
A visible problem is not always the root cause. "Poor fit" describes what happened at try-in. It does not explain whether the failure began with the preparation, impression, scan, design, model, or manufacturing process.
Fit and Seating Problems
A crown that does not seat may have tight proximal contacts, internal interference, an incorrect path of insertion, or preparation undercuts. It may also reflect an inaccurate impression, missing scan data, incorrect margin marking, a distorted model, or unsuitable internal relief.
An open margin can begin with tissue covering the finish line, blood or saliva contamination, impression tearing, or incomplete digital capture. It can also result from incorrect margin interpretation or manufacturing distortion.
Poor fit is an outcome, not a complete diagnosis.
The case should be traced backward. Was the margin clearly visible? Was the preparation compatible with the material? Did the restoration seat on the model? Were contacts verified before shipment?
Occlusal and Contact Problems
High occlusion is commonly linked to an inaccurate bite record, incomplete opposing-arch data, unstble digital articulation, or excessive CAD contacts. Proximal contacts may also vary when design parameters differ between technicians or the model does not reproduce the clinical situation accurately.
An incorrect bite usually causes high occlusion, wrong intercuspation, or excessive adjustment. A restoration that physically cannot seat is more likely to involve contacts, internal interference, undercuts, margins, or inaccurate working data.
Shade, Esthetic, and Implant Problems
Shade remakes often begin with incomplete information. A shade tab alone may not show stump shade, translucency, surface texture, incisal effects, or the surrounding dentition.
Esthetic problems can also result from unconfirmed expectations. A restoration may be technically acceptable but rejected because the patient expected a different length, shape, brightness, or translucency.
Implant cases carry another risk: inaccurate implant position data. A scan can appear complete even when the scanbody is not fully seated. The final restoration may then have an incorrect interface position, emergence profile, contact, or occlusion.
A complete scan of an incorrectly seated scanbody is still inaccurate.
What Dentists Can Do Before Sending a Case to the Lab
Clinical data define what the laboratory can reproduce. When the preparation, impression, scan, bite, or prescription is unclear, the technician must interpret missing information. That increases variation.
Prepare the Tooth for the Selected Material
Preparation design and material selection should be planned together.
The preparation must provide enough occlusal and axial reduction for the selected material. It also needs a clear path of insertion, a readable finish line, and adequate space in functional areas. Undercuts, sharp internal line angles, and limited clearance can cause seating problems or force the laboratory to compromise thickness and contour.
A monolithic zirconia crown, layered ceramic crown, and bonded glass-ceramic restoration do not have identical preparation requirements. Layered restorations need room for the framework and veneering ceramic. Bridges require attention to shared insertion paths and connector dimensions.
When space is inadequate, the laboratory may have to use an overcontoured design, reduce material thickness, recommend another material, or request repreparation. These choices should never be made silently.
Material selection should reflect space, occlusal load, esthetic demand, bonding conditions, and restoration design.
Capture Accurate Impressions or Digital Scans
A traditional impression should show a continuous finish line without tears, bubbles, voids, tray show-through, or double margins. Tray stability, tissue retraction, hemostasis, material handling, and removal timing all affect accuracy.
The impression should be inspected before it is disinfected, packed, and shipped.
Digital scanning removes several sources of physical distortion, but it does not correct poor tissue control or incomplete margins. Before submission, confirm that:
- The margin is visible around the full preparation;
- The preparation and adjacent teeth are complete;
- There are no holes, stretched areas, or stitching errors;
- The opposing arch contains enough stable anatomy;
- The bite scan matches the patient's actual occlusion.
Moisture, blood, saliva, reflective surfaces, and mobile tissue can reduce scan quality. The laboratory should not be expected to guess where a margin is.
Verify the Bite and Complete the Prescription
The bite record must capture a stable jaw relationship at the intended vertical dimension. In digital cases, both arches and the bite should be reviewed before submission. A small buccal scan may be inadequate for long-span, full-arch, or partially edentulous cases.
The prescription should clearly state the restoration type, material, shade, stump shade, design requirements, occlusal preferences, pontic form, implant system, and requested delivery date. Anterior cases may also need details about translucency, texture, incisal characterization, tooth length, and patient expectations.
Treatment decisions should be finalized before production starts. Mid-process changes in material, shade, or design consume time and may require a restart.
Questions are cheapest before production begins.

Control High-Risk Implant and Esthetic Cases
Some cases require more verification because small errors have larger consequences.
Confirm Scanbody Seating and Implant Components
The scanbody must match the implant system and platform. The connection area should be clean, and no tissue, debris, bone, temporary material, or damaged component should prevent complete seating.
Seating should be stable and consistent with the manufacturer's instructions. Abnormal resistance is a reason to stop and reposition the component, not force it.
When seating is uncertain, verify it clinically and, where appropriate, radiographically with a projection that clearly shows the implant–scanbody connection. The laboratory should also confirm the implant library, platform, interface, and restorative component before design.
A scanbody error can shift contacts, screw-channel position, emergence profile, occlusion, and esthetics at the same time.
Confirm Esthetic Expectations Before Final Production
Shade photographs should use consistent lighting, correct exposure, and a visible shade tab in the same plane as the tooth. The laboratory may also need the stump shade because the preparation can influence translucent ceramics.
The prescription should describe shape, length, texture, incisal translucency, characterization, and the intended relationship to adjacent teeth.
For complex cases, approval should happen before final ceramic work. A wax-up, digital preview, mock-up, provisional restoration, or PMMA try-in allows the dentist and patient to confirm the plan while changes remain manageable.
Documented approval reduces late esthetic remakes and gives the laboratory a clear target.
What Dental Labs Should Check Before Production Begins
An incoming-case review is the laboratory's first quality-control gate. Its purpose is to confirm that the case contains enough accurate information for predictable production.
The laboratory should review:
- File and prescription completeness;
- Margin visibility;
- Preparation space and insertion path;
- Bite and opposing-arch credibility;
- Material compatibility;
- Implant system and component details;
- Shade and esthetic information;
- Bridge span and connector space.
If the margin cannot be identified reliably, the laboratory should not estimate it and continue. If the selected material conflicts with available space, the technician should explain the risk and discuss an alternative. If the bite appears unstable, the case should pause until it is confirmed.
Stopping a case for clarification is a quality-control action, not wasted time.
Case-specific risks should also be documented and carried through design, production, and final inspection. Speed without case validation often creates more expensive delays later.
Build Quality Control Into Every Stage of the Lab Workflow
Final inspection alone cannot prevent all remakes. Quality control must be built into design, manufacturing, finishing, and release.
Design and Manufacturing Controls
During CAD design, verify the margin, insertion path, internal relief, material thickness, proximal contacts, occlusal contacts, contour, connector dimensions, and implant interface.
These checks should follow standardized parameters rather than personal preference alone. Values may vary by material and case type, but the decision rules should remain consistent.
Manufacturing adds more variables. Milling tools wear. Scanners and machines require calibration. Sintering, crystallization, printing, and post-processing depend on controlled settings. Incorrect nesting, support design, furnace programs, or implant libraries can produce a restoration that looks acceptable on screen but fails clinically.
Digital equipment improves repeatability only when the workflow around it is controlled.
Final Quality Control and Technician Calibration
Before shipment, the restoration should be checked against the clinical data and prescription. Final quality control should cover:
- Seating, internal surface, and margins;
- Proximal contacts and occlusion;
- Material thickness and contour;
- Shade, texture, and finish;
- Implant interface and screw channel;
- Completion of all written instructions.
Technician skill remains essential, especially in morphology, esthetics, and problem solving. But skill must operate within a repeatable system.
Training should include regular calibration on margin interpretation, contact strength, occlusal design, material parameters, implant components, and defect recognition. Real remake cases are useful training tools because they show where the workflow failed.
A strong laboratory does not depend on one technician having a good day.
Improve Dentist–Lab Communication and Case Approval
Many remakes begin with incomplete information or assumptions that were never confirmed.
Effective communication should define the clinical goal, material, shade, stump shade, occlusion, contacts, pontic design, implant components, esthetic details, and delivery requirements. Complex cases also need approval points before final production.
Three moments matter most:
- Before submission: The dental team checks the preparation, records, photographs, and prescription.
- Before production: The laboratory confirms material suitability, data quality, and case risks.
- Before final fabrication: The dentist approves designs, prototypes, or esthetic plans when needed.
Important decisions should be documented. "Make it more natural" is too vague. The laboratory needs specific direction, such as reducing brightness, adding cervical chroma, softening line angles, or increasing incisal translucency.
The laboratory should be equally specific when reporting a problem. "Bad scan" gives little guidance. "The distal margin is missing below the gingival tissue and cannot be identified reliably" is actionable.
Clear, documented communication reduces interpretation and prevents changes from being lost between people or departments.
Track Remakes, Major Adjustments, and Root Causes
A laboratory or practice cannot improve a problem it does not define.
A full remake should be recorded separately from laboratory rework, major chairside adjustment, and minor adjustment. Cases changed because of a new clinical condition, revised prescription, or patient-requested esthetic preference should also have separate categories.
A simple rate can be calculated as:
Remake rate = Full remakes ÷ Total restorations delivered × 100%
That number is useful, but it can hide frequent major adjustments. Track both.
The record should include the restoration type, reported problem, direct cause, likely root cause, stage where the issue began, corrective action, and whether it has happened before.
Useful root-cause categories include clinical preparation, impression or scan, bite record, communication, design, manufacturing, material processing, implant component, shipping damage, and changed clinical condition.
Rates should also be reviewed by restoration type. Crowns, bridges, veneers, implant restorations, and full-arch cases have different risks.
Each significant remake should lead to a decision: update the checklist, change a parameter, add a quality-control step, retrain staff, or improve submission instructions.
A remake that produces no process change is likely to repeat.
A Shared Checklist for More Predictable Restorations
A checklist does not replace judgment. It prevents important steps from being missed during busy handoffs.
|
Stage |
Dentist Check |
Laboratory Check |
|
Preparation |
Adequate reduction, readable margin, no harmful undercuts |
Material suitability, insertion path, minimum thickness |
|
Impression or scan |
Complete margin, stable data, no distortion or missing areas |
File completeness, margin visibility, usable working data |
|
Bite |
Stable jaw relationship, complete opposing arch |
Credible articulation and occlusal relationship |
|
Prescription |
Material, shade, design, contacts, occlusion, special requests |
No missing or conflicting instructions |
|
Implant case |
Correct scanbody, complete seating, correct implant information |
Correct library, platform, interface, and components |
|
Design and production |
Approve complex designs or prototypes when needed |
Check margin, relief, contacts, occlusion, thickness, and contour |
|
Final delivery |
Verify seating, margins, contacts, occlusion, and esthetics |
Final QC against prescription and case data |
|
Feedback |
Report major adjustments and clinical findings |
Classify remakes and apply corrective action |
The checklist should change with the case mix. A team producing posterior zirconia crowns needs different controls from one handling full-arch implant work or anterior ceramics.
Consistency improves when both sides know what must be checked, who owns the decision, and when production should stop for clarification.

Conclusion
Dental restoration remakes are reduced by controlling the full process: preparation, impressions or scans, bite records, prescriptions, incoming review, design, manufacturing, quality control, and feedback.
Accurate clinical data prevent guesswork. Standardized laboratory systems reduce internal variation. Clear approval points stop avoidable changes from reaching final production.
Digital technology supports this process, but it does not replace sound records, trained technicians, or disciplined quality control.
ADS dental laboratory Ltd is a China-based digital dental lab providing long-term custom restoration outsourcing services for overseas dentists and dental laboratories. Through case review, standardized digital workflows, staged quality control, and responsive communication, we help clients reduce preventable remakes and improve first-time case accuracy. Contact our team to discuss your case requirements or long-term laboratory partnership.