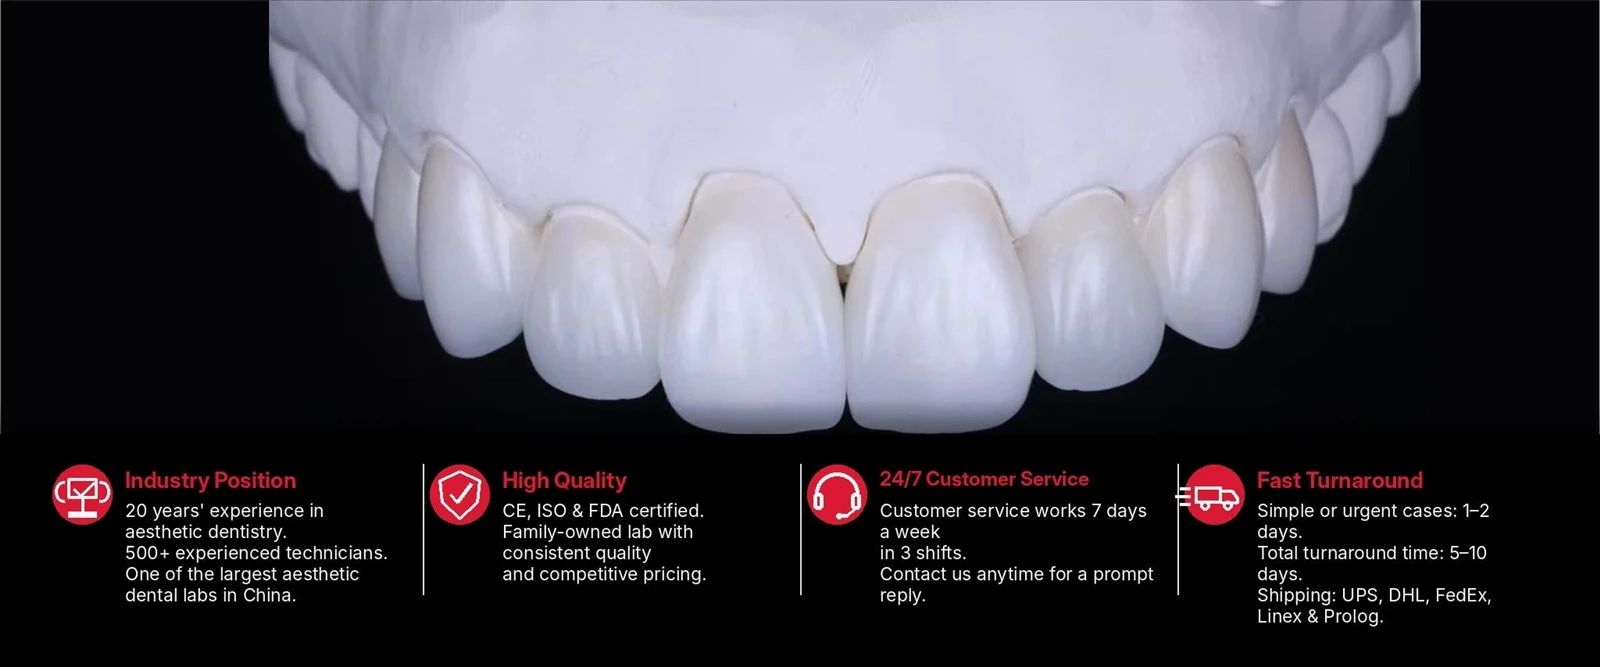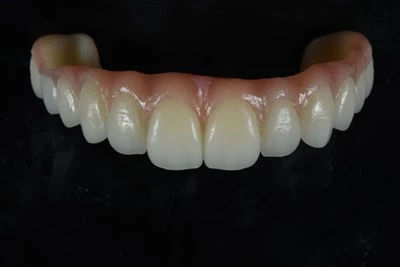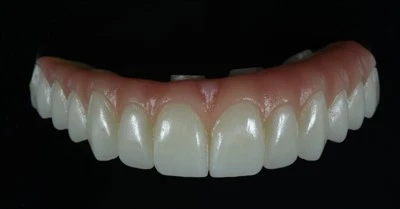
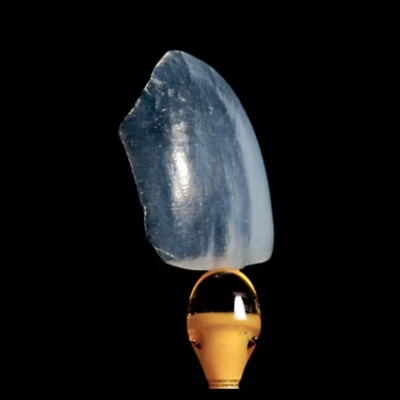


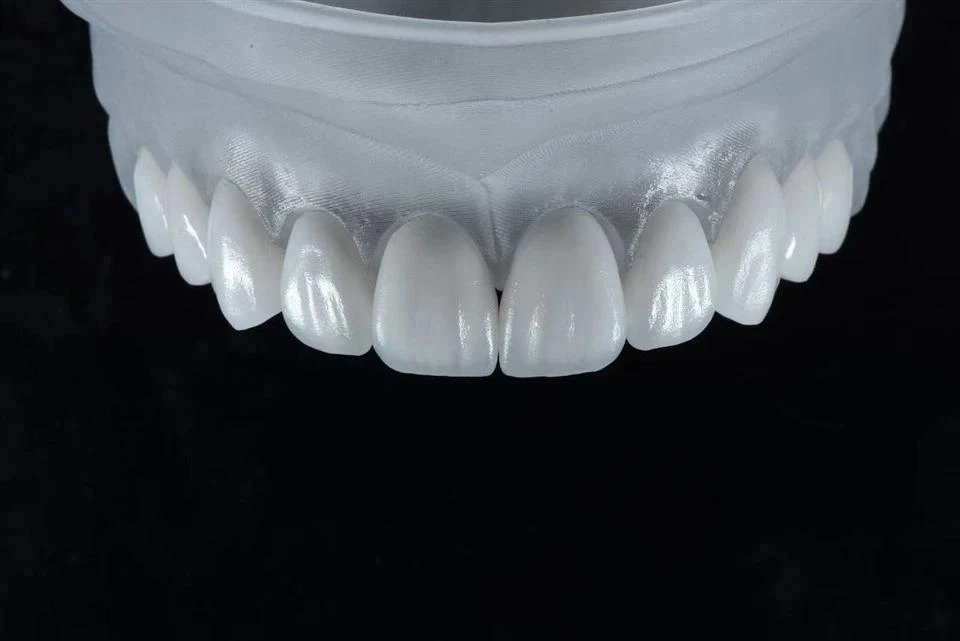
A natural tooth is never optically flat. Look closely at an unrestored central incisor under good lighting and you will see a landscape of subtle ridges, perikymata grooves, mamelons, and a surface sheen that changes with the angle of light. Reproducing that landscape-not just matching the shade-is what helps a veneer disappear naturally into the smile.
Two variables play an especially important role in this process: veneer surface texture and glaze. Together, they influence how light reflects from, scatters across, and passes through ceramic dental veneers. That optical behavior can determine whether the restoration appears natural and integrated or overly smooth, bright, and artificial.
This article explains how macro-texture, micro-texture, and veneer glaze interact to influence veneer esthetics, with practical considerations for CAD/CAM design, ceramic materials, surface characterization, and laboratory craftsmanship.
Why Surface Texture and Glaze Matter for Veneer Esthetics
Shade is only one part of the esthetic equation. A veneer can be matched closely to a shade tab and still look artificial when its surface optics are incorrect.
The human eye does not perceive color in isolation. It perceives color together with the way light interacts with the surface. When light reaches natural enamel, part is reflected from the surface as specular and diffuse reflection, while part enters the tooth and scatters within the enamel and dentin before exiting again. This combination contributes to the depth, translucency, and vitality associated with natural teeth.
A ceramic veneer must recreate a similar optical effect.
Veneer surface texture primarily influences the external reflection pattern. A very smooth surface tends to create stronger, more concentrated specular highlights, while a textured surface distributes reflected light more broadly.
Veneer glaze influences the final surface sheen and may also subtly affect perceived color, value, and translucency depending on its thickness and optical properties.
Natural-looking veneers therefore depend on more than shade matching. They require a coordinated relationship between:
- shade
- translucency
- morphology
- surface texture
- incisal characterization
- gloss
- glaze
The goal is not simply to maximize gloss. It is to create a controlled reflection pattern that resembles the patient's natural dentition.
|
Optical Parameter |
Controlled Primarily By |
Visible Effect |
|
Specular reflection |
Micro-texture + glaze/polish |
High-gloss versus softer surface reflection |
|
Diffuse reflection |
Macro-texture + micro-texture |
Softness and naturalness of reflected light |
|
Translucency and depth |
Material + glaze thickness |
Vitality versus flat appearance |
|
Value |
Glaze shade + surface gloss |
Perceived brightness |
|
Perceived color saturation |
Surface scatter + glaze tint |
Depth and cleanliness of hue |
How Macro-Texture Shapes Veneer Light Reflection
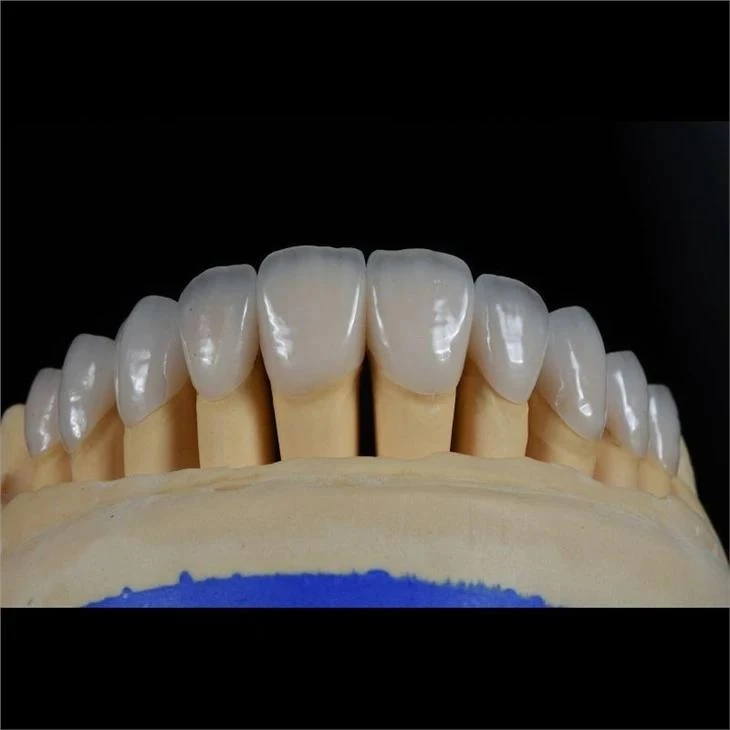
Macro-texture refers to the larger surface contours that reproduce the anatomical form of a natural tooth. These include developmental lobes, cervical convexity, marginal ridge contours, incisal features, and the overall facial curvature that determines how light moves across the restoration.
Why Macro-Texture Changes the Reflection Pattern
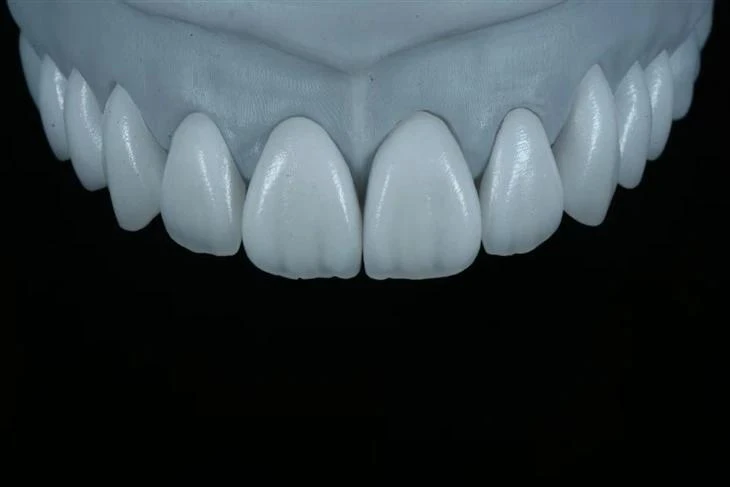
The facial surface of a natural incisor is not a single flat plane. It typically includes developmental lobes separated by shallow depressions.
Light striking these contours is reflected in several directions rather than returning as one broad, uniform highlight. This creates a more complex reflection pattern that the eye often interprets as natural.
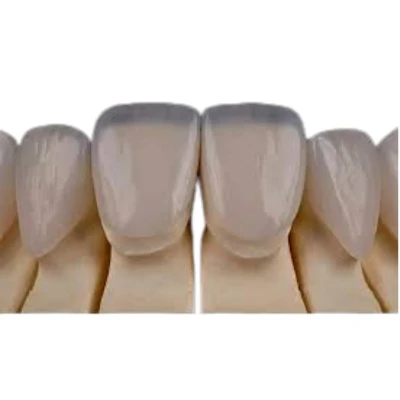
When a veneer is designed with an overly flat or uniformly convex facial surface, light may form a continuous highlight band. The result can appear excessively bright or artificial even when the shade is accurate.
Proper lobe separation, subtle depressions, line angles, and facial convexity help break up this reflection and produce a more natural appearance.
CAD/CAM Considerations for Veneer Macro-Texture
In a digital workflow, macro-texture is established largely during CAD design. Important considerations include:
- Lobe characterization: Three developmental lobes can be incorporated with subtle inter-lobe depressions instead of creating an excessively uniform facial surface.
- Cervical convexity: The cervical, middle, and incisal thirds require controlled transitions so that light does not reflect identically across the entire facial surface.
- Reflection zones: The design should create natural mesial, central, and distal light-reflection areas rather than one uninterrupted highlight.
- Incisal characterization: Mamelon form, incisal contour, and translucency should be coordinated with the contralateral and adjacent teeth.
CAD/CAM provides a precise and repeatable foundation for these contours, particularly in multi-unit veneer cases. However, digital precision does not automatically create natural esthetics. Default tooth libraries can appear overly symmetrical or idealized unless the technician customizes the design.
This is especially relevant in an advanced digital dental laboratory workflow: digital precision establishes the basic morphology, while experienced technicians refine the individual surface character that makes the restoration less uniform and more natural.
How Micro-Texture Controls Veneer Gloss
If macro-texture is the landscape, micro-texture is the surface skin.
Micro-texture refers to the fine irregularities that influence whether a ceramic veneer appears glossy, satin-like, or matte. On natural enamel, these details include perikymata, subtle striations, and microscopic surface irregularities.
Micro-Texture and Gloss Perception
Gloss is strongly influenced by surface roughness at the microscopic level.
A very smooth surface produces greater specular reflection. Light is reflected in a more concentrated direction, creating a strong and sometimes mirror-like highlight.
Natural enamel is not perfectly smooth. Its micro-irregularities scatter part of the reflected light, creating a combination of specular and diffuse reflection.
The balance matters:
- too much specular reflection can make a veneer appear glassy;
- too much diffuse reflection can make it look dull or lifeless;
- controlled micro-texture creates a more natural sheen.
|
Surface Finish |
Approximate Roughness (Ra) |
Light Behavior |
Clinical Perception |
|
Over-glazed / high-gloss polish |
Very low (<0.2 μm) |
High specular, low diffuse |
Very glossy or potentially artificial |
|
Natural glaze |
Low (0.2–0.5 μm) |
Balanced specular + diffuse |
Natural sheen |
|
Mechanical polish only |
Moderate (0.3–0.7 μm) |
Higher diffuse, lower specular |
Satin or slightly dull |
|
Untreated / as-milled |
High (>0.7 μm) |
Mostly diffuse, low specular |
Matte or chalky |
Reproducing Perikymata and Natural Surface Striations
For highly esthetic anterior cases, porcelain veneer surface texture involves more than achieving a specific gloss level.
Experienced technicians can reproduce subtle perikymata and directional striations through controlled surface characterization. These details should remain subtle because the goal is not to make the texture visually obvious. It is to change the way light interacts with the restoration.
Surface texture should also be age-appropriate.
Younger natural teeth may display more visible perikymata and stronger surface characterization, while older teeth often appear smoother because of long-term enamel wear.
A veneer for a younger patient therefore may benefit from more visible micro-characterization, whereas a veneer intended to blend with mature adjacent dentition may require a smoother ceramic surface finish.
Matching the wear pattern and texture of the neighboring teeth can be just as important as matching their shade.
How Glaze Changes Veneer Surface Esthetics
Glaze is the thin glassy surface layer created during the final characterization and firing process. It contributes to the final optical appearance of a ceramic veneer and helps establish a smooth, finished surface.
For veneer esthetics, glaze is important because it affects:
- surface gloss
- reflected light
- perceived value
- subtle shade characterization
- preservation or masking of underlying texture
For a broader look at how staining and glazing dental ceramics affect the final appearance of restorations, these finishing steps should be considered as part of the complete esthetic workflow rather than isolated procedures.
How Glaze Thickness Affects Appearance
Glaze thickness is an important variable.
A glaze layer that is too thin may leave areas of inconsistent surface sheen. A glaze layer that is too thick can produce an overly uniform glassy surface and partially mask the underlying macro- and micro-texture.
The ideal approach is generally to preserve the intentional surface characterization while creating a consistent final sheen.
In practical terms:
- Thin, even glaze of approximately 15–25 μm: Helps preserve underlying texture while establishing a natural surface sheen.
- Thicker glaze above approximately 50 μm: May fill surface detail and create stronger, more uniform gloss.
- Uneven glaze pooling: Can produce irregular shiny and dull areas across the same restoration.
A useful principle is that glaze should preserve intentional surface texture rather than erase it.
This is why surface texture and glaze should not be treated as unrelated finishing steps. They are part of the same optical design.
How Glaze Firing Shapes the Ceramic Surface
During glaze firing, the glaze material melts and flows over the ceramic surface, filling microscopic irregularities and forming a continuous glassy layer.
Firing variables such as:
- temperature
- heating rate
- hold time
- vacuum
- ceramic system
- can influence the final veneer surface finish.
Vacuum firing is commonly used in ceramic processing because it can help reduce porosity and bubble formation within the fired ceramic or glaze layer.
Temperature and hold time must be matched to the ceramic system being used. Lithium disilicate ceramics may use glaze firing temperatures around 700–740°C, while feldspathic systems may require different parameters depending on the manufacturer's formulation.
Over-firing can allow glaze to flow excessively and soften previously created surface details. Under-firing may leave the surface insufficiently matured and more matte or rough.
Repeated firing cycles can also influence the optical behavior of a ceramic restoration. For that reason, careful planning of staining, characterization, and glaze firing can help limit unnecessary thermal cycles.
Glaze Shade and Color Depth
Glaze can also carry subtle color.
Tinted stains or glaze materials may be used to:
- increase cervical warmth
- adjust chroma
- emphasize incisal effects
- make small final shade corrections
However, surface color modification has limits.
Because external stain is located near the ceramic surface, excessive use can make characterization appear painted onto the restoration instead of developing naturally from within it.
For substantial shade changes, adjusting the underlying ceramic body, translucency, or internal characterization is generally more effective than relying heavily on surface stain.
Natural veneer esthetics therefore depend on coordinating shade transition, internal optical depth, surface texture, and glaze, rather than attempting to solve every esthetic issue during the final glazing stage.
Glazing vs. Polishing for Veneer Surface Finishing
Whether a ceramic restoration should be glazed, mechanically polished, or finished using a combination of both remains an important consideration in veneer fabrication.
Both approaches can produce a smooth ceramic surface, but they influence the final optical appearance differently.
Advantages of Glazing
Glazing can provide:
- a relatively uniform surface sheen
- repeatable gloss across multiple units
- subtle external shade adjustment
- a smooth final ceramic surface
Its primary limitation is that excessive glaze can soften or mask carefully created surface characterization.
Glazing also requires another firing cycle, meaning the laboratory must control the corresponding thermal variables.
Advantages of Mechanical Polishing
Mechanical polishing uses ceramic polishing instruments and pastes rather than an additional glaze layer.
Potential advantages include:
- no additional firing cycle
- preservation of existing surface characterization
- direct adjustment of local gloss
- creation of differential sheen across different areas of the veneer
A technician can, for example, selectively alter gloss in different zones instead of making the entire facial surface uniformly reflective.
The challenge is maintaining a consistently smooth and esthetically balanced surface.
Combining Glaze and Selective Polishing
For some esthetic veneer cases, a hybrid finishing approach can combine the benefits of both techniques:
- Apply characterization stains and a controlled glaze layer.
- Fire according to the ceramic manufacturer's recommended protocol.
- Evaluate the surface reflection and preserved texture.
- Selectively polish specific areas when differential gloss is required.
This approach allows the underlying characterization to remain visible while giving the technician additional control over the final reflection pattern.
At ADS Dental Laboratory, glazing, surface texture, staining, contouring, shade matching, and veneer layering are among the stages in which experienced dental technicians continue to perform detailed manual work rather than relying entirely on automated production. This reflects a broader production principle: digital precision provides the foundation, while experienced dental craftsmanship controls the final esthetic details.
How Ceramic Material Affects Texture and Glaze
The ceramic material itself influences how veneer surface texture, glaze, translucency, and characterization interact.
Different ceramics have different crystalline structures, glass content, optical properties, and processing requirements. When material selection is still being considered, understanding the differences between Feldspathic and E.max veneers can help clarify how strength, translucency, layering potential, and finishing behavior affect the case.
Lithium Disilicate Veneers
Lithium disilicate glass-ceramic is widely used for veneer fabrication because it provides a combination of strength and translucency.
Typical flexural strength for pressed lithium disilicate is approximately 360–400 MPa.
From the perspective of ceramic veneer surface finishing:
- its glass-containing matrix responds well to glazing;
- external stains and glaze can be used for characterization;
- selected techniques also allow additional ceramic layering;
- micro-texture can be refined with appropriate diamond instruments and polishing systems;
- its inherent translucency provides subsurface optical depth beneath the surface characterization.
For CAD/CAM lithium disilicate veneers, a common workflow may include milling, crystallization, characterization, staining, and final glazing according to the ceramic system being used.
ADS works with E.max veneers and other lithium disilicate esthetic restorations, while material selection for individual cases depends on the doctor's prescription, esthetic requirements, functional needs, shade requirements, and other case-specific considerations.
For cases requiring additional ceramic characterization beyond a more monolithic approach, hand-layered E.max veneers provide another option for creating individualized optical depth and surface esthetics.
Feldspathic Porcelain Veneers
Feldspathic porcelain veneers remain an important option for highly individualized veneer esthetics.
Their high glass content and layering capability allow skilled ceramists to create internal optical effects such as:
- dentin body variation
- enamel translucency
- mamelon effects
- incisal characterization
- subtle shade transitions
- From a surface texture perspective:
- hand layering allows substantial control over internal optical depth;
- micro-texture can be incorporated and refined before final finishing;
- glaze can provide an enamel-like surface sheen when applied carefully;
- intentional texture should be preserved through the final firing and finishing stages.
Feldspathic porcelain generally has lower flexural strength-approximately 60–100 MPa-than lithium disilicate, making case selection, preparation design, bonding conditions, and functional loading especially important.
Lithium Disilicate vs. Feldspathic Porcelain
|
Property |
Lithium Disilicate |
Feldspathic Porcelain |
|
Flexural strength |
~360–400 MPa |
~60–100 MPa |
|
Translucency |
High |
Very high |
|
Glaze integration |
Excellent |
Excellent |
|
Internal layering |
Available depending on technique |
Extensive layering capability |
|
Micro-texture response |
Very good |
Excellent |
|
CAD/CAM compatibility |
Widely available |
Commonly associated with hand-layered techniques |
|
Typical application |
Conservative esthetic restorations |
Highly individualized layered esthetic cases |
Material type and restoration thickness both influence final color and translucency, particularly in thin ceramic restorations such as veneers.
This is why veneer glaze and surface texture should never be evaluated completely in isolation. They are part of a broader system involving:
material + thickness + stump shade + translucency + internal characterization + surface texture + final gloss.
How Dental Technicians Control Veneer Texture and Glaze
Technical knowledge only becomes clinically meaningful when it is translated into consistent laboratory execution.
At the bench, the difference between a technically acceptable veneer and a highly individualized one often depends on the technician's ability to interpret:
- morphology
- light reflection
- ceramic translucency
- surface texture
- shade transition
- incisal characterization
- gloss
ADS has developed a dedicated Veneer Aesthetic Center and a specialized esthetic production team. The laboratory's veneer work includes feldspathic veneers, IPS e.max veneers, ultra-thin veneers, no-prep and minimal-prep veneers, hand-layered veneers, and customized esthetic veneers.
The company currently has close to 200 professionals involved in veneer-related production. This scale makes another issue especially important: high-end veneer esthetics must be not only artistic but also repeatable.
For dental lab outsourcing, the question is not simply whether one veneer can be made beautifully. Long-term partners also need consistency in morphology, surface characterization, gloss, shade interpretation, and production standards across continuing cases.
A Typical Veneer Characterization Workflow
A detailed esthetic veneer workflow may include the following stages:
- Design review: The CAD design is checked for facial contour, lobe separation, cervical convexity, line angles, and reflection-zone distribution.
- Milling, pressing, or layering: The restoration is fabricated according to the selected ceramic system and production technique.
- Crystallization or ceramic firing: Material-specific thermal processing establishes the ceramic structure or layered body.
- Shade and optical characterization: Stains, ceramic effects, translucency, cervical chroma, and incisal characteristics are refined according to the case requirements.
- Macro- and micro-texture refinement: Surface anatomy, developmental features, and age-appropriate texture are carefully adjusted.
- Glaze application: Glaze is applied in a controlled layer so that it does not unnecessarily mask surface detail.
- Glaze firing: The ceramic is fired according to the applicable material protocol.
- Post-glaze evaluation and selective polishing: Reflection, gloss, and texture are evaluated and adjusted where necessary.
- Final quality control: The finished veneer is checked for shade, esthetics, surface texture, margins, contacts, and other relevant quality parameters.
At ADS, digital case processing, CAD/CAM design, scanning, milling, and related manufacturing technologies are combined with manual esthetic stages such as ceramic layering, staining, glazing, surface texturing, shade matching, and contouring.
This combination helps maintain an important distinction:
Digital manufacturing can improve precision and repeatability, but the micro-esthetics of a veneer still depend heavily on experienced human judgment.
Evaluating Veneer Esthetics Under Different Lighting Conditions
Surface texture and glaze do not appear identical under every light source.
A veneer that appears appropriately glossy under a strong laboratory light may reflect differently under daylight, clinical lighting, or warmer ambient conditions.
Useful evaluation environments may include:
- daylight or daylight-simulating illumination
- typical clinical operatory lighting
- warmer ambient lighting
Looking at the restoration under more than one lighting condition can reveal whether the glaze is excessively reflective, whether texture has been flattened, or whether the restoration loses vitality under certain illumination.
The objective is not to make the veneer look identical under every light source. It is to maintain believable optical behavior across the environments in which the patient will actually be seen.
Common Veneer Surface Texture and Glaze Problems
Even when high-quality ceramic materials are used, several surface-finishing problems can reduce veneer esthetics.
|
Problem |
Possible Cause |
Practical Correction |
|
Glassy or artificial appearance |
Excessive glaze or mechanical gloss |
Reduce uniform gloss and preserve more natural surface characterization |
|
Dull, lifeless surface |
Insufficient final surface finish |
Re-evaluate glazing or polishing protocol |
|
Inconsistent gloss |
Uneven glaze application or localized pooling |
Improve glaze uniformity and firing control |
|
Texture disappears after glazing |
Glaze layer masks micro-texture |
Reduce glaze thickness and refine finishing sequence |
|
Shade changes after repeated firing |
Excessive thermal cycling |
Plan characterization carefully and minimize unnecessary firing |
|
Veneer does not blend with adjacent teeth |
Texture or gloss differs from natural enamel |
Match the neighboring teeth's morphology, wear pattern, texture, and gloss |
One of the most common mistakes is evaluating texture and gloss only after fabrication is nearly complete.
For complex anterior cases, these factors should be considered earlier as part of the esthetic prescription.
The clinician and laboratory can communicate not only:
- shade
- stump shade
- material
but also:
- desired surface character
- age-related texture
- incisal characterization
- gloss preference
- morphology
- special esthetic instructions
For clinicians who want to improve this part of the prescription, understanding how to communicate shade and characterization to a dental lab can help reduce ambiguity between the clinical and laboratory teams.
At ADS, standardized case prescriptions can include shade, stump shade, gingival/body/incisal characterization, staining, morphology-related requirements, and other special instructions. This helps make surface characterization part of the overall esthetic plan rather than an afterthought at the glazing stage.
Conclusion
Surface texture and glaze are not simply cosmetic finishing details. They directly influence how a veneer interacts with light and therefore how naturally the restoration integrates into the smile.
Macro-texture shapes the larger reflection pattern. Micro-texture determines the balance between specular and diffuse light. Glaze establishes the final surface sheen and can either preserve or obscure the characterization beneath it. Material choice, ceramic thickness, translucency, morphology, shade, and technician finishing all interact with these factors.
The most natural-looking veneers therefore do not come from maximizing gloss or matching a shade tab alone. They come from controlling how light interacts with the entire restoration.
For clinicians and dental laboratories, surface texture and gloss should be considered part of the esthetic prescription rather than left entirely to the final finishing stage. In long-term dental lab outsourcing, maintaining this esthetic language consistently from case to case is just as important as producing one successful restoration.
ADS Dental Laboratory Ltd is a full-service digital dental laboratory in Shenzhen, China, with a dedicated Veneer Aesthetic Center and extensive experience producing customized esthetic veneers for overseas dentists and dental laboratories. If you would like to discuss veneer materials, surface characterization, digital workflows, or a specific esthetic case, contact our team to review your requirements.
FAQ
What surface texture looks most natural on porcelain veneers?
There is no single surface texture that is ideal for every patient. Natural-looking veneers generally reproduce the morphology, wear pattern, and micro-texture of the adjacent teeth. Younger teeth may show more obvious perikymata and surface characterization, while older teeth often have smoother surfaces because of enamel wear.
Can too much glaze make veneers look artificial?
Yes. Excessive glaze can create a very uniform, highly specular surface and may partially fill or mask fine surface texture. A natural veneer glaze should create an appropriate sheen while preserving the underlying morphology and micro-characterization.
Is polishing better than glazing for ceramic veneers?
Neither technique is universally better. Glazing can provide a uniform finished surface and allow subtle external color adjustments, while mechanical polishing gives the technician direct control over localized gloss. Some veneer cases benefit from combining a controlled glaze with selective polishing.
Does the ceramic material affect veneer surface texture and glaze?
Yes. Lithium disilicate and feldspathic porcelain differ in composition, strength, translucency, layering possibilities, and finishing behavior. Material selection influences how internal characterization, surface texture, glaze, and polishing contribute to the final veneer esthetics.
What information should a dentist send to the dental laboratory for an esthetic veneer case?
Shade is only part of the prescription. For highly esthetic cases, it can also be helpful to communicate stump shade, translucency expectations, incisal characterization, desired morphology, surface texture, age-related wear characteristics, and preferred gloss level. Clear esthetic instructions help the laboratory coordinate the veneer surface finish with the adjacent natural dentition.
References
Wang Q. Influence of material type and thickness on the esthetic properties of all-ceramic restorations. Chinese Journal of Tissue Engineering Research. 2026.