


Meta Description:
Learn the common causes of veneer remakes, from shade and fit issues to preparation, scans, and occlusion, plus practical ways to prevent them.
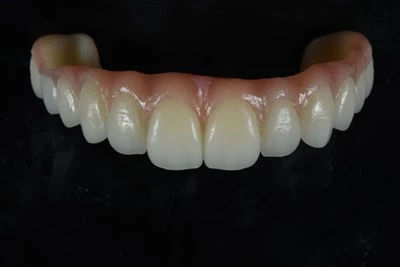
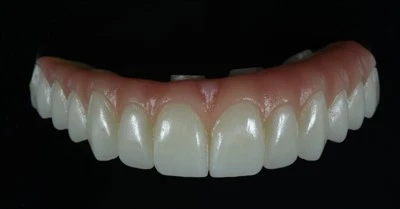
A veneer remake is the refabrication or replacement of a veneer because the original restoration cannot be accepted or maintained as intended. It does not always mean the veneer fractured. A restoration may be structurally intact but still require a remake because of poor fit, incorrect contours, shade mismatch, occlusal interference, or other clinical and esthetic problems.
Reducing avoidable veneer remakes therefore requires control across the entire workflow-from preparation and case records to laboratory fabrication, try-in, bonding, and long-term patient care.

What Counts as a Veneer Remake-and Why Does It Happen?
Veneer remakes occur at different stages.
Some are identified before final bonding. A veneer may not seat completely, the shade may be unacceptable, the proximal contacts may be incorrect, or the tooth proportions may not match the planned smile design. In these situations, the restoration may need adjustment or complete refabrication even though the ceramic itself has not failed.
Other veneers require replacement after cementation because of debonding, fracture, chipping, recurrent caries, discoloration, or functional problems.
Long-term replacement is another category. The veneer, supporting tooth, gingival tissues, occlusion, or adjacent dentition can change over years of service.
Clinical evidence reflects this range of failure modes. In one retrospective study of 194 replaced indirect veneers, documented problems included dimensional errors, discoloration, chipping, fracture, debonding, shade mismatch, and recurrent caries.
The practical point is simple: veneer failure and veneer fracture are not synonymous. Remakes can originate from clinical procedures, case communication, laboratory processes, material selection, or patient-related factors. The same principle applies more broadly when trying to reduce remakes in dental restorations: prevention depends on identifying where errors enter the workflow rather than focusing only on the final restoration.
Incorrect Veneer Size, Shape, Contours, and Contacts
Incorrect dimensions are an important but sometimes underestimated reason for veneer replacement.
In the study of 194 replaced indirect veneers, dimensional errors in veneer size and/or shape were the most frequent cause of replacement, reported in 58.2% of the studied replacement cases. This does not mean that 58.2% of all veneers fail for this reason; it describes the distribution within this specific group of replaced restorations.
Dimensional problems can involve contour, proximal contact, marginal adaptation, or anatomical form. Clinically, this may present as a veneer that looks too wide or narrow, appears overcontoured, creates an incorrect contact, or simply does not integrate with the adjacent dentition.
Several stages can contribute. The diagnostic design may not accurately represent the intended result. The laboratory may receive incomplete information about tooth proportions or incisal position. An inaccurate impression or scan can also alter the working data used to design the restoration.
For demanding anterior cases, prevention should start before ceramic fabrication. Diagnostic records, reference photographs, approved wax-ups or digital designs when appropriate, and clear instructions about length, morphology, contacts, and surface characteristics give the technician a defined target.
The laboratory then needs to verify contours, contacts, margins, and overall morphology before the case leaves production. A veneer can be technically intact and still be a remake if its form is clinically unacceptable.
Shade and Color Mismatch
Veneer shade mismatch occurs when the final restoration does not integrate with the intended tooth color or adjacent dentition. It may appear too high or low in value, too opaque, too translucent, too grey, or otherwise visually inconsistent.
Shade communication is more complex than writing "A1" or "A2" on a laboratory prescription.
The final appearance can be influenced by the prepared tooth or stump shade, ceramic thickness, ceramic translucency or opacity, the target shade, adjacent teeth, incisal characterization, and the luting material. Clinical photography and lighting conditions also affect the information the laboratory receives.
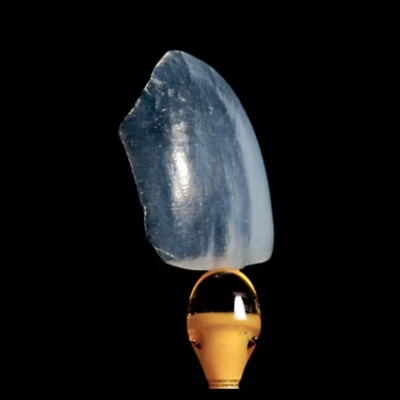
This is especially important with translucent ceramic restorations because the underlying substrate can contribute to the final optical result. A structured protocol for communicating veneer shade to the dental lab can help ensure that the technician receives more than a basic shade designation.
A stronger shade communication protocol may include:
- Desired final shade and prepared stump shade
- Photographs with appropriate shade tabs visible
- Clear photographs of adjacent teeth
- Translucency or opacity requirements
- Cervical, body, and incisal characterization
- Surface texture and other individual esthetic features
- Digital shade data when available
Research on replaced veneers also identifies discoloration and shade mismatch among documented reasons for replacement.
For a simple posterior restoration, limited shade information may sometimes be sufficient. For a high-esthetic anterior veneer case, "veneer, A2" is rarely a complete laboratory instruction.
Poor Marginal Fit, Preparation, and Impression or Scan Errors
A veneer is fabricated from the clinical information available to the laboratory. If the preparation, margin, impression, or digital scan is compromised, even precise laboratory manufacturing cannot reliably reconstruct information that was never captured.
These factors should therefore be considered as a connected workflow rather than isolated errors.
Poor or Unclear Margins
A marginal discrepancy is a mismatch between the restoration margin and the prepared finish line of the tooth. It may present as an open margin, overextension, incomplete seating, or an area that requires excessive adjustment.
The laboratory must first be able to identify the margin.
Soft tissue, moisture, incomplete retraction, an unclear preparation boundary, or missing scan/impression data can make the finish line difficult to interpret. Guessing the intended margin introduces avoidable uncertainty into the restoration.
The priority is not simply choosing one margin design for every case. The finish line needs to be appropriate for the clinical situation, clearly defined, and accurately captured.
Inadequate Tooth Preparation
Preparation determines the restorative space available to the technician.
Insufficient or uneven reduction may leave too little space to achieve the desired contour, thickness, translucency, and shade. The resulting restoration may appear bulky or overcontoured. Excessive reduction can create a different set of clinical and bonding considerations.
Preparation also needs to correspond with the planned restoration. An ultra-thin veneer, a conventional ceramic veneer, and a case requiring significant masking do not necessarily have identical space or design requirements.
For this reason, preparation should be evaluated in relation to the planned material, final tooth position, substrate color, esthetic objective, and available enamel-not according to a single reduction number applied to every case. For a more detailed clinical discussion, see this guide on how to prepare teeth for veneers.
Inaccurate Impressions or Digital Scans
Conventional impressions can contain tears, pulls, voids, or distortion. Digital impressions remove several conventional impression steps, but they introduce their own potential problems.
A digital scan may contain missing data around the gingival margin, incomplete interproximal information, soft-tissue interference, or stitching errors. A digital workflow is only as reliable as the data captured.
Before submitting a case, the clinician should review the digital model from multiple angles and verify that the preparation, margins, adjacent teeth, and other required anatomy are complete. Understanding what dental labs need from an intraoral scan can help clinicians identify missing or ambiguous data before the patient leaves. Ambiguous areas are easier to rescan while the patient is still present than to resolve after fabrication begins.
Digital does not automatically mean accurate. Good digital dentistry still depends on complete clinical data.

Occlusion, Fracture, Debonding, and Patient-Related Factors
Some veneer remakes are primarily esthetic or dimensional. Others result from mechanical, bonding, biological, or patient-related factors.
Understanding the difference matters because the prevention strategy changes with the cause.
Occlusal Interference and Excessive Functional Load
Occlusal interference occurs when a restoration creates an undesirable contact during closure or functional mandibular movement.
For the laboratory, accurate opposing-arch and bite information is essential. A well-designed veneer produced against an inaccurate interocclusal relationship may still create a clinical problem.
This becomes particularly important in multi-unit anterior cases where incisal position and functional movements need careful consideration. The laboratory should receive the opposing arch and appropriate bite records rather than designing the case from the prepared arch alone.
At try-in, the clinician can evaluate contacts and function before definitive bonding. Occlusion is therefore both a case-record issue and a clinical verification step.
Fracture, Chipping, and Debonding
Fracture refers to structural breakage severe enough to compromise the restoration, while chipping involves localized loss of ceramic. Debonding occurs when the veneer loses adhesion to the supporting tooth.
These complications may be influenced by different combinations of restoration design, material properties, bonding conditions, preparation, ceramic thickness, functional load, and trauma.
The retrospective veneer study documented chipping, fracture, and debonding among the failure modes requiring replacement and also found different patterns among the materials represented in its replacement sample.
Prevention therefore cannot be reduced to simply choosing the "strongest" ceramic. The complete case-preparation, bonding substrate, material, design, functional environment, and cementation protocol-needs to work as a system.
Bruxism, Trauma, Caries, and Long-Term Changes
Not every replacement is caused by something that went wrong during fabrication.
Bruxism and other parafunctional habits can subject veneers to repeated functional stress. Accidental trauma and habits such as biting hard objects or using teeth as tools can also cause damage. When clinically indicated, protective appliances such as night guards for teeth may form part of the long-term management strategy for patients with bruxism or related parafunctional activity.
The supporting tooth can change as well. Recurrent caries may compromise the tooth-restoration complex even when the ceramic itself was initially satisfactory. Over longer periods, gingival position, contacts, occlusion, surrounding teeth, and esthetic expectations may also change.
Sometimes the veneer is not the primary reason for replacement-the clinical environment around it has changed.
Incomplete Dentist–Lab Communication and Material Selection
The dental laboratory cannot directly see the patient unless a separate clinical or shade consultation has been arranged. In most outsourced veneer cases, technicians make decisions from the records sent by the dentist.
Missing information therefore creates assumptions.
Incomplete or Ambiguous Lab Prescriptions
A detailed veneer prescription should provide the information needed to translate the treatment plan into a physical restoration.
Depending on the case, this can include:
- Restoration and material requirements
- Desired final shade and stump shade
- Translucency or opacity
- Incisal position and length
- Tooth shape and morphology
- Surface texture
- Mamelons, incisal halo, or other characterization
- Proximal contact requirements
- Occlusal information
- Reference photographs and special instructions
A prescription containing only "veneer, A2" leaves many of these decisions undefined. Material, translucency, incisal characteristics, and surface texture cannot reliably be inferred from a basic shade designation alone.
When information is unclear, communication before fabrication is far more efficient than discovering the discrepancy at try-in.
Material Selection Should Follow the Case
Feldspathic porcelain veneers, lithium disilicate restorations such as E.max veneers, and other ceramic systems have different optical, mechanical, fabrication, and bonding considerations.
There is no single veneer material that is automatically the best option for every patient.
Material selection should consider the preparation design, restorative space, substrate color, desired optical effect, functional load, bonding conditions, restoration design, and the manufacturer's indications. Dentists who need a closer comparison of these two commonly used options can also review the clinical and laboratory considerations for Feldspathic vs. E.max veneers.
Clinical data also need careful interpretation. For example, one replacement study found that lithium disilicate represented the largest proportion of replaced veneers in its sample, while porcelain and zirconia restorations showed different complication patterns. That does not establish an overall failure ranking because the original number of veneers placed in each material group was not the same information being measured.
Choose the material for the case rather than relying on habit or one mechanical property.
A Step-by-Step Workflow to Prevent Avoidable Veneer Remakes
Many remake risks can be identified before a restoration reaches the final bonding appointment. The most effective approach is a repeatable workflow with checkpoints at the clinic and laboratory.
Before Sending the Case to the Lab
Before submission, verify the clinical information that will determine the restoration:
- Preparation and margins are clearly recorded.
- Impression or scan data are complete.
- Opposing arch and required bite information are included.
- Final shade and stump shade are documented.
- Appropriate clinical photographs are supplied.
- Material and esthetic requirements are defined.
- Incisal position, morphology, contacts, and special characterization are communicated when relevant.
The objective is to remove avoidable ambiguity before the technician starts designing or fabricating the veneer.
During Laboratory Fabrication
The laboratory should not simply manufacture whatever enters the production queue.
Questionable preparations, unclear margins, conflicting shade information, missing bite records, or ambiguous prescriptions should be flagged before proceeding. For complex anterior cases, digital design review or additional communication may be appropriate before final ceramic fabrication.
Quality control should focus on the features that commonly lead to clinical rejection: margins, contacts, contour, morphology, shade, esthetics, and occlusal relationships.
At ADS Dental Laboratory Ltd, the digital workflow can include digital case receiving, STL and intraoral scan processing, CAD/CAM production, digital case tracking, and staged quality-control procedures. Veneer and ceramic cases also undergo technician-controlled processes for shade, contour, texture, margins, contacts, and occlusal evaluation.
Digital technology improves control and traceability, but experienced technical judgment remains essential.
At Try-In Before Final Bonding
Try-in is the final opportunity to identify a correctable problem before it becomes significantly more difficult to resolve.
The clinician should verify:
- Complete seating and marginal fit
- Proximal contacts
- Shade and optical integration
- Tooth length, contour, and morphology
- Overall esthetic result
- Occlusion where applicable
Shade should be assessed under appropriate conditions and with the intended try-in protocol when required. If the fit, shade, or esthetics remain uncertain, that uncertainty should be resolved before definitive bonding.
Catching a problem at try-in is preferable to discovering it after definitive cementation.

How Dentist–Lab Collaboration Helps Reduce Veneer Remakes
Individual case accuracy matters, but consistency across many cases depends on the relationship between the dental practice and laboratory.
A laboratory that repeatedly works with the same dentist can become familiar with preparation preferences, desired tooth morphology, contact preferences, surface texture, shade expectations, and case communication style. The dentist, in turn, learns what records the laboratory needs to reproduce those preferences consistently.
Remakes should also create feedback.
Instead of treating every remake as an isolated replacement order, the clinic and laboratory can record the root cause: shade-related, fit-related, contact-related, scan-related, occlusion-related, prescription-related, fracture-related, or another documented reason. Repeated patterns can then be used to improve the workflow. This feedback loop is especially useful in long-term dental lab outsourcing relationships.
For laboratory-controlled stages, systematic QC adds another checkpoint. ADS Dental Laboratory uses production tracking and quality-control procedures covering areas such as margins, contacts, occlusion, shade, esthetics, and final inspection.
The objective is not to claim that every veneer remake can be eliminated. It is to identify avoidable remake risks early enough to act on them.
Reducing Veneer Remakes Starts With Controlling the Entire Workflow
Veneer remakes have no single cause. Incorrect size and shape, shade mismatch, poor marginal fit, inadequate preparation, incomplete impressions or scans, unclear prescriptions, occlusal problems, fracture, debonding, material selection, and long-term patient factors can all contribute.
Prevention therefore starts long before final ceramic fabrication. Accurate clinical records, clear dentist–lab communication, case-specific material selection, controlled laboratory production, systematic QC, careful try-in, and feedback after problems occur all help reduce avoidable remakes.
ADS Dental Laboratory Ltd provides custom aesthetic dental veneers and long-term dental lab outsourcing for overseas dentists, clinics, and dental laboratories, including feldspathic, IPS e.max, ultra-thin, minimal-prep, no-prep, and customized veneer solutions. If you have a veneer case that requires material, shade, digital file, or technical coordination before fabrication, contact the ADS team to discuss the case requirements.