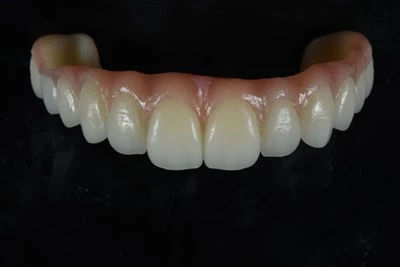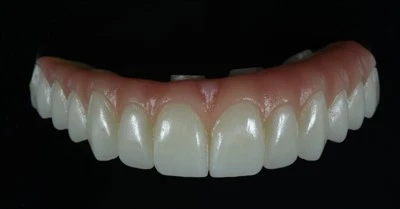
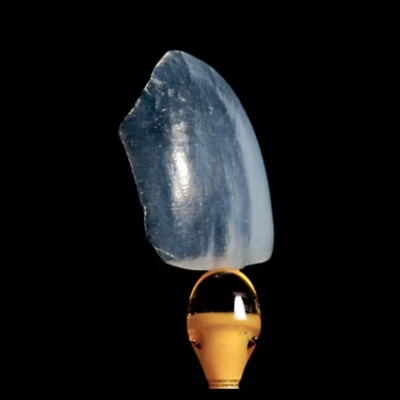
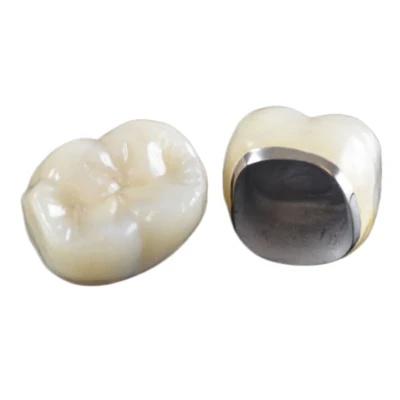


Every remade crown, every mismatched shade, every contour that misses the mark - many of these remakes trace back to the same root cause: the dental lab never received enough visual information to get it right the first time. A written prescription with a shade notation and a single intraoral snapshot rarely provides the full picture. It leaves too much room for interpretation.
Dental photography for lab communication is the clinical practice of capturing standardized intraoral and extraoral images so that the technician can see what the dentist sees in the chair. When combined with a detailed lab prescription and digital case data, these photographs help communicate shade, morphology, smile dynamics, gingival architecture, and other details that are difficult to describe in writing alone.
This guide explains exactly what photos to send to a dental lab, why each image matters, and how to capture lab-usable images that support more predictable restorative outcomes.

Why Dental Photos Matter Alongside the Lab Prescription
A dental lab prescription tells the technician what to make. Photographs show the technician what the restoration needs to match.
That distinction can determine whether a restoration blends naturally with the surrounding dentition or stands out.
Consider shade communication alone. The VITA Classical shade guide, one of the most widely used dental shade-matching systems, organizes tooth colors into four hue groups - A for reddish-brown, B for reddish-yellow, C for grey, and D for reddish-grey - with different chroma levels.
A prescription reading "A2" tells the lab the general value and hue. It does not communicate the patient's incisal translucency, cervical chroma shift, white spots, subtle mamelon pattern, surface texture, or other individual characteristics.
For clinicians who want to go deeper into this topic, our guide on how to communicate shade to a dental lab explains how shade tabs, stump shade, photography, and characterization information work together.
Dental shade photography helps fill that gap. Good images capture the three-dimensional reality of tooth color - how it changes from cervical to incisal, how enamel thickness affects value, and how surface texture interacts with light - in a way that a written shade notation cannot fully reproduce. Research indexed in PubMed on dental photography and shade matching also provides a useful starting point for reviewing the clinical literature behind photographic shade communication.
|
Information Type |
Prescription Alone |
Prescription + Photos |
|
Base shade (hue/value/chroma) |
Partial (single notation) |
Full (shade tab in context) |
|
Incisal translucency |
Not communicated |
Visible in retracted views |
|
Surface texture & morphology |
Not communicated |
Visible in macro shots |
|
Soft tissue contour & biotype |
Not communicated |
Visible in retracted frontal |
|
Characterizations (cracks, stains, white spots) |
Not communicated |
Visible in close-up views |
|
Patient's natural smile dynamics |
Not communicated |
Visible in full-smile photo |
Labs consistently report that cases arriving with a complete photo set have significantly lower remake rates. The photography itself takes under five minutes per patient. The alternative - a remake cycle involving another appointment, another unit of material, and another round of shipping - takes far longer.
Six Core Photos for Better Dental Lab Communication
Not every restorative case requires the complete twelve-view photography series used in some esthetic documentation protocols. However, a core set of standardized photographs gives the dental laboratory the visual context needed to interpret the case more accurately.
The exact combination can vary depending on whether the case involves a single posterior crown, veneers, implant restorations, or other fixed restorations.
Full-Face Portrait
Capture a full-face photograph with the patient seated upright, with the head parallel to the floor and the patient looking straight ahead. Frame the image from the hairline to the chin, with the camera positioned at approximately the same height as the patient's face.
This photograph provides broad facial context, including:
- Facial midline
- Smile line
- Relationship between the incisal plane and lower lip
- Proportion of the teeth within the face
For anterior esthetic cases, this view is particularly important. A technician designing a central incisor or multiple anterior restorations needs to understand how those teeth relate to the patient's facial proportions.
Full-Smile and Resting-Lip Photos
Capture two additional facial or smile views: one with the lips relaxed and slightly parted and another showing a full natural smile.
These photos help the dental lab evaluate how much tooth structure is displayed at rest and how the anterior teeth interact with the lips during smiling.
They also document the smile arc - the curve created by the incisal edges of the anterior teeth relative to the contour of the lower lip.
The smile arc is an important esthetic consideration in restorative dentistry. Without this visual information, the technician has limited ability to assess how the final restoration should integrate into the patient's natural smile.
Retracted Frontal View
The retracted frontal view is one of the most useful images for dental lab communication.
Using bilateral cheek retractors, capture the dentition with the teeth in maximum intercuspation. The camera should be positioned directly in front of the patient, approximately perpendicular to the occlusal plane, with the dental midline centered in the frame.
This image helps communicate:
- Overall tooth shade
- Gingival architecture
- Gingival recession or inflammation
- Dental midline
- Tooth proportions
- Adjacent tooth morphology
- General restorative context
Because the lips are retracted, this view also removes much of the shadow and visual interference created by the surrounding soft tissues.
For many restorative cases, the retracted frontal photograph provides the technician with the most useful overall intraoral reference.
Retracted Lateral Views
Capture both right and left lateral views.
Using a retractor on the side being photographed and, where appropriate, a dental mirror to obtain a more direct view, photograph the buccal surfaces from the canine toward the posterior teeth.
These views are especially valuable for posterior restorations such as:
- Crowns
- Bridges
- Implant restorations
They help the lab evaluate the occlusal relationship, buccal contours, adjacent tooth morphology, and soft tissue conditions around the restoration site.
Accurate lateral photographs also provide useful information that may not be obvious from a frontal image alone.
Maxillary and Mandibular Occlusal Views
Using a large intraoral mirror, capture one occlusal photograph of the maxillary arch and one of the mandibular arch.
These images communicate:
- Overall arch form
- Palatal and lingual contours
- Tooth position
- Spatial relationships between teeth
- General occlusal anatomy
Occlusal photographs are particularly useful for multi-unit restorations, extensive anterior cases, and full-arch work.
Although an intraoral scan provides detailed digital geometry, photographs still provide useful visual context and can help the lab identify clinical details that may not be obvious from the digital model alone.
Shade Tab Photo
A properly captured shade tab photograph is one of the most important images for dental photography for shade matching.
Place the selected shade tab edge-to-edge with the prepared tooth or adjacent natural tooth. For anterior cases, align the incisal edge of the shade tab with the incisal region of the tooth whenever possible.
Capture a close-up image using the same lighting and camera settings used for the other intraoral photographs.
A shade notation on a prescription is a label. A shade tab photo provides a visual comparison.
It allows the dental technician to evaluate how the selected shade compares with the patient's natural dentition under the same photographic conditions and can provide additional information about:
- Value
- Chroma
- Hue
- Incisal translucency
- Cervical saturation
- Internal characterization
For demanding anterior restorations, shade matching photography is therefore an important part of the case submission.
|
Photo Type |
Purpose |
Essential For |
|
Full-face portrait |
Facial context, midline, smile line |
Anterior esthetic cases |
|
Full-smile (rest + smile) |
Tooth display, smile arc |
All anterior cases |
|
Retracted frontal |
Shade, gingival architecture, proportions |
Every case |
|
Retracted lateral (R + L) |
Buccal contour, occlusal relationship |
Posterior cases |
|
Occlusal (upper + lower) |
Arch form, lingual/palatal contour |
Multi-unit cases, full arch |
|
Shade tab close-up |
Color verification in context |
Every case |

Camera Settings for Lab-Usable Dental Photos
A photograph that is too dark, too bright, heavily color-shifted, or out of focus can mislead the dental lab rather than help it.
Consistency is therefore one of the most important principles of restorative dental photography.
Camera and Lens
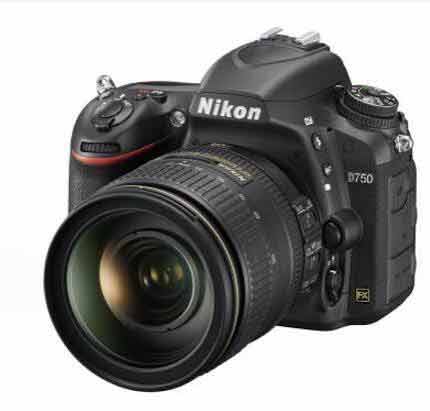
A DSLR or mirrorless camera equipped with a dedicated macro lens in approximately the 90–105 mm focal-length range is commonly used for clinical dental photography.
This focal length helps minimize distortion at the short working distances required for intraoral photography.
A 100 mm macro lens at a reproduction ratio of approximately 1:2 to 1:3 can capture the anterior segment while maintaining accurate proportions. At 1:1 magnification, it can capture an individual tooth with greater surface detail.
Flash
A ring flash or dual-point twin flash provides more consistent illumination than ambient operatory lighting.
Ambient light and operatory lights can introduce inconsistent color temperature and unwanted shadows.
A ring flash provides even illumination that is useful for standardized dental shade photography, while a twin flash can create more dimensional lighting that reveals surface texture.
For routine dental lab communication, consistency is often more important than dramatic lighting.
Recommended Camera Settings
|
Parameter |
Recommended Setting |
Rationale |
|
Aperture |
f/22 to f/32 |
Maximum depth of field - keeps more of the arch in focus |
|
Shutter speed |
1/125 to 1/200 sec |
Syncs with flash and reduces ambient-light contamination |
|
ISO |
100 to 200 |
Minimum noise and high color fidelity |
|
White balance |
Flash or custom (5500K) |
Helps maintain consistent shade rendering |
|
Focus |
Manual, set to desired magnification |
Reproducible framing across visits |
|
Image format |
RAW or high-quality JPEG |
RAW allows greater flexibility for white-balance correction |
Once a photography protocol has been established, keep the settings as consistent as possible.
Using the same camera, flash, magnification, exposure, and white-balance protocol across patients and appointments allows the dental laboratory to compare photographs with greater confidence.
Extra Photography for Esthetic Dental Cases
For E.max veneers, anterior zirconia crowns, and anterior implant crowns, the core photo set is only the starting point.
Additional photographs can communicate internal color, translucency, preparation shade, and other information that is especially important when the restoration must blend closely with natural teeth.
Cross-Polarized Photography
Cross-polarized photography uses polarizing filters positioned over the flash and lens to reduce surface reflections from enamel and ceramic.
The resulting image can reveal details that are often masked by surface glare, including:
- Dentin hue
- Enamel translucency
- Incisal halo
- Internal characterization
For demanding anterior restoration photography and veneer photography, cross-polarized images can provide useful additional information for the technician.
They are particularly valuable when reproducing layered ceramic restorations where subtle internal color variations influence the final esthetic result.
Stump Shade Photography
For full-coverage preparations, the color of the prepared tooth - or stump shade - can affect the appearance of the final restoration, particularly when translucent ceramic materials are used.
For example, a very light preparation beneath a translucent restoration can influence its apparent final value.
Capture a close-up of the prepared tooth with a stump shade tab positioned adjacent to it. Send this photograph together with the conventional shade tab photo of the natural dentition.
This provides the dental laboratory with both the desired external shade reference and information about the underlying preparation color.
The technician can then consider that information when selecting restorative materials and planning the ceramic or staining strategy.
What to Send With Your Dental Photos
Photographs are important, but they are not sufficient on their own.
The most effective dental case submission combines standardized photographs with a detailed dental lab prescription and the appropriate digital case data.
Clinical information may include:
- Material preference, such as zirconia, lithium disilicate, PFM, or full metal
- Specific ceramic system or material requirement where relevant
- Occlusal scheme notes, including canine guidance, group function, or deep-bite concerns
- Patient habits relevant to material selection, including bruxism or clenching
- Desired esthetic outcome
- Timeline constraints, such as upcoming events, travel, or patient availability
Digital information may include:
- Intraoral scan files such as .STL or .PLY when available
- CBCT cross-sections for relevant implant cases
- Previous CAD/CAM design files when replacing an existing prosthesis
If you are unsure whether a scan contains enough usable information, our guide on what dental labs need from an intraoral scan covers scan quality, margins, occlusion, file completeness, and case-submission requirements in more detail.
For esthetic cases, the prescription should also communicate details that photographs may not fully explain, such as:
- Target shade
- Stump shade
- Gingival, body, and incisal characterization
- Occlusal staining
- Margin requirements
- Contact preferences
- Occlusal requirements
- Special design instructions
The combination of standardized dental photographs, a detailed written prescription, and digital scan data gives the lab a much stronger basis for interpreting the clinical intent without relying on unnecessary assumptions.
For practices working with international production partners, it is also helpful to establish a consistent protocol for sending a digital dental case to an overseas lab, including photographs, prescription data, scan files, and special instructions.
Common Dental Photography Mistakes That Can Lead to Remakes
Even practices that regularly send photographs to a dental laboratory may unintentionally submit images that provide limited clinical value.
Several mistakes occur repeatedly.
Inconsistent Lighting
Photographs taken under one lighting condition during the first appointment and a completely different condition during another appointment are difficult to compare.
This is especially problematic for dental shade communication.
Use a consistent flash protocol and minimize uncontrolled ambient or operatory lighting when shade accuracy matters.
Shade Tab Held at the Wrong Angle
The shade tab should be positioned as close as practical to the same plane as the tooth and face the camera at a similar angle.
A shade tab tilted toward or away from the light can reflect illumination differently from the natural tooth, producing a misleading comparison.
No Retracted Views
A full-smile photograph alone provides valuable facial information, but it is not sufficient for evaluating intraoral shade, gingival architecture, and detailed tooth morphology.
Retracted frontal and, where appropriate, lateral images provide the dental technician with clearer clinical information.
Blurry or Low-Resolution Images
If the image is out of focus or heavily compressed, surface texture and internal characteristics may disappear.
If the technician cannot clearly see a crack line, white spot, mamelon pattern, surface texture, or other characterization, reproducing it becomes much more difficult.
No Context for a Single-Tooth Case
A close-up photograph of only the prepared tooth does not show the technician how that tooth relates to the adjacent and opposing dentition.
For single-unit cases, include at least a retracted frontal photograph so the dental lab can evaluate shade, contour, proportion, and surrounding anatomy in context.
Many of these communication problems overlap with the broader causes discussed in our guide on how to reduce remakes in dental restorations.

Dental Lab Photo Checklist Before You Send the Case
Before submitting a restorative case, confirm that the photographic and digital information is complete.
The following checklist provides a practical framework for standard, esthetic, and implant cases.
|
Checklist Item |
Standard Cases |
Esthetic Cases |
Implant Cases |
|
Full-face portrait |
Optional |
Required |
Optional |
|
Full-smile (rest + smile) |
Optional |
Required |
Optional |
|
Retracted frontal view |
Required |
Required |
Required |
|
Retracted lateral views |
For posterior cases |
Required |
Required |
|
Occlusal views |
For multi-unit cases |
Required |
Required |
|
Shade tab close-up |
Required |
Required |
Required |
|
Cross-polarized images |
Not needed |
Recommended |
Not needed |
|
Stump shade photo |
For full-coverage preps |
Required |
Required |
|
Written prescription with material, shade, and design notes |
Required |
Required |
Required |
|
Intraoral scan file |
If available |
If available |
Required |
|
CBCT cross-section |
Not needed |
Not needed |
Required |
A dental laboratory that receives a complete communication package - standardized photographs, a detailed prescription, and appropriate digital data - has a much stronger foundation for producing a restoration that reflects the dentist's clinical intent.
A few additional minutes spent documenting the case can help reduce unnecessary questions, shade misunderstandings, and avoidable remake cycles.
Conclusion
So, what photos should you send to your dental lab?
For most restorative work, use a standardized photographic framework that includes a retracted frontal view and shade reference, then add full-face, smile, lateral, and occlusal views according to the type and complexity of the case. For demanding esthetic restorations, stump shade and cross-polarized photographs can provide additional information that helps the technician understand color, translucency, and characterization.
The central principle of effective dental photography for lab communication is simple: give the technician enough consistent visual context to understand the clinical situation rather than asking them to infer what cannot be seen.
ADS Dental Laboratory Ltd is a full-service digital dental laboratory based in Shenzhen, China, providing long-term dental lab outsourcing and customized restoration production for dentists and denta laboratories worldwide. Our capabilities include crown and bridge restorations, aesthetic veneers, implant restorations, full-arch prosthetics, removable restorations, and CAD/CAM-supported digital workflows.
If you would like to discuss a restorative case, digital workflow, or long-term dental laboratory outsourcing project, contact our team and send us your case requirements, photographs, prescription, and available digital files for review.
FAQ
What photos should I send to a dental lab?
For most restorative cases, start with a retracted frontal view and a shade tab close-up. Depending on the case, add full-face, full-smile, lateral, and occlusal photographs.
Anterior esthetic cases generally require more facial and smile information, while posterior, multi-unit, implant, and full-arch cases may require additional lateral and occlusal views.
The goal is to give the dental technician enough visual context to understand the shade, tooth proportions, morphology, occlusion, gingival architecture, and relationship of the restoration to the surrounding dentition.
How should I take a shade tab photo for the dental lab?
Position the selected shade tab adjacent to the natural tooth and keep it in approximately the same plane and orientation.
For anterior teeth, align the incisal region of the tab with the tooth where practical.
Use consistent lighting and camera settings, and capture enough surrounding dentition to provide context. This allows the technician to compare value, chroma, hue, translucency, and characterization more accurately.
When should I send a stump shade photo?
A stump shade photograph is particularly useful for full-coverage ceramic restorations where the underlying preparation color may influence the final appearance.
It is especially important in anterior esthetic cases and when using relatively translucent restorative materials.
Capture the prepared tooth with a stump shade reference adjacent to it and send the image together with the desired final shade information.
Do esthetic cases need cross-polarized photographs?
Not every case requires cross-polarized photography.
However, it can be highly useful for veneers, anterior crowns, and other demanding esthetic restorations because it reduces surface glare and reveals internal tooth characteristics such as dentin hue, enamel translucency, incisal effects, and internal characterization.
What should I send to the dental lab besides photographs?
Photos should be accompanied by a detailed dental lab prescription and the digital information relevant to the case.
Depending on the restoration, this may include intraoral scan files, material requirements, shade and stump shade information, occlusal instructions, characterization details, implant information, and special design requirements.
For complex cases, the most effective dental lab communication comes from combining photographs, written instructions, and digital records rather than relying on any single source of information.