
At ADS Dental Laboratory, we produce custom digital crowns for overseas dentists and labs. Our process relies on CAD/CAM technology to deliver precise zirconia crowns with consistent fit and aesthetics. A digital crown production workflow starts when a dentist sends a digital file (usually STL or PLY from an intraoral scan) and ends with a finished crown shipped back. This replaces traditional impressions, stone models, and manual wax-ups.
The result is faster turnaround, fewer remakes, and better long-term performance. We typically complete a single zirconia crown in 5-7 working days, including quality checks and international shipping. Below is the exact sequence we follow in our lab.

Why Choose Our Digital Crown Workflow?
Digital production cuts out many variables found in analog methods. Traditional impressions can distort during pouring or shipping. Manual adjustments add time and risk inconsistency. Our CAD/CAM approach uses precise digital data from the start.
Here are the main differences:
|
Aspect |
Traditional Analog Workflow |
Our Digital CAD/CAM Workflow |
|
Impression |
Silicone/alginate, prone to distortion |
Intraoral scan, micron-level accuracy |
|
Turnaround (in-lab) |
10-14 days typical |
5-7 days for standard zirconia crowns |
|
Remake Rate |
Higher due to human error |
Lower (under 2% in our records) |
|
Fit & Occlusion |
Manual check and adjust |
Virtual simulation + final verification |
|
Materials |
Variable batches |
Certified multilayer zirconia blocks |
|
Patient Chair Time |
More adjustments expected |
Minimal chairside tweaks |
The benefits add up for your practice. You get reliable crowns without investing in milling machines or sintering ovens. We handle the technical side while you focus on patient care. Digital files stay archived, so adjustments or replacements are straightforward.
Step-by-Step Digital Crown Production Workflow
We break the process into seven clear steps. Each one builds on the previous to ensure the final crown fits, functions, and looks right.
Step 1: Receiving Digital Files & Initial Review
The workflow begins when you upload files through our portal or email. We accept STL, PLY, or OBJ formats from scanners like 3Shape TRIOS, Medit i700, iTero, or similar systems. Include your prescription: shade guide (VITA or custom photos), material preference (monolithic zirconia or layered), occlusal notes, and any specific requests.
Our team reviews everything within 24 hours. We check scan quality, margin clarity, opposing teeth alignment, and bite registration. If something is missing or unclear-like poor edge definition-we contact you immediately to avoid delays later. Clean data at this stage prevents 80% of potential issues downstream.
Once approved, we move to model preparation.
Step 2: Digital Model Preparation & Validation
We import the files into Exocad or 3Shape software. The system generates a virtual working model, including the prepared tooth, adjacent teeth, and antagonists.
Technicians clean up artifacts, define the preparation margin line (often with semi-automated tools), and set up the virtual articulator for occlusion checks. This step creates a solid foundation. Any small error here carries through the entire process, so we double-check alignment and contacts early.
With a validated model ready, design begins.
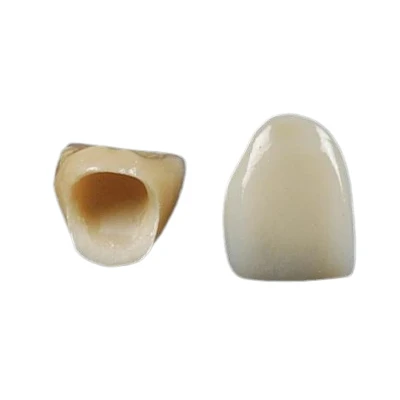
Step 3: CAD Design by Expert Technicians
Design is where the crown takes shape. Our technicians use the prescription and reference photos to build the restoration.
Key focus areas include:
- Marginal fit: Seamless transition to prevent microleakage.
- Occlusal harmony: Proper cusp-fossa relation and dynamic contacts.
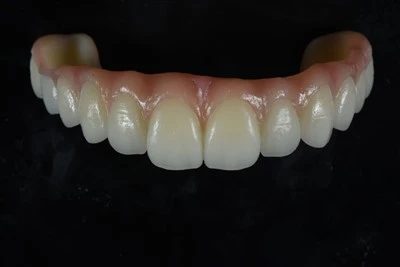
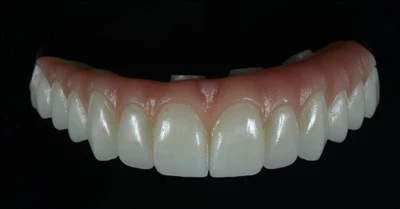
- Anatomy and aesthetics: Natural morphology, translucency gradient, and shade match.
- Functional needs: Extra reinforcement for bruxism cases if noted.
We combine manual expertise with software tools for margin detection and occlusion optimization. For anterior or high-aesthetic cases, we often send a 3D preview for your approval. You can request changes remotely before fabrication starts. This collaboration step reduces surprises at delivery.
Approved design moves to manufacturing.
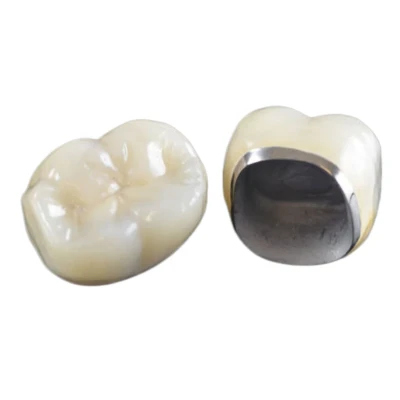
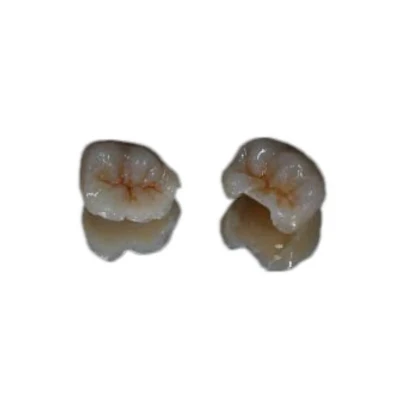
Step 4: CAM Fabrication
The CAD file goes to our CAM software for nesting. We place multiple crowns in a single zirconia blank to optimize material use.
Crowns are milled on 5-axis or 6-axis machines from high-quality zirconia blocks (brands like Upcera or Vita equivalents). We use multilayer discs for natural incisal-cervical gradation. Dry or wet milling depends on the material-both deliver micron-level precision.
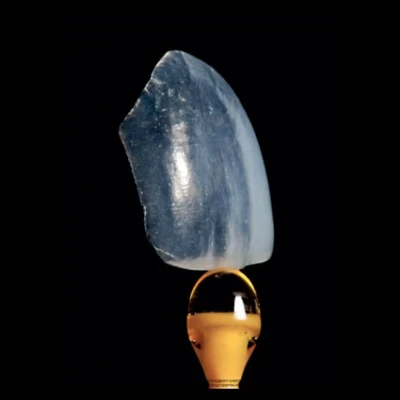
The output is a green-state (pre-sintered) crown. Strength at this stage is low, so careful handling is critical.
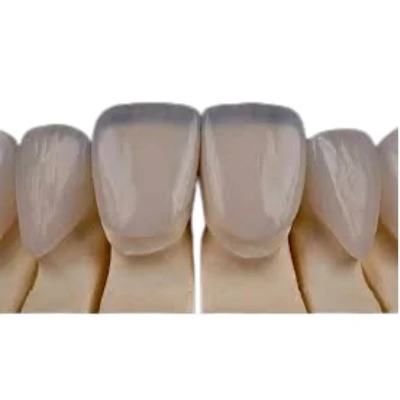
Step 5: Post-Processing & Characterization
Next comes sintering in a dedicated furnace. We follow precise temperature curves (typically peaking at 1450-1550°C) to achieve full density and translucency. Final strength reaches 1000-1300 MPa depending on the zirconia type.
After sintering, technicians add final touches:
- Glazing for smooth surface.
- Staining for lifelike characterization (especially anterior teeth).
- Hand polishing for texture and luster.
This step turns a functional piece into an aesthetic one that blends with natural dentition.
Step 6: Rigorous Quality Control & Final Inspection
Every crown passes multiple checks before packaging.
We verify:
Marginal integrity (digital overlay or physical silicone check).
Occlusion (virtual and physical articulation).
Color match and surface finish.
Overall dimensions and thickness.
Tools include microscopes, magnification loupes, and strength simulation if required. Only crowns that meet our internal standards proceed. Reject rate stays very low because issues are caught early.
Step 7: Packaging, International Shipping & Delivery
The approved crown is cleaned, disinfected, and packed in protective foam with shock-absorbing materials. We include a QC report and any notes.
Shipping uses DHL or FedEx with full tracking. Standard delivery to most overseas locations takes 2-4 days. You receive updates at every stage.
How ADS Ensures Superior Quality & Consistency
We source zirconia from certified suppliers and calibrate equipment regularly. Our technicians receive ongoing training on software updates and material handling. Long-term data shows average in-lab time of 5 days for standard cases and remake rates below industry norms.
One overseas clinic we work with sends anterior zirconia cases regularly. Their feedback highlights consistent shade matching and minimal adjustments-results built on repeatable processes.
Ready to Start?
Digital crown production is the standard for precision and efficiency. Partnering with ADS gives you lab-grade results without the overhead. Upload a test case-no commitment required. We review it free and provide feedback.
Contact us via WhatsApp, email, or our portal for quotes, guides, or a quick online walkthrough. Let's make your next restoration straightforward and reliable.