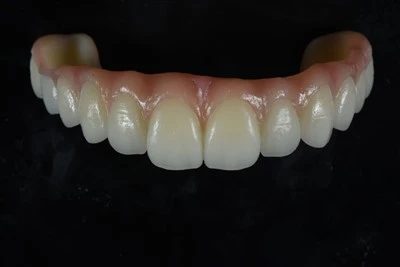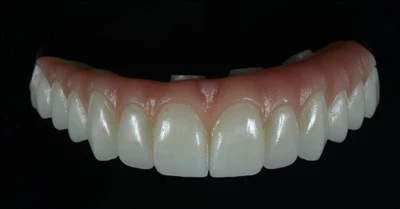
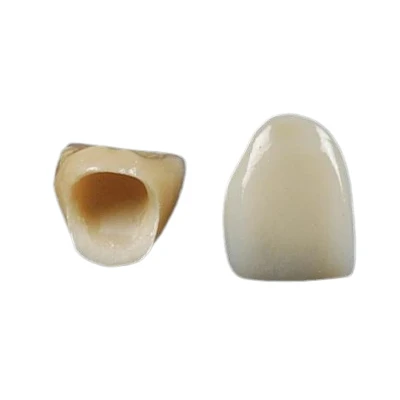
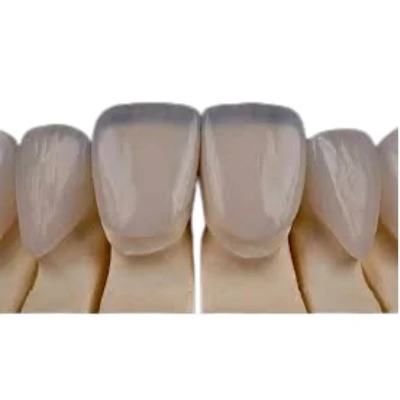
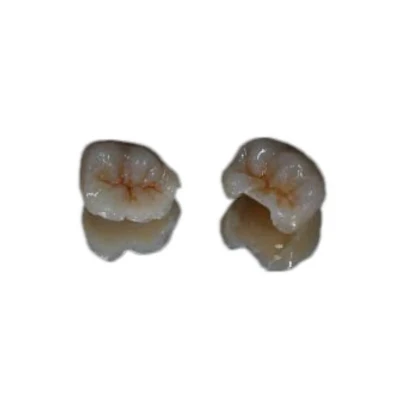
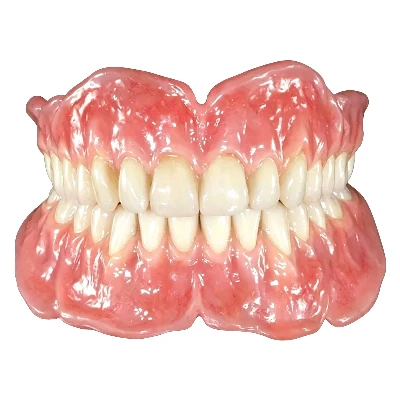


Post-curing is the controlled final polymerization stage used after a 3D printed denture has been cleaned and dried. The denture may already have its final shape when it leaves the printer, but the resin has not necessarily reached its intended mechanical, dimensional, surface, or biological properties. A validated post-curing cycle uses specific light, time, temperature, and positioning conditions to complete the material's processing. Poor control at this stage can reduce strength, affect fit, and create inconsistent results across production batches.

What Is Post-Curing in Digital Denture Fabrication?
Post-curing in digital denture fabrication is the process of exposing a cleaned 3D printed denture to additional light, and in some systems controlled heat, after printing. Its purpose is to increase polymer conversion and help the resin reach the final properties defined by the material manufacturer.
This step is different from the light exposure that occurs inside the printer.
During printing, each resin layer receives enough energy to form a stable three-dimensional structure. That exposure must be fast and precise so the printer can reproduce the digital design layer by layer. It does not always complete every available polymerization reaction within the material.
As a result, a printed denture may still contain unreacted functional groups, residual monomers, oligomers, or other resin components. Post-curing continues the light-activated reaction under more uniform and controlled conditions.
It is also important to distinguish post-curing from other post-processing steps:
- Washing removes uncured liquid resin from the surface.
- Drying removes residual solvent before curing.
- Post-curing advances the resin toward its final polymerized state.
- Finishing and polishing correct support marks, margins, layer lines, and surface texture.
Post-curing does not replace cleaning or polishing. It is one stage within a complete digital denture post-processing workflow.
A printed denture is shaped during printing. It reaches its intended material state during validated post-curing.
Why Post-Curing Matters for 3D Printed Dentures
Post-curing affects how a digital denture performs after delivery. The most important effects involve mechanical strength, biological response, dimensional consistency, and surface condition.
Mechanical Strength and Surface Hardness
Denture base resin must tolerate repeated loading during chewing, insertion, and removal. If polymer conversion remains too low, the material may not achieve its intended flexural strength, impact resistance, or surface hardness.
Proper post-curing can help improve or stabilize:
- Flexural strength
- Impact resistance
- Surface microhardness
- Resistance to scratching and wear
- Long-term structural stability
These properties do not always respond to curing time in the same way. In some studies, flexural strength reaches a relatively stable level after a certain curing period, while surface hardness continues to increase with longer exposure.
This matters because a laboratory cannot judge curing quality from one property alone. A denture may feel hard at the surface while still failing to meet the complete validated material profile.
Longer curing is not automatically better. Once a material reaches its intended performance range, additional exposure may provide little benefit and may increase the risk of color change or distortion.
Biocompatibility and Residual Resin Components
A denture base remains in prolonged contact with oral mucosa. For that reason, the biological performance of the resin is as important as its strength.
Inadequate washing or post-curing may leave a higher level of residual resin components. These substances can affect the biological response of the material and may contribute to irritation or cytotoxicity concerns if the appliance has not been processed according to the validated workflow.
Post-curing helps the resin reach the biological state established by the manufacturer's testing. It does not eliminate every residual component, and it cannot compensate for poor cleaning.
Biocompatibility depends on the entire material-processing chain:
- Correct printing parameters
- Complete removal of uncured surface resin
- Proper drying
- Validated post-curing
- Controlled finishing and polishing
A resin labeled for denture use is only being used as intended when its required post-processing instructions are followed.
Dimensional Stability and Denture Fit
Post-curing continues the polymerization reaction. As the polymer network develops, the denture may undergo additional shrinkage, thermal movement, or stress release.
This means post-curing can support dimensional stability, but it can also create distortion when the process is incorrect.
Common dimensional risks include:
- Warping caused by excessive heat
- Uneven shrinkage caused by shadowed areas
- Stress release after support removal
- Fit changes caused by incorrect placement
- Component mismatch between the denture base and printed teeth
A validated curing cycle is designed to keep these changes within an acceptable range. It does not make the denture dimensionally inactive.
A precise digital design can still lose accuracy during post-processing. Good fit depends on preserving the design through printing, washing, curing, support removal, and final finishing.
Surface Condition and Color
Post-curing affects surface chemistry, hardness, tackiness, and final color. An under-cured surface may remain soft, sticky, or difficult to polish. An incorrect high-energy or high-temperature cycle may cause yellowing, whitening, or other shade changes.
Post-curing does not automatically smooth the denture.
It cannot remove:
- Layer lines
- Support marks
- Printing pores
- Rough borders
- Design defects
- Surface damage caused during cleaning
Final smoothness and gloss still depend on print quality, support placement, finishing, and polishing.
Post-curing helps establish the correct surface state. It does not correct poor manufacturing.
How the Post-Curing Process Works
Most 3D printed denture resins contain reactive monomers or oligomers, a photoinitiator system, pigments, and other formulation components.
When the photoinitiator absorbs light within the correct wavelength range, it generates reactive species that start polymerization. These reactions connect small resin molecules into a larger polymer network.
During printing, this reaction occurs rapidly in thin layers. The goal is to create enough conversion for each layer to hold its shape and bond to the next layer. Because the exposure must remain fast, some reactive groups may remain after printing.
Post-curing provides additional energy to continue the process.
The result depends on several variables:
- Wavelength
- Light intensity
- Total delivered energy
- Exposure time
- Chamber geometry
- Distance from the light source
- Resin thickness and pigmentation
- Temperature
- Placement of the denture inside the chamber
Some post-curing units add controlled heat. Higher temperature can increase molecular movement and accelerate the remaining reaction. This may improve selected mechanical properties in some resin systems.
Heat must remain controlled. Excessive temperature can create internal stress, distortion, or color change.
Wavelength alone does not determine curing quality. Two units labeled 405 nm may deliver very different results because their irradiance, chamber design, temperature control, and exposure uniformity are not the same.
Post-curing works when the light source, resin formulation, energy dose, and temperature are treated as one validated system.

Key Post-Curing Parameters Dental Labs Must Control
There is no single post-curing time or temperature that applies to every digital denture resin. The correct cycle is material-specific.
Curing Time
Published studies and commercial workflows often use curing periods between approximately 20 and 60 minutes.
Some studies report that 20 to 30 minutes may be enough for certain mechanical properties to stabilize. Other results show that surface microhardness may continue to increase when curing is extended to 60 minutes.
These ranges are useful for understanding the process, but they are not universal production settings.
Longer curing may fail to produce proportional benefits. It can also increase:
- Production time
- Thermal exposure
- Color shift
- Dimensional change
- Risk of overprocessing
The laboratory should use the exact time specified for the resin and curing unit combination.
Light Wavelength, Irradiance, and Total Energy
Many dental post-curing systems use light centered around 405 nm. Some units use a broader range, such as approximately 390 to 540 nm, to activate different photoinitiator systems.
The wavelength must match the resin formulation.
A wavelength mismatch can reduce polymerization efficiency even when the curing time appears sufficient. The same problem can occur when the lamp output is too low.
Irradiance describes the power of light reaching the surface. Time and irradiance together influence the total delivered energy. That is why a 20-minute cycle in one curing unit cannot automatically be replaced by a 20-minute cycle in another.
The following factors also change the actual exposure:
- Lamp age
- Internal contamination
- Distance from the light source
- Reflective chamber design
- Turntable operation
- Number of parts inside the chamber
- Shadowed surfaces
A general-purpose UV box or cosmetic nail lamp should not be treated as equivalent to a validated dental curing unit simply because it emits purple or ultraviolet light.
Curing Temperature
Published and commercial workflows may use controlled temperatures from approximately 40°C to 80°C. Moderate conditions around 50°C or 60°C are common in some systems, while higher-temperature cycles may be specified for particular resins.
Heat can accelerate polymerization and may improve selected properties, including impact strength, in some materials. It can also cause problems when applied incorrectly.
Potential risks include:
- Warping
- Internal stress
- Excessive shrinkage
- Component mismatch
- Discoloration
- Surface changes
Temperature must be considered together with curing time and light energy. A higher temperature does not justify a longer cycle unless the manufacturer specifically validates that combination.
Part Placement and Light Uniformity
A full denture has complex geometry. The intaglio surface, palatal vault, flanges, tooth sockets, and concave areas can create shadows inside the curing chamber.
Placement affects how evenly the denture receives light.
Labs should avoid:
- Stacking parts
- Allowing dentures to touch each other
- Placing the appliance against the chamber wall
- Blocking the intaglio surface
- Overloading the curing unit
Some material systems require the denture to be turned over or cured in more than one stage. Others specify a fixed orientation or support condition.
Print orientation can also influence post-processing. A 0°, 45°, or 90° build angle changes support placement, layer direction, surface texture, and stress distribution. These differences may affect how the denture responds during washing, support removal, and post-curing.
The correct curing cycle is defined by the resin, printer, washing process, and curing unit-not by time alone.
A Step-by-Step Post-Curing Workflow for Digital Dentures
A consistent workflow reduces variation between cases. Each step should follow the material manufacturer's instructions for use.
1. Complete the Print and Drain Excess Resin
After printing, allow excess liquid resin to drain from the denture. Pay attention to the intaglio surface, tooth sockets, and deep concave areas where resin may collect.
Do not move directly from the printer to the curing chamber.
2. Clean the Printed Denture
Wash the denture using the solvent, concentration, equipment, and cycle specified for the material.
Some systems use approximately 95% isopropyl alcohol. Others require a different solvent, concentration, or dedicated washing unit.
Overwashing can also be harmful. Excessive solvent exposure may affect surface quality or dimensional stability.
3. Dry the Denture Completely
Residual alcohol or cleaning solvent can interfere with the surface during curing. It may cause whitening, tackiness, contamination, or inconsistent polymerization.
The denture should be visibly dry before entering the curing chamber.
4. Follow the Required Support-Removal Sequence
Some resins are cured with supports attached. Others require support removal first.
Removing supports too early may release stress and increase deformation. Leaving them in place when the workflow requires removal may block light or interfere with final geometry.
The sequence should come from the resin IFU, not laboratory habit.
5. Inspect the Print Before Curing
Check for defects that post-curing cannot repair:
- Missing margins
- Cracks
- Voids
- Severe layer separation
- Incomplete printing
- Major warping
- Support failure
A defective print should be evaluated before more time is spent processing it.
6. Position the Denture Correctly
Place the denture so light can reach all required surfaces. Avoid contact between appliances and prevent the tissue surface from being hidden.
Use the recommended fixture or orientation when the system provides one.
7. Select the Validated Program
Confirm:
- Resin name
- Resin batch
- Curing unit
- Program number
- Time
- Wavelength
- Temperature
- Required orientation
Using the same generic program across different materials is a common production error.
8. Complete Additional Bonding or Curing Steps
Denture base resin, printed tooth resin, bonding resin, and characterization materials may require separate curing cycles.
A two-part printed denture should not be treated as though every component has the same chemistry.
9. Finish, Polish, and Inspect
After curing, remove remaining supports, finish the margins, polish the surface, and inspect the final appliance.
The lab should verify:
- Surface condition
- Color
- Base adaptation
- Tooth-to-base connection
- Occlusion
- Fit
- Structural integrity
A reliable result comes from controlling the whole post-processing sequence, not from the curing chamber alone.

Common Post-Curing Mistakes and How to Avoid Them
Post-curing errors often appear as surface defects, low hardness, distortion, or batch inconsistency.
Under-Curing
Under-curing can result from:
- Shortened exposure time
- Low lamp output
- Incorrect wavelength
- Overloaded curing chamber
- Shadowed surfaces
- Wrong material program
- Poor equipment maintenance
Possible signs include a sticky surface, unusual odor, low hardness, weak polishing response, or inconsistent mechanical performance.
A printed denture should never be released simply because the surface feels solid.
Excessive or Incorrect Curing
Overprocessing does not always mean "too many minutes." It may also involve excessive irradiance, high temperature, repeated curing, or the wrong preset program.
Possible consequences include:
- Color change
- Warping
- Internal stress
- Fit alteration
- Tooth-base mismatch
- Longer production time without measurable benefit
More energy is not automatically safer.
Cleaning and Equipment Errors
Many curing defects begin before the denture enters the chamber.
|
Problem |
Likely Cause |
What the Lab Should Check |
|
Sticky surface |
Incomplete drying, low light energy, or residue |
Washing cycle, drying time, lamp output |
|
Warping |
Excess heat, poor placement, or support removal error |
Temperature, orientation, support sequence |
|
Low hardness |
Insufficient energy or wavelength mismatch |
Program selection, lamp condition, resin compatibility |
|
Color change |
Excess exposure, heat, or contamination |
Time, temperature, chamber cleanliness |
|
Batch inconsistency |
Equipment drift or poor process control |
Calibration, maintenance, production records |
The most common mistake is treating post-curing as a timer setting. It is a controlled manufacturing process.
Quality Control for Consistent Post-Curing Results
A dental laboratory should be able to repeat the same validated process across different production days, technicians, and resin batches.
That requires more than saving a curing preset.
The laboratory should maintain records for:
- Resin brand and batch
- Printer and print program
- Washing solution and cycle
- Drying conditions
- Curing unit and program
- Curing date
- Equipment maintenance
- Final inspection results
The curing unit also needs routine attention. Lamp output can decline over time. Reflective surfaces may become contaminated. Temperature sensors can drift. Turntables can stop moving correctly.
A programmed 20-minute cycle is only meaningful when the equipment continues to deliver the expected light and temperature.
Final inspection should include more than checking whether the denture feels hard. The technician should examine:
- Surface tackiness
- Cracks or white areas
- Abnormal color
- Base distortion
- Intaglio surface integrity
- Tooth-base connection
- Occlusion
- Fit
- Case traceability
Dentists evaluating a digital denture laboratory should ask whether the lab uses manufacturer-validated post-curing systems and documented quality-control procedures. Owning a 3D printer does not prove that the full workflow is under control.
Process discipline is what turns digital equipment into consistent denture production.
Conclusion
Post-curing matters because it helps a 3D printed denture reach its intended mechanical strength, dimensional performance, surface condition, and biological state. It works by applying a controlled combination of light, time, and, in some systems, heat to continue polymerization after printing.
There is no universal post-curing cycle for every denture resin. Consistent results depend on correct washing, complete drying, material-specific settings, proper placement, equipment maintenance, and final inspection.
ADS Dental Laboratory Ltd uses controlled digital denture production and post-processing procedures to support stable quality for overseas dentists and dental laboratories. Contact our team to discuss your digital denture workflow, outsourcing requirements, or a case for technical evaluation.
FAQ
How Long Should a Digital Denture Be Post-Cured?
Research and commercial workflows often use cycles between 20 and 60 minutes. Some materials may reach stable flexural properties within 20 to 30 minutes, while surface hardness may continue to change during longer cycles.
The correct time is the one validated for the specific resin and curing unit. A general time range should never replace the manufacturer's instructions.
Can Any UV Curing Unit Be Used?
No.
Two curing units with the same listed wavelength can differ in irradiance, chamber design, light uniformity, and temperature control. Dental resins should be processed with a curing unit approved or validated for that material whenever possible.
Does Longer Curing Always Improve Denture Strength?
No.
Some properties reach a plateau. Additional curing may produce little improvement and may increase the risk of color change, heat exposure, or distortion.
The goal is not maximum exposure. The goal is the correct exposure.
Should Supports Be Removed Before or After Post-Curing?
It depends on the resin and workflow.
Keeping supports in place may help maintain shape during curing. In other systems, supports must be removed first to improve light access or complete assembly.
Follow the specific material instructions.
Can Post-Curing Fix a Distorted or Poorly Printed Denture?
No.
Post-curing cannot correct design errors, missing borders, voids, layer separation, major support failure, or an already distorted base. These problems require case evaluation and may require reprinting.
Do Denture Base and Tooth Resins Use the Same Curing Program?
Not necessarily.
Denture base resin, printed tooth resin, bonding resin, and surface characterization materials may use different wavelengths, times, temperatures, and cleaning procedures.
Each material must be processed according to its own validated instructions.