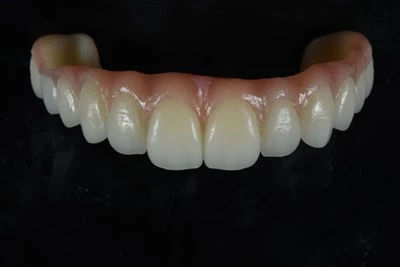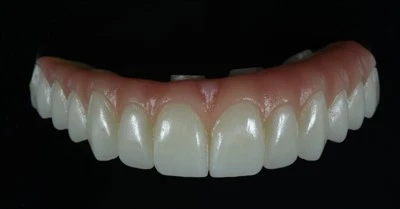
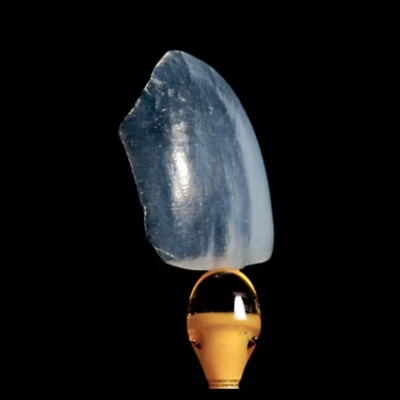

Digital Smile Design (DSD) is a digital workflow that uses facial photographs, intraoral scans, and video captures to plan aesthetic dental restorations before any tooth preparation begins. When combined with CAD/CAM veneer fabrication, this digital veneer workflow turns a largely subjective aesthetic process into a more measurable and reproducible approach.
For dentists planning dental veneers, Digital Smile Design for veneers can help connect facial analysis, digital wax-up, tooth preparation, CAD/CAM veneer design, and final fabrication within one coordinated workflow. This article explains how Digital Smile Design works, how the approved design connects to veneer fabrication, and what material and quality-control considerations matter most for the final restoration.

What Is Digital Smile Design?
Digital Smile Design is a concept that integrates facial analysis, digital photography, and intraoral scanning to design a patient's smile in a virtual environment. The goal is to align tooth size, proportion, gingival contour, and incisal edge position with facial midlines, lip dynamics, and the patient's aesthetic preferences - all before a handpiece touches enamel.
The core principle is predictability. Traditional aesthetic dentistry relied heavily on the clinician's eye and the dental technician's interpretation of an impression. DSD creates a shared digital blueprint so the dentist, patient, and dental laboratory technician can work from the same proposed aesthetic outcome.
When the patient approves a digital wax-up or intraoral mock-up, that approved design can help guide preparation, restoration dimensions, tooth morphology, and final ceramic contours.
DSD is not a single software product. It is a methodology that can be carried out through different professional dental CAD and smile-design platforms. The specific software matters less than the discipline of the workflow, the quality of the clinical records, and the communication between the clinician and the dental laboratory.
Digital Smile Design Workflow: From Facial Records to Design File
Step 1: Facial and Dynamic Analysis
The process starts with standardized facial photographs - frontal, lateral, and oblique views - plus a video of the patient smiling, speaking, and laughing. These records reveal the dynamic relationship between the lips, teeth, and gums that a static impression cannot.
Key reference lines are established from this data:
|
Reference Parameter |
What It Measures |
Clinical Significance |
|
Facial midline |
Symmetry axis through philtrum |
Aligns central incisor contact point |
|
Smile line |
Curvature of lower lip border during full smile |
Guides incisal edge curvature |
|
Gingival display |
Amount of gum visible at full smile |
Determines need for crown lengthening or surgical adjustment |
|
Buccal corridor |
Dark space at mouth corners during smile |
Influences tooth width and arch expansion |
|
Incisal plane |
Tilt of upper tooth edges relative to pupils |
Affects perceived smile harmony |
These references provide the foundation for aesthetic veneer design because the proposed restorations are evaluated in relation to the entire face rather than the teeth alone.
Step 2: Intraoral Scanning and Data Integration
A digital intraoral scanner captures the dental arch in three dimensions, producing an STL file that represents the topography of the prepared - or unprepared - dentition.
The intraoral scan is merged with facial photographs and video frames in the design software, creating a composite model where the proposed veneer design can be evaluated in the patient's facial context.
Modern intraoral scanners achieve accuracy in the range of 20–50 micrometers for full-arch scans, which is sufficient for veneer margin design and occlusal registration. The digital impression also avoids some of the distortion associated with conventional elastomeric impression materials and can improve the efficiency of transferring case information to a digital dental laboratory.
For predictable laboratory production, scan quality, margin visibility, bite registration, and complete case data all matter. Dentists working digitally may also find it useful to understand what dental labs need from an intraoral scan before submitting a veneer case.
Step 3: Digital Tooth Design
Within the CAD software, the designer or clinician adjusts tooth dimensions - including length, width, proportion, emergence profile, incisal edge position, and surface texture - against the facial reference framework.
The software typically provides libraries of tooth morphologies that can then be individualized according to the patient's anatomy and the intended aesthetic result.
The digital veneer design output may include:
- A 3D digital wax-up showing the proposed final tooth shapes
- A preparation guide indicating how much enamel reduction is needed at each tooth surface
- A mock-up file that can be 3D-printed for intraoral trial
The mock-up is one of the most important parts of the Digital Smile Design workflow. It allows the patient to see and experience the proposed result in the mouth before irreversible preparation begins.
Tooth length, phonetics, smile line, lip support, and overall appearance can therefore be evaluated and adjusted digitally before the final veneer fabrication process starts.
Step 4: From Digital Design to Tooth Preparation
Once the design is approved, a 3D-printed preparation guide can be fabricated. The guide fits over the teeth and features reduction windows that indicate how much enamel should be removed at different locations.
The goal is to support minimally invasive preparation, preserve enamel where possible, and remove only the amount of tooth structure required for the planned restoration.
This represents a meaningful shift from conventional veneer preparation, where reduction depth may depend primarily on bur dimensions and clinician judgment. A digitally planned preparation guide converts the approved aesthetic design into a more controlled and measurable clinical reference.
How CAD/CAM Veneer Fabrication Works
What CAD/CAM Means in Dentistry
CAD/CAM stands for Computer-Aided Design and Computer-Aided Manufacturing.
In dentistry, it describes a digital production pipeline in which a restoration is designed in software and then physically produced through milling or another digital manufacturing process.
For milled veneers, the workflow takes information from the approved Digital Smile Design, post-preparation scan, and final CAD design and translates it into a physical ceramic restoration through subtractive milling of prefabricated ceramic material.
Digital planning does not mean that every veneer must be milled. Some aesthetic veneer cases, particularly feldspathic or hand-layered restorations, may combine digital design and planning with traditional ceramic craftsmanship.
For a broader view of how scan data moves through design and manufacturing, see this overview of the CAD/CAM dental workflow.
The Veneer Fabrication Pipeline
After tooth preparation and a post-preparation intraoral scan, the CAD software is used to design the final veneer - or set of veneers - over the digital preparation model.
The final CAD/CAM veneer design accounts for factors such as:
- Margin placement
- Emergence profile
- Restoration thickness
- Occlusal contacts
- Interproximal contacts
- Incisal edge position
- Overall veneer morphology
Once the digital design is finalized, the production file can be transferred to the CAM system, which positions the restoration within the selected material and calculates the milling path.
|
Fabrication Stage |
What Happens |
Typical Duration |
|
Digital design finalization |
Veneer morphology locked in CAD software |
10–25 minutes |
|
CAM nesting and toolpath |
Software positions veneer in block and plans mill route |
2–5 minutes |
|
Milling |
Diamond burs cut veneer from ceramic block |
10–20 minutes |
|
Crystallization / sintering |
Glass-ceramic blocks undergo heat treatment |
15–30 minutes |
|
Characterization and glaze |
Staining and external glaze applied for shade match |
10–20 minutes |
For a single veneer, the chairside CAD/CAM cycle can complete in under two hours. For a full anterior case involving six to eight veneers, the laboratory timeline typically runs two to five working days depending on complexity and characterization requirements.
Chairside vs. Dental Laboratory Veneer Production
CAD/CAM veneer production can take place in either a chairside or dental laboratory environment.
Chairside CAD/CAM systems allow the clinician to scan, design, mill, and deliver a restoration within a single appointment. This can be efficient for single-unit or relatively straightforward cases but may have limitations when extensive characterization and complex multi-unit aesthetics are required.
Laboratory production transfers the digital case to a veneer dental laboratory equipped with professional CAD/CAM systems and experienced aesthetic technicians. The laboratory can combine digital manufacturing with customized staining, characterization, contouring, surface texture, and hand-finishing.
For full-smile aesthetic cases in which shade gradients, translucency, incisal characterization, and surface texture are important, laboratory veneer fabrication can provide greater flexibility for individualized finishing.
The choice does not always have to be either-or. Many practices use a hybrid workflow: chairside production for selected single-unit or posterior restorations and dental lab outsourcing for demanding anterior aesthetic cases.

Veneer Material Options for Digital Fabrication
Lithium Disilicate (E.max)
Lithium disilicate glass-ceramic - commonly associated with IPS e.max - is widely used for CAD/CAM veneer fabrication.
Its crystal structure contains over 60 percent lithium disilicate crystals dispersed in a glass matrix, providing flexural strength in the range of 360–500 MPa together with translucency that can closely mimic natural enamel.
For veneers, lithium disilicate is frequently selected because it balances aesthetics and mechanical performance. It can be milled as thin as 0.3 mm for selected no-prep or minimal-prep cases, bonds reliably to enamel through hydrofluoric acid etching and silane coupling, and accepts external staining for individualized shade matching.
Its combination of strength, translucency, machinability, and bonding performance makes it suitable for many anterior aesthetic veneer cases. In laboratory-based digital workflows, digital E.max veneers are one example of how CAD/CAM design can be combined with customized aesthetic finishing.
Feldspathic Ceramic
Feldspathic porcelain is a traditional veneer material with excellent translucency and optical vitality.
Its flexural strength is lower, around 90–120 MPa, which generally limits its use to appropriate low-stress anterior cases. Feldspathic porcelain veneers are typically created through hand-layering rather than milling, although some CAD/CAM ceramic options also exist.
A skilled aesthetic dental technician can use feldspathic ceramic to reproduce subtle translucency, internal characterization, incisal effects, surface texture, and natural shade transitions.
For this reason, feldspathic veneers remain particularly relevant for highly aesthetic, ultra-thin, no-prep, or minimal-prep veneer cases when the clinical conditions are appropriate.
The trade-off is greater technique sensitivity and lower strength compared with stronger ceramic systems, making case selection particularly important.
Dentists comparing aesthetic ceramic options can also review the differences between Feldspathic vs. E.max veneers, particularly when translucency, strength, preparation design, and final characterization need to be balanced.
Zirconia
Zirconia - specifically yttria-stabilized tetragonal zirconia polycrystal (Y-TZP) - offers flexural strength exceeding 800 MPa, considerably higher than glass-ceramics.
For veneers, thin zirconia restorations in the range of 0.3–0.5 mm can be milled for selected cases requiring higher strength or greater masking ability, such as patients with bruxism or heavily discolored teeth.
The trade-off is aesthetics. Zirconia is generally more opaque than lithium disilicate, and increased opacity can affect the depth and vitality of an anterior restoration unless the restoration is carefully selected and characterized.
Bonding to zirconia is also different from bonding to glass-ceramics because zirconia cannot be etched with hydrofluoric acid and instead requires an appropriate surface-treatment and primer protocol.
|
Material |
Flexural Strength |
Translucency |
Minimum Thickness |
Bonding Method |
Best Indication |
|
Lithium disilicate |
360–500 MPa |
High |
0.3 mm |
HF etch + silane |
Anterior veneers, general aesthetic cases |
|
Feldspathic ceramic |
90–120 MPa |
Very high |
0.3 mm |
HF etch + silane |
No-prep veneers, high-aesthetic low-stress cases |
|
Zirconia (thin) |
800+ MPa |
Low–medium |
0.3–0.5 mm |
Sandblast + primer |
Bruxism, severe discoloration masking |
Lithium disilicate covers many clinical situations. Zirconia becomes relevant when strength or opacity is the priority, while feldspathic ceramic remains an important option for highly individualized aesthetic cases where skilled hand-layering is available.
How Quality Control Works in a Digital Veneer Workflow
Digital veneer fabrication does not eliminate the need for quality control. Instead, it changes where and how quality can be evaluated.
In a conventional workflow, much of the final result depended on the dental technician's waxing, investing, pressing, and finishing skills. Some problems might not become apparent until the restoration reached the clinical try-in stage.
In a digital dental workflow, the design file becomes an additional quality-control checkpoint. Margins can be evaluated on screen, occlusal clearance can be measured digitally, and restoration thickness can be checked before milling or fabrication begins.
Digital verification, however, does not replace hands-on finishing.
A milled restoration still requires careful polishing or glazing, and a uniform ceramic block does not automatically reproduce the shade variation found in natural teeth. External staining, glazing, contouring, surface texture, and other forms of characterization therefore remain important for aesthetic integration.
This is especially important in anterior veneer fabrication, where translucency, shade transition, incisal characterization, natural morphology, and surface texture can significantly influence the final result.
The critical quality parameters to verify before delivery include:
- Marginal adaptation: The veneer margin must seat flush with the preparation finish line, with no detectable gap on the digital model or at try-in.
- Thickness uniformity: The veneer should maintain appropriate thickness across its surface, without thin areas that increase fracture risk or excessive thickness that causes over-contouring.
- Occlusal clearance: Sufficient material thickness should remain in functional areas to reduce the risk of crack propagation under load.
- Shade integration: The final shade should integrate with adjacent teeth under different lighting conditions while accounting for possible metamerism.
For complex aesthetic veneer cases, digital precision and experienced dental craftsmanship therefore work together rather than replacing one another.
Common Digital Smile Design and Veneer Fabrication Mistakes
Skipping the Mock-Up
One of the most important risks in DSD-driven veneer cases is moving directly from digital design to tooth preparation without an intraoral mock-up.
A design that appears ideal on screen may feel different when evaluated in the patient's mouth. The proposed teeth may appear too long, too bulky, or interfere with speech and lip movement.
The mock-up allows the dentist and patient to evaluate the proposed aesthetic result before irreversible tooth preparation. Adjustments can then be transferred back into the digital wax-up and final veneer design.
Over-Reliance on Automation
CAD software can generate proposed tooth designs based on library templates.
Accepting those proposals without sufficient individual modification may result in generic or overly symmetrical restorations that do not reflect the patient's facial character.
Natural teeth contain asymmetries, subtle shade gradients, variations in surface texture, and individualized morphology. Digital design therefore provides a starting framework rather than a finished aesthetic result.
A dentist, CAD designer, or dental technician with a strong understanding of dental morphology still needs to refine the case.
Material-Strength Mismatch
Selecting zirconia for a straightforward anterior aesthetic case only because it is stronger can sacrifice translucency that may be important for the intended result.
Conversely, selecting lithium disilicate for a patient with significant parafunctional loading simply because of its aesthetic characteristics may increase fracture risk.
Veneer material selection should therefore reflect the clinical situation, preparation design, available thickness, underlying tooth shade, aesthetic requirements, functional loading, and bonding conditions rather than the laboratory's default material.
Neglecting the Gingival Framework
Digital Smile Design focuses heavily on teeth, but gingival architecture frames the smile.
A well-designed veneer placed next to inflamed, receded, or asymmetrical gingiva can still produce an unsatisfactory aesthetic result.
Periodontal health and gingival contour should therefore be evaluated before - or as part of - veneer treatment planning. The digital workflow can also incorporate gingival planning and crown-lengthening guides when required, provided these considerations are included during the treatment-planning stage.

Future Developments in Digital Smile Design and Veneer Fabrication
Digital Smile Design is moving toward greater 3D integration.
Many current workflows combine 2D photographs with 3D intraoral scans, which can introduce alignment challenges. Emerging workflows increasingly use 3D facial scanning to record facial structures in three dimensions and integrate them with intraoral scan data.
This can improve the evaluation of facial midlines, smile line curvature, tooth position, and buccal corridors within a more complete digital environment.
Artificial intelligence is also entering digital tooth design. Some software can propose tooth morphology based on facial characteristics and other patient parameters, reducing the time required for initial design.
These automated proposals continue to require human evaluation and refinement, particularly in customized aesthetic veneer cases.
Dental materials are evolving as well. Newer zirconia formulations with increased translucency are narrowing part of the aesthetic gap between zirconia and traditional glass-ceramics.
Resin-matrix ceramics - including polymer-infiltrated ceramic networks - offer another combination of ceramic characteristics and composite-like toughness, although their long-term clinical data is still accumulating.
Despite these developments, the fundamentals of successful veneer treatment remain unchanged: the smile should fit the patient's facial characteristics, preparation should preserve enamel where clinically appropriate, the restorative material should match the case requirements, and the restoration should be fabricated and bonded according to a controlled clinical and laboratory workflow.
Technology accelerates and standardizes parts of the process, but it does not replace clinical judgment or skilled dental craftsmanship.
Conclusion
Digital Smile Design and veneer fabrication work best as one connected workflow. DSD establishes the aesthetic blueprint through facial analysis, digital wax-up, intraoral scanning, and mock-up validation, while CAD/CAM design and skilled laboratory fabrication translate that plan into the final restoration. Predictability depends not only on digital technology, but also on accurate clinical records, appropriate material selection, clear dentist–laboratory communication, quality control, and experienced aesthetic finishing.
ADS Dental Laboratory Ltd is a full-service digital dental laboratory based in Shenzhen, China, providing long-term dental lab outsourcing and customized aesthetic veneer fabrication for dentists and dental laboratories worldwide. If you would like to discuss a digital veneer case, STL or intraoral scan workflow, material selection, or ongoing veneer production requirements, contact our digital dental laboratory to review your specific case and laboratory needs.
FAQ
What information should a dentist send to the dental laboratory for a digital veneer case?
A well-documented digital veneer case may include intraoral scans or STL files, bite records, standardized facial and intraoral photographs, the approved digital wax-up or mock-up information, shade information, stump shade when relevant, preparation details, and specific aesthetic instructions.
For complex aesthetic cases, communicating incisal position, surface texture, translucency, characterization, and the patient's approved smile design can help the dental laboratory translate the clinical plan into the final restorations more consistently.
Can Digital Smile Design be used with both milled and hand-layered veneers?
Yes. Digital Smile Design is primarily a planning and communication workflow rather than a requirement for one specific fabrication technique.
The approved digital design can guide CAD/CAM-milled lithium disilicate veneers as well as cases involving hand-layered feldspathic veneers or other customized laboratory fabrication techniques. The appropriate production method depends on the material, clinical indication, aesthetic requirements, and desired restoration characteristics.
Can veneers be fabricated directly from an intraoral scan?
Yes. A digital veneer workflow can use an accurate intraoral scan instead of a conventional physical impression.
The scan provides the dental laboratory with the digital preparation model needed for CAD design and restoration fabrication. The quality of the result still depends on accurate margin capture, complete scanning data, proper bite registration, and clear clinical and aesthetic communication.
Which material is best for veneer fabrication?
There is no single material that is ideal for every veneer case.
Lithium disilicate is widely used because it provides a useful balance of strength, translucency, and bonding characteristics. Feldspathic ceramic can provide excellent optical properties for highly aesthetic and appropriately selected low-stress cases, while zirconia may be considered when greater strength or masking ability is required.
Material selection should be based on the preparation, underlying tooth shade, occlusion, available restoration thickness, aesthetic target, and functional demands.
Is laboratory veneer fabrication better than chairside CAD/CAM?
The most appropriate workflow depends on the case.
Chairside CAD/CAM can be efficient for selected single-unit and straightforward cases. A specialized dental laboratory may provide additional flexibility for multi-unit anterior cases that require detailed shade transitions, translucency, hand characterization, surface texture, and individualized aesthetic finishing.