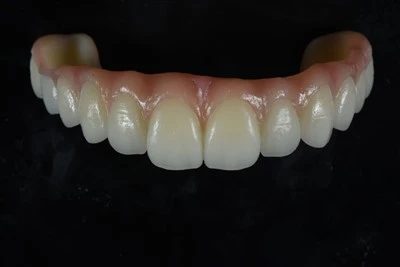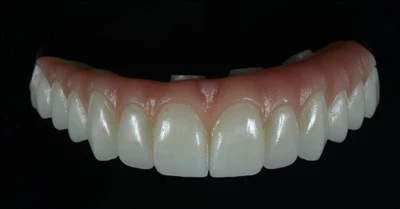
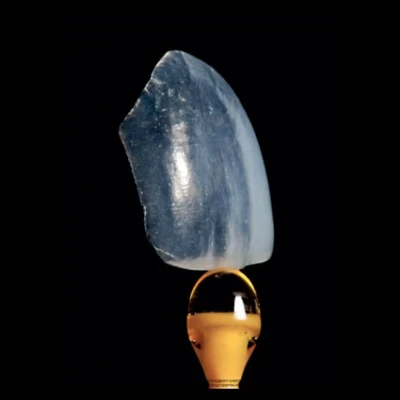
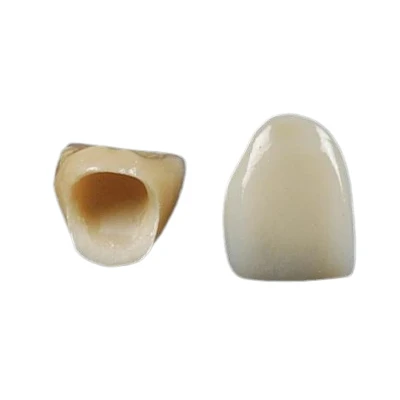
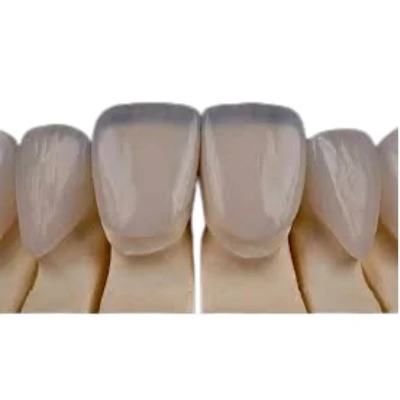
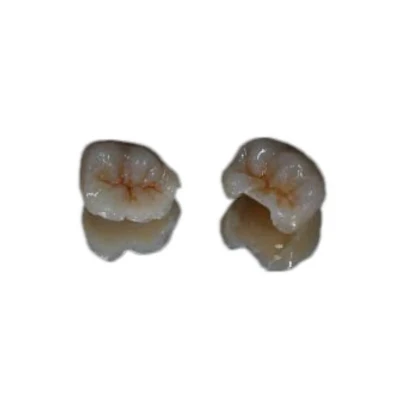


Dental veneers are thin, custom-made restorations that cover the facial surface of teeth to improve color, shape, proportion, and smile harmony. High-quality veneers are not standard shells taken from stock. Each one is designed for a specific preparation, tooth position, shade condition, bite, and patient.
The dental veneer fabrication process depends on the full clinical–laboratory workflow. Accurate records give the laboratory a reliable starting point. Material selection, design, fabrication, characterization, and quality control determine whether the veneers look natural and seat correctly.

What High-Quality Veneer Fabrication Really Requires
A dental laboratory does more than copy the shape of a prepared tooth. The technician must interpret the dentist's prescription, photographs, scan data, preparation design, occlusion, and aesthetic goals as one case.
For veneers, small errors become visible quickly. A slightly overcontoured cervical area can make the restoration look bulky. An incorrect line angle changes how light reflects from the surface. A margin that is difficult to identify can affect seating. A small shade difference may become obvious when several anterior restorations are placed side by side.
High-quality veneer fabrication therefore depends on five controls:
- Accurate clinical records
- A design that respects tooth proportion and occlusion
- The correct ceramic materials and fabrication method
- Controlled shade, texture, and translucency
- A documented quality-control process before delivery
The process starts before any ceramic is milled, pressed, or layered. It starts with the quality of the case information sent to the laboratory.
Step 1: Receive and Review the Clinical Records
The first laboratory step is case intake. The lab receives the prescription, prepared-arch scan or impression, opposing arch, bite record, photographs, shade information, and any diagnostic design or provisional reference.
For a simple case, the required information may be limited. For a six-, eight-, or ten-unit veneer case, the laboratory needs more context because the design must work across the entire smile.
Useful records include:
- Full-face and close-up smile photographs
- Retracted frontal and lateral intraoral photographs
- Photographs with a calibrated shade tab
- The preparation shade or stump shade
- The desired tooth length, shape, and brightness
- Approved provisional veneers or diagnostic wax-up
- Notes on midline, smile arc, gingival levels, and patient preferences
For an overseas dental laboratory, photographs are especially important. The technician cannot see the patient directly, so images become the main source of information about lip position, facial symmetry, surface texture, tooth display, and the relationship between the planned veneers and the rest of the smile.
The laboratory should also inspect the scan or impression before production begins. It should confirm that the margins are visible, the proximal areas are captured, the opposing arch is complete, and the bite record is stable. If any of these records are unreliable, the lab should stop and request clarification.
A good design cannot compensate for missing margins, distorted impressions, or an inaccurate bite.
Restorative Space and Preparation Design
Veneer preparations often involve approximately 0.3–0.7 mm of facial reduction, but this is not a fixed rule. The required space depends on the ceramic, tooth position, underlying color, planned contour, and degree of shade change.
Conservative preparation is important, but insufficient space creates a difficult laboratory choice. The technician may have to produce an overcontoured veneer or reduce ceramic thickness to a level that limits strength and shade control.
The laboratory should therefore review:
- Facial and incisal clearance
- Margin location and continuity
- Undercuts and insertion path
- Available space for masking
The relationship between the preparation and the planned final contour
This review is not a clinical diagnosis. It is a production check to confirm that the requested restoration can be fabricated predictably.
Step 2: Build the Working Model and Design the Smile
A working model is the physical or digital representation of the prepared teeth used for design, fit verification, and fabrication.
With conventional impressions, the laboratory pours a stone model, trims it, sections the dies if required, and marks the preparation margins. With intraoral scan files, the data is imported into CAD software, checked for defects, and converted into a virtual working model. A printed model may still be produced for contact, seating, and final inspection.
Digital dentistry shortens several manual steps, but it does not remove the need for judgment. The technician still has to identify the margin, establish the insertion path, review ceramic thickness, and evaluate the occlusion.
The veneer design is then developed as part of the full smile rather than as a group of isolated shells. The laboratory controls:
- Tooth width-to-length proportion
- Midline and axial inclination
- Incisal edge position
- Smile arc
- Contact areas and embrasures
- Cervical contour
- Line angles and reflective zones
- Lip support
- Symmetry across the arch
- Tooth-specific anatomy
For larger cases, the approved provisional restorations can serve as an aesthetic and functional prototype. Feedback about length, phonetics, lip support, shape, and tooth display can be transferred into the final design.
Natural-looking veneers are not created by making every tooth identical. Central incisors, lateral incisors, and canines need different anatomy, yet the full set must remain coordinated in proportion, color, texture, and brightness.
Step 3: Select the Material and Fabrication Method
Material selection affects minimum thickness, translucency, masking ability, strength, surface treatment, and the fabrication route. It should be decided before final design because the technician needs to know how much space the material requires and how it will behave after firing, pressing, or milling.
The main laboratory options are shown below.
|
Material or system |
Common fabrication method |
Main strengths |
Typical considerations |
|
Feldspathic porcelain |
Hand layering |
High aesthetic control, thin restorations, detailed internal effects |
Technique-sensitive and highly dependent on case selection and technician skill |
|
Lithium disilicate |
Heat pressing or CAD/CAM milling |
Good balance of strength, translucency, and production flexibility |
Shade and thickness must match the masking requirement |
|
Zirconia |
CAD/CAM milling |
High strength and useful masking in selected cases |
Less common for highly translucent veneers; bonding protocol differs from glass ceramics |
|
Indirect composite resin |
Laboratory-built indirect technique |
Repairable and often lower in cost |
Usually lower long-term gloss and stain resistance than ceramic |
This article focuses mainly on indirect ceramic veneers fabricated in a dental laboratory. Direct composite veneers are usually shaped by the dentist in the mouth and follow a different workflow.
The material decision should be based on the clinical situation, not on a claim that one ceramic is universally best. A highly translucent material can look excellent over a favorable tooth shade but may fail to mask a dark preparation. A stronger material may still produce a poor result if the contour, thickness, or bonding strategy is wrong.
The correct material is the one that matches the preparation, substrate shade, aesthetic target, and functional demand.
Step 4: Fabricate the Veneers
Once the design and material are approved, the laboratory selects the most suitable fabrication path. Veneers may be fully layered, heat-pressed, CAD/CAM milled, or produced with a cut-back and layering technique.
Hand-Layered Feldspathic Veneers
Feldspathic veneers are built by applying ceramic powders in controlled layers. The technician develops the dentin body, enamel layer, incisal translucency, and internal effects while controlling the total thickness.
The restoration is fired several times. Because ceramic shrinks during firing, the technician must anticipate dimensional change and refine the contour between cycles. This method offers high artistic control, especially when the case requires subtle translucency, fine texture, or close matching to natural adjacent teeth.
The quality of a layered veneer depends heavily on thickness control and the technician's understanding of light. Too much opacity can make the veneer look flat. Too much translucency can expose the underlying tooth color.
Heat-Pressed Ceramic Veneers
Pressed ceramic veneers are usually made through a lost-wax process. The laboratory creates a wax pattern, invests it, removes the wax, and heat-presses a ceramic ingot into the mold.
After pressing, the restoration is divested, separated from the sprue, fitted, and refined. It may then be completed with external stain and glaze or cut back and layered with veneering ceramic for additional incisal depth.
Pressing is useful when the laboratory wants a dense, consistent ceramic structure with efficient reproduction of the approved design.
CAD/CAM-Milled Veneers
In a digital veneer workflow, the technician finalizes the CAD design, nests the restorations in the selected ceramic block, and sends the file to the milling machine.
After milling, the veneers are carefully separated and the margins are refined under magnification. Depending on the material, the restorations may require crystallization, sintering, staining, glazing, or localized layering.
CAD/CAM veneer fabrication improves repeatability and gives the laboratory precise control over dimensions, thickness, contacts, and symmetry. It does not make the process automatic. The final anatomy, shade, surface texture, and fit still depend on technician judgment.
For demanding anterior cases, a hybrid method often provides the best balance. The laboratory can mill or press the main ceramic form, then cut back selected areas and add layered porcelain for greater depth and translucency.

Step 5: Refine Shape, Shade, and Surface Texture
Fabrication creates the basic restoration. Characterization makes it look like a natural tooth.
The technician first refines the contour. This includes the cervical emergence, facial convexity, incisal edge, contact zones, embrasures, and line angles. Line angles are especially important because they control the apparent width of the tooth and the position of the main reflective area.
Shade is then developed through the ceramic structure, not only through external stain. The final appearance is influenced by:
- The preparation or stump shade
- Ceramic thickness
- Material translucency
- Dentin and enamel layering
- Incisal effects
- Stain and glaze
- Try-in paste and resin cement
For multi-unit veneer cases, the laboratory must maintain consistency without making the restorations look copied. Small variations in translucency, texture, and anatomy help the set look natural, while brightness and overall color direction remain controlled.
Surface texture also matters. Natural enamel is not completely flat. It has vertical developmental form, fine horizontal texture, changing line angles, and different levels of gloss. If a veneer is polished into a featureless surface, it can look artificial even when the shade is correct.
High-quality veneers should not simply be white. They should reflect light like teeth.
Step 6: Perform Laboratory Quality Control
Before delivery, every veneer should pass a structured veneer quality-control check. This stage confirms that the restorations match the prescription and that no manufacturing defect has been overlooked.
The laboratory should verify:
- Complete seating on the model or die
- Marginal continuity
- Internal surface integrity
- Proximal contacts
- Insertion path
- Facial and incisal thickness
- Tooth proportion and arch symmetry
- Shade consistency
- Surface texture and gloss
- Absence of cracks, chips, or milling damage
- Correct tooth number and case identification
For digital cases, the lab may compare the final restoration with the approved CAD design. For physical cases, the technician checks the veneers on the working model and, when appropriate, on a solid model used to evaluate collective seating and contacts.
Multi-unit cases need an additional full-arch review. The technician should check the midline, incisal plane, smile arc, canine position, lateral incisor character, and the way the veneers progress across the arch.
Minor chairside adjustment may be normal during try-in. Major seating, contour, or shade problems should be corrected before permanent bonding.
A consistent quality-control system is what turns an attractive veneer into a reliable laboratory product.
Step 7: Deliver for Clinical Try-In and Bonding
The completed veneers are cleaned, identified by tooth number, protected against contact damage, and packaged for delivery. For overseas cases, packaging must also protect thin ceramic margins during international transport.
The dentist then performs the clinical try-in. The restorations are evaluated for:
- Complete intraoral seating
- Marginal fit
- Proximal contact
- Shade under oral conditions
- Gingival relationship
- Incisal edge position
- Centric and excursive contacts
- Overall facial and smile harmony
Try-in paste may be used to evaluate how the selected resin cement will influence the final shade. This is especially important for thin or translucent veneers because the underlying tooth and cement can affect the final result.
Bonding is completed by the dentist. The internal surface treatment must follow the instructions for the specific ceramic. Glass ceramics and zirconia do not use identical protocols, so the laboratory and clinic should communicate clearly about material type and any pretreatment already performed.
The laboratory controls fabrication quality. The dentist confirms the result in the patient's mouth.
Common Factors That Cause Veneer Remakes
Many veneer remakes can be traced to preventable communication or workflow problems rather than to the ceramic itself.
Common causes include:
- Unclear or incomplete margins
- Inaccurate bite records
- Missing preparation-shade information
- Poorly exposed shade photographs
- Insufficient restorative space
- Major design changes requested after fabrication
- Unapproved tooth length or midline
- Incorrect assumptions about brightness or translucency
- Heavy chairside adjustment that changes texture or glaze
A clear prescription, complete records, and early design approval reduce these risks. For complex aesthetic cases, the laboratory should resolve uncertainties before production rather than rely on correction after delivery.
Conclusion
Dental laboratories fabricate high-quality veneers through a defined sequence: case review, model creation, smile design, material selection, ceramic fabrication, characterization, quality control, and final delivery for clinical try-in and bonding.
The best results come from accurate clinical records and disciplined laboratory decisions. Technology improves speed and repeatability, but natural aesthetics still depend on experienced control of shape, thickness, shade, texture, and fit.
ADS Dental Laboratory Ltd is a China-based digital dental lab providing custom veneer and restoration outsourcing services for overseas dentists and dental laboratories. Contact our team to discuss your veneer workflow, case requirements, and long-term outsourcing needs.